Transient – Part 1

Welcome to the Progressive Needles Knit Along sponsored by Skacel Collection.  Transient is a great new pattern designed to showcase the gradient colors found in HiKoo’s Concentric yarn.  Before we begin, here is an overview of the KAL:

  • A portion of the 4-part mystery pattern is revealed here on the 1st, 2nd, 3rd and 4th Thursdays in April at 9am Eastern time.  The weekly pattern, video resources and lots of helpful tips are included in each post.  An abbreviated, pattern-only version is included to download.
  • All techniques are supported with video instruction at knitpurlhunter.com
  • All questions and comments are monitored daily both here and in the Knit Purl Hunter group on Ravelry.  It’s like having  your own private knitting tutor!
  • Projects completed by May 15 are eligible for the monthly prize drawing – first prize is a set of addi Clicks!  See skacelknitting.com for all the info.
  • VERY IMPORTANT:  Transient is a FREE pattern through May 31.  After this date, it will only be available for purchase on Ravelry.  Be sure to download each portion of the pattern prior to this date.  Saving it to your Ravelry page will NOT save the pattern.  The helpful tips and videos for each section will remain on my website indefinitely.

The Yarn

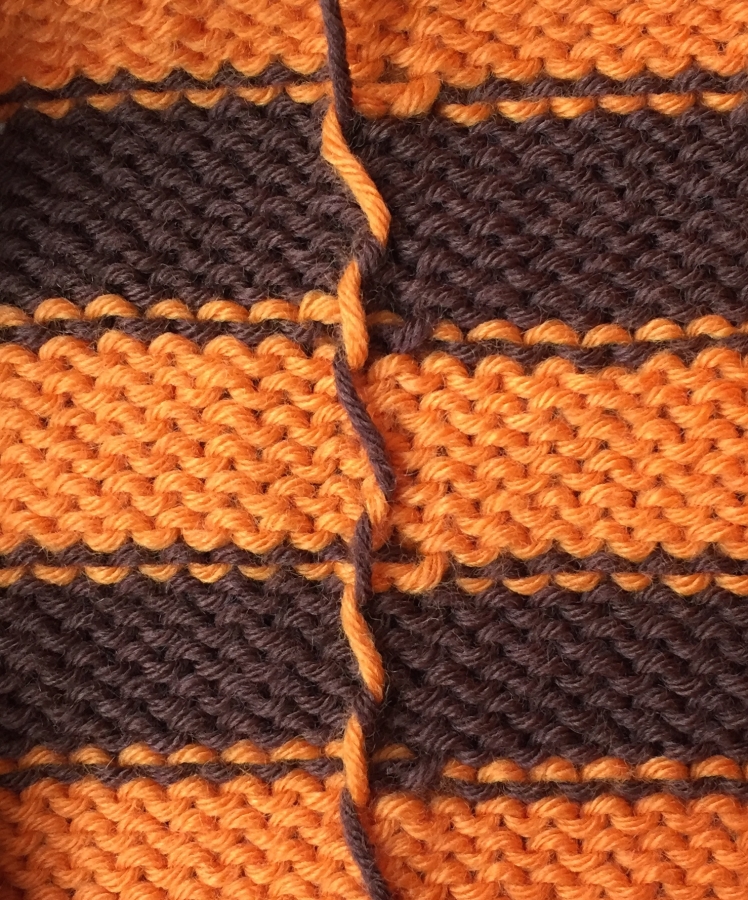
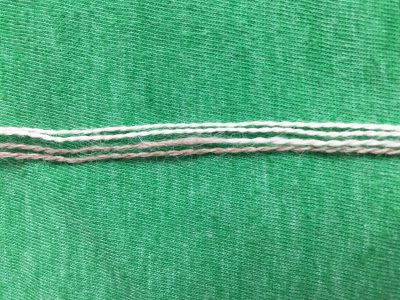
No doubt you have been gazing at your lovely cake of yarn and wondering how it achieves its uniform color gradience.  Concentric is comprised of four, thin plies of yarn that are left untwisted.  All four of these plies are held together while knitting to create a worsted weight yarn.  At the beginning of the skein (whether from the outside or the inside), there are four strands of the same color.  We will name that AAAA – 4 strands of Color A.  At the end of 30 meters (approx. 33 yards), one of the plies will change to the next color (color B).  We will call that AAAB – 3 strands of Color A and 1 strand of Color B.  At the end of the next 30 meters, the plies change to 2 strands of Color A and 2 strands of Color B – AABB (seen below).

After another 30 meters, another strand is changed leaving 1 strand of Color A and 3 strands of Color B – ABBB.  Lastly, the final 30 meters brings the color to all 4 strands in Color B – BBBB.  This exact coloring pattern occurs through 13 changes ending with DDDD.  I have spelled out the sequence in the Pattern Notes below for your reference.

Each section in the pattern will deal with one or more of these colorways.  For those knitters unable to use Concentric, follow the pattern instructions as written unless otherwise indicated in the directions.

Concentric may be knit from the inside or the outside of the skein.  Since the colors change every 30 meters, the direction that the yarn is used has no impact on the the pattern.  If you choose to knit from the inside of the skein, I recommend placing it inside of a ziploc bag and feeding the yarn through the top of the bag to contain the skein as the yardage diminishes.

Shawl Basics

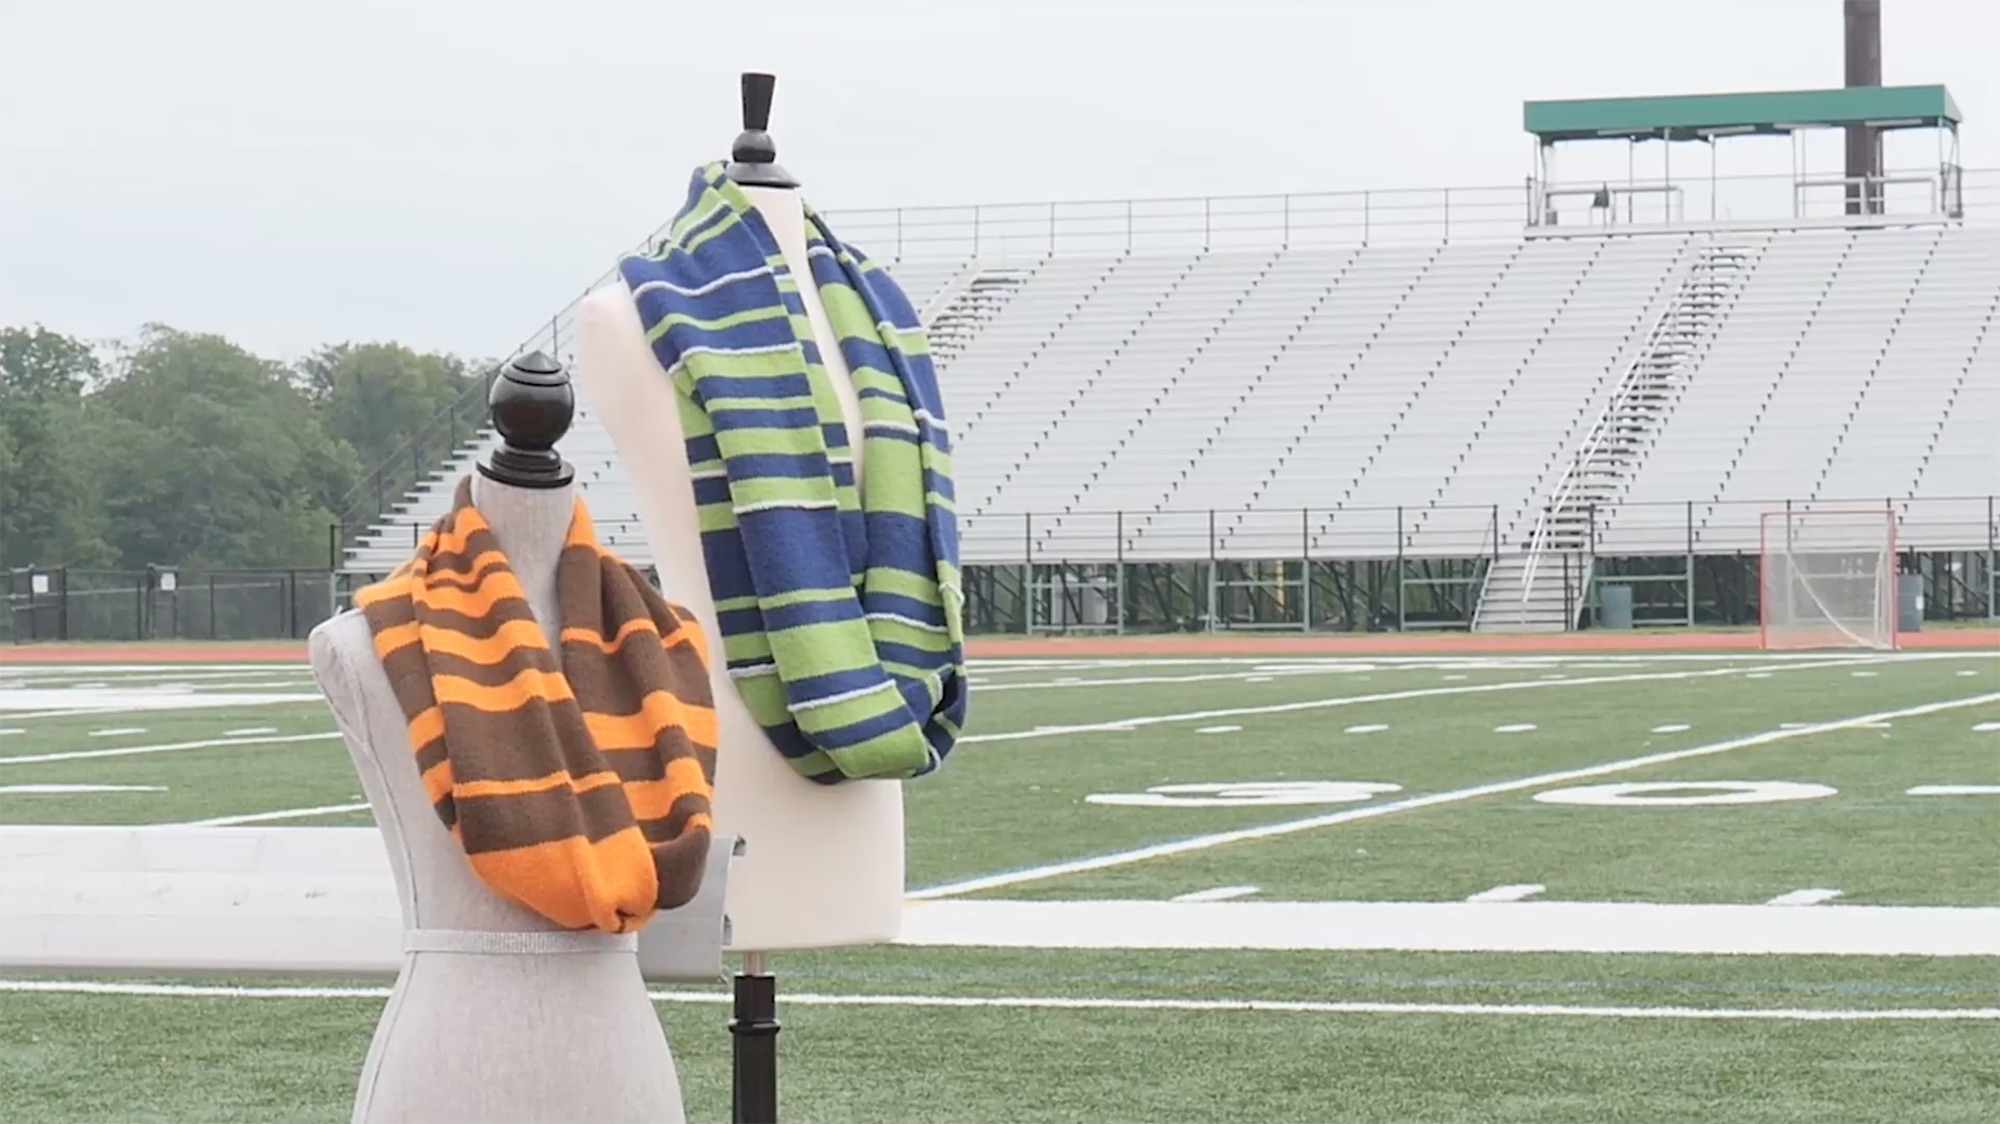
Transient is an asymmetrical triangle that allows it to be worn in many ways.  (See Schematic below)  The triangle gets its shape by increasing one stitch on every row at the same edge.  In other words, on right side rows, an increase is worked into the last stitch of the row.  The worked is then turned and an increase is worked into the first stitch of this wrong side row.  All increases are worked at this edge as a kfb – knit front and back.

The shawl is completely reversible so it is very helpful to hang a marker on the right side of the fabric to avoid confusion.

I found a row counter to be an essential tool in this project.  Many of the stitch patterns are simple and it is easy to cruise along paying no attention to the row number.  Should you lose track of your row count, I have a few tips for you.  After completing a right side row, there will be an odd number of stitches on the needle.  After completing a wrong side row, there will be an even number of stitches on the needle.  If you have lost your row count completely, a little math will get you back on track.  There will be two more stitches on the needle than the number of the last completed row. Example:  If there are 75 stitches on the needle, then the last completed row is Row 73.

Gauge Swatches Are Liars!

While I try to always speak kindly, it is hard to hold my tongue in the face of traitorous gauge swatches.  Many times I have knit a great big swatch, measured diligently several times, only to find that once I start the project my gauge has changed.  What are we knitters to do in the face of these evil liars?

The truth of the matter is that we have human hands that are handcrafting thousands of stitches.  Unlike a machine, each stitch is uniform but not exactly the same.  Stitches change with mood, comfort level, temperature, humidity, stitch familiarity, and needle material.  Once we accept this fact, gauges should be thought of as a first attempt at stitch counts.  A knitter should always check gauge again as the project is underway to once again evaluate the stitches.

Part One is a very short knit to provide ample time to check your gauge and reknit if necessary.  There is NO danger in running out of yarn.  Everyone will knit the shawl until all of the yarn is used.  (This will make so much more sense as the pattern is revealed – have faith!)  Should you need to reevaluate your gauge, watch my Gauge in Garter Stitch video for an accurate assessment.

Gauge and Section 1

The first section of Transient  is worked in simple garter stitch to anchor this end of the shawl.  The goal is to finish the section at or near the end of Color AAAA.  I knit three shawls and each of them ended with a different amount of AAAA yarn remaining at the end of Section 1.  That’s right – same person, same needles, same yarn and I used a different amount of yarn each time.  I ended up with 1/2 yard to 3 yards of AAAA at the end of Section 1 in each of my samples.  I recommend starting with your swatch needle size or perhaps one larger if you went down two or more sizes.  Work Section 1 and then evaluate how much length you have remaining in AAAA.  If you have less than 3 yards of AAAA then I would just continue with that needle size.  If you have more than 3 yards, I would try again on a larger needle.  Conversely, if you started into AAAB on the last row or two of Section 1 that is fine as well.

Every knitter must stop at the end of Row 52 with 54 stitches to set the stage for the lace in the upcoming section.  If you are not satisfied with the stopping point in your yarn, you can unravel and reknit on a different needle, cut your yarn to “cheat” and hurry up the color change, or merrily ignore all of this business and knit on.

Please know that stitch counts and exact stopping points will only occur in Parts 1 and 2 (weeks 1 & 2) of the KAL.  The larger areas in Parts 3 and 4 (weeks 3 & 4) will have you ignoring stitch counts, letting the colors be the boss.  I will reveal this bit of magic later:)

Section 1 – AAAA

Unravel your gauge swatch as all of the skein is needed for the shawl.  Tie a simple knot near the end of your yarn to corral the four plies and prevent one yarn from scooting ahead of the others.  Cast on 2 stitches, leaving an 8″ tail to weave in later.  Work Rows 1 – 52.  At this point you can compare your yarn usage with the pattern and determine if another needle size is needed.

Section 2 – AAAB

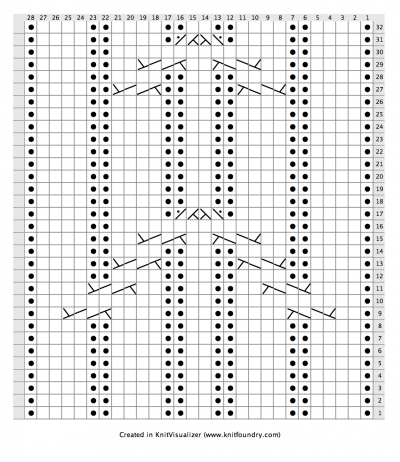
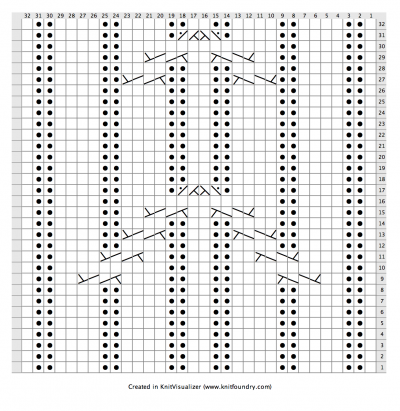
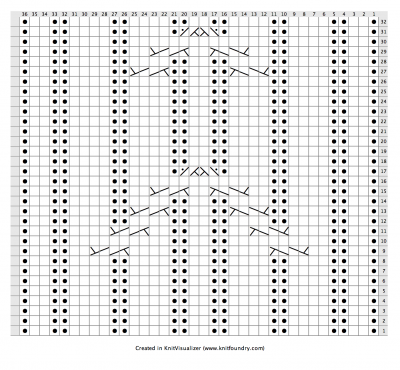
Section 2 features a garter diamond lace pattern that is comprised of simple increases and decreases.  If you are new to lace knitting, rest assured that this small section is as tough as it gets in this shawl.  We have stretches of delightfully relaxing and beautiful stitches ahead in the shawl!

In addition to the single decreases k2tog and ssk, this section uses the double decrease k3tog tbl – knit three together through the back loop.  While this stitch is rather simple to execute, sharp needle tips make this decrease a snap to work.

A few tips for Section 2:

  • In all of my shawls, the yarn changed to AAAB somewhere in Row 54.  Don’t worry if yours is slightly different!
  • To avoid excessive counting, place a removable marker after the first 50 stitches from the beginning of the right side row.  As your shawl grows, add additional markers for each new 50 stitches.  (The markers will need to move in a few of the lace rows, but are easily replaced.)
  • Row 57 – don’t forget the yarn over that precedes the k1, kfb at the end of the row.
  • Row 58 – the yarn overs that flank each side of the k3tog tbl on the previous row like to get all jumbled up.  The order on the needles of these 3 stitches should be yo, k3tog tbl, yo.
  • After Row 76, I had between 12 – 36″ of AAAB remaining.  This is for your reference and not an exact requirement.

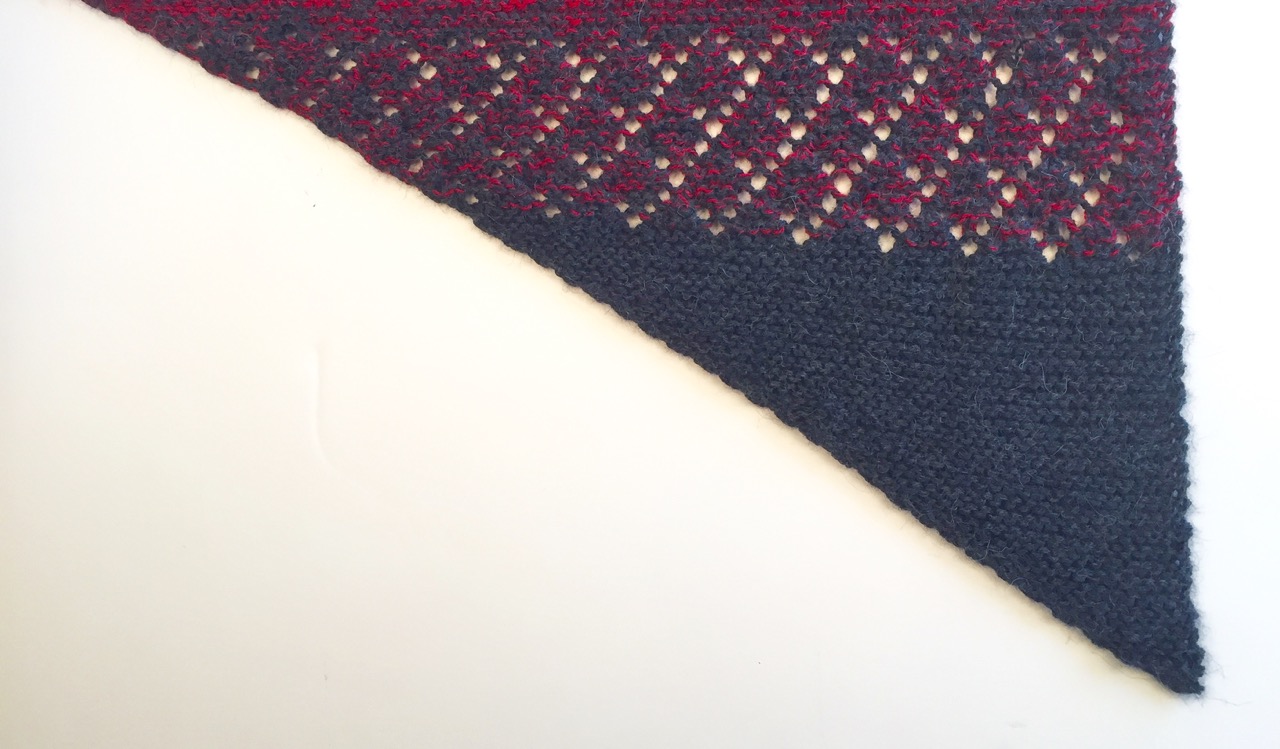
Pictured below is Part One completed.  Get ready for three sections of knitting next week!

Happy knitting,

Michelle


Cableship – Part 3

Are you a huge fan of the German Short Row Heel, too?  I’m still marveling at its simple construction!

It’s now time to move up the leg with another cable design.  The instep design will continue up the front of the leg while the former heel/foot stitches will get their very own cable pattern.  I fiddled around with graph paper and practice yarn to arrive at the new cable design.  I love how it graces the back of the leg so regally.  The cables move over the ribbed design.  I think you will enjoy the unique cables found in Rows 17 and 31.  These cables include one knit and one purl stitch to form a central arch.  They are fun to work!

cableship-leg

Begin the leg by working Row 1 of the Instep pattern (found in Part 1) over the front of the leg and then working Row 1 of the Leg Back pattern over the former heel stitches.  Both charts or written instructions must be followed at the same time.  All goes well in Rows 1- 8 when the numbers are the same for both the front and back.  After Row 8, return to Row 1 (Instep Design) over the front leg and then work Row 9 (Leg Back Design) for the back of the leg.  To avoid confusion, I made a few cheat notes in my chart margins to help me stay on track.  It is easy to get lost moving from chart to chart so I found that this system worked well for me.

Margin notes for the corresponding Leg Back design are seen next to the Instep design row here:

cablship-chart2

Margin notes for the corresponding Leg Front (former Instep) design is seen next to the Leg Back design row:

cableship-chart3

As you can see, the Leg Back charts are rather large and fill an entire page for each size.  If you do not wish to print out all of the charts, preview the document and only print the necessary pages.

Work the Leg Back design until the leg reaches 1 1/2″ less than the total desired height of the leg ending after Row 32 of Leg Back design.  I worked two full repeats of the Leg Back design for my sock and these two repeats came to measure about 5″.  Next week’s instructions will add about 1 1/2″.

See you next week when I bring you a great new bind off perfect for toe up socks.

Happy knitting,

Michelle

Part Three

Click here to download printable version

KPHtemplate_abbreviations

C4B (C2 over 2 Right) – slip next 2 stitches onto cable needle and hold in back of work, knit next 2 stitches from left hand needle, then knit 2 stitches from cable needle. See Cables Video

C4F (C2 over 2 Left) – slip next 2 stitches onto cable needle and hold in front of work, knit next 2 stitches from left hand needle, then knit 2 stitches from cable needle. See Cables Video

LTp (Left Twist, purl bg) – slip next stitch to cable needle and hold in front of work, p1 from left hand needle, k1 from cable needle.

RTp (Right Twist, purl bg) – slip next stitch to cable needle and hold in back of work, k1 from left hand needle, p1 from cable needle.

KPHtemplate_instructions

Directions are for Small (Medium, Large in parentheses when necessary).

Leg

Prior to knitting the leg, count the stitches for accuracy.

Continue established instep design for Leg Front over first 28(32, 36) stitches beginning with Row 1. (Instructions found in Part One.)

Work Leg Back design over second 28(32, 36) stitches in appropriate size from written instructions following or from charts found below, until leg reaches 1 ½” less than desired length ending after Row 32 of Leg Back design. On Leg Front, Row 8 will be last row worked.

Leg Back – Small

  1. P1, k4, p2, k4, p2, k2, p2, k4, p2, k4, p1.

2 – 8. Same as 1.

  1. P1, k2, C4F, k4, p2, k2, p2, k4, C4B, k2, p1.
  2. P1, k10, p2, k2, p2, k10, p1.
  3. P1, k4, C4F, (k2, p2) twice, k2, C4B, k4, p1.
  4. Same as 1.
  5. P1, k4, p2, C4F, p2, k2, p2, C4B, p2, k4, p1.
  6. Same as 1.
  7. P1, k4, p2, k2, C4F, k2, C4B, k2, p2, k4, p1.
  8. P1, k4, p2, k14, p2, k4, p1.
  9. P1, k4, p2, k4, p1, LTp, RTp, p1, k4, p2, k4, p1.

18 – 26. Same as 1.

  1. Same as 13.
  2. Same as 1.
  3. Same as 15.
  4. Same as 16.
  5. Same as 17.
  6. Same as 1.

Leg Back – Medium

  1. K1, p2, k4, p2, k4, p2, k2, p2, k4, p2, k4, p2, k1.

2 – 8. Same as 1.

  1. K1, p2 ,k2, C4F, k4, p2, k2, p2, k4, C4B, k2, p2, k1.
  2. K1, p2, k10, p2, k2, p2, k10, p2, k1.
  3. K1, p2, k4, C4F, (k2, p2) twice, k2, C4B, k4, p2, k1.
  4. Same as 1.
  5. K1, p2, k4, p2, C4F, p2, k2, p2, C4B, p2, k4, p2, k1.
  6. Same as 1.
  7. K1, p2, k4, p2, k2, C4F, k2, C4B, k2, p2, k4, p2, k1.
  8. K1, p2, k4, p2, k14, p2, k4, p2, k1.
  9. K1, p2, k4, p2, k4, p1, LTp, RTp, p1, k4, p2, k4, p2, k1.

18 – 26. Same as 1.

  1. Same as 13.
  2. Same as 1.
  3. Same as 15.
  4. Same as 16.
  5. Same as 17.
  6. Same as 1.

Leg Back – Large

  1. P1, k2, p2, k4, p2, k4, p2, k2, p2, k4, p2, k4, p2, k2, p1.

2 – 8. Same as 1.

  1. P1, k2, p2 ,k2, C4F, k4, p2, k2, p2, k4, C4B, k2, p2, k2, p1.
  2. P1, k2, p2, k10, p2, k2, p2, k10, p2, k2, p1.
  3. P1, k2, p2, k4, C4F, (k2, p2) twice, k2, C4B, k4, p2, k2, p1.
  4. Same as 1.
  5. P1, k2, p2, k4, p2, C4F, p2, k2, p2, C4B, p2, k4, p2, k2, p1.
  6. Same as 1.
  7. P1, k2, p2, k4, p2, k2, C4F, k2, C4B, k2, p2, k4, p2, k2, p1.
  8. P1, k2, p2, k4, p2, k14, p2, k4, p2, k2, p1.
  9. P1, k2, p2, k4, p2, k4, p1, LTp, RTp, p1, k4, p2, k4, p2, k2, p1.

18 – 26. Same as 1.

  1. Same as 13.
  2. Same as 1.
  3. Same as 15.
  4. Same as 16.
  5. Same as 17.
  6. Same as 1.

cableshipbacklegend

Leg Back – Small

cableshipsmback

Leg Back – Medium

cableshipbackmed

Leg Back – Large

cableshipbacklg


Cableship – October KAL!

DSC_0124

Cables and I have long had a deep, loving relationship that I refer to as a “cableship”.  I bring the yarn and needles, while the cables bring the power to make my heart sing!

Join me October 6th for my next mystery knit along, Cableship.  This toe up sock pattern is full of great cable techniques, but also includes a heel new to the series.  Yes, I have uncovered another method for simple sock success!

I designed Cableship to showcase the vibrant hues of Zauberball sock yarn.  The sock knits up beautifully in every shade of this rich, gradient yarn.  My video tutorials and daily interaction make the sock knitting a snap.  The only hard part will be choosing just one color of Zauberball!

The KAL is FREE and no registration is required.  Simply go to knitpurlhunter.com anytime after 9 am on October 6th to download the first installment of the pattern.  I answer questions daily on my website and in my Ravelry group.

Prizes are generously provided by our sponsor, Skacel Collection.

Materials

  • Zauberball Socks, 75%wool/25%nylon, 100g/459 yards, 1 skein
  • US #2 (2.75mm) or size necessary to achieve desired gauge.  Pattern may be knit with double points, two circulars or Magic Loop method.
  • Cable needle
  • Markers

Gauge

Approx. 8 sts = 1″ in stockinette

Size

Small, Medium and Large.
Small – leg circumference measures approximately 5” unstretched and stretches comfortably to 10”.
Medium – leg circumference measures approximately 6” unstretched and stretches comfortably to 12”.
Large – leg circumference measures approximately 7” unstretched and stretches comfortably to 14”.

Further size adjustment may be made by changing needle sizes.

Scoreboard 2.0

scoreboard2


Click here to download printable version

Questions are also monitored daily through the end of the season in the Knit Purl Hunter group on Ravelry.

KPHtemplate_materials

Featured Yarn

HiKoo Simplicity, 55% Merino superwash, 28% acrylic, 17% nylon; 117 yds / 50g; uses two team colors, approx. 3 (6) skeins each.

Optional – one skein of a third color for a visual break between games.

addi Needles

Two 4.5mm (approx. US 7) 16” circular needles

(Second needle is needed to graft stitches using Kitchener Stitch)

Additional Notions

Tapestry needle, stitch marker, approx. 1 yd of waste yarn, Size G crochet hook – for provisional cast on

KPHtemplate_gauge

21 stitches and 27 rounds = 4” in Stockinette Stitch

KPHtemplate_size

Small (Large)

Average cowl is 8” wide, approx. 40 (94)” around.

Length around varies with total number of points scored.

KPHtemplate_abbreviations

MC – Main Color. Primary color that represents your favorite team.

CC – Contrasting Color. Secondary color that will always represent the opponent.

CC2 – Contrasting Color 2. Optional third color used to separate games.

Notes

  • Cowl is worked in the two colors of your favorite team.
  • Primary color represents your team (MC).
  • Secondary color will always represent the opponent (CC).
  • All stitches are worked in knit.
  • When changing colors, work the Jogless Stripe technique for smooth color transitions.  See Jogless Stripe video
  • When working stripes that are 4 or more rounds high, carry the unused yarn with the working yarn by twisting the yarns together on the wrong side at the beginning of every 4th round as in photo below.  See Carrying Yarns in Circular Knitting video

scoreboardcarry


KPHtemplate_instructions

All Sizes

With waste yarn, cast on 80 stitches using a Provisional Cast On.  See Provisional Cast On video

Place marker and join in the round, taking care not to twist the stitches.

Upon completion of first round (as described below), place a Lifeline through the stitches to aid in removal of provisional cast on at end of project. See Lifeline video

Short Version (shown above)

The striping sequence is determined by the order of the scores in each game. Knit two rounds in designated color each time a team scores. A score can be a field goal, touchdown (includes extra point), or safety.

Example game summary:

Favorite team scores a touchdown – knit 2 rounds MC

Favorite team scores a field goal – knit 2 rounds MC

Opponent scores a touchdown – knit 2 rounds CC

Favorite team scores a touchdown – knit 2 rounds MC

Opponent scores a field goal – knit 2 rounds CC

Total = 10 rounds knit for game.

Work as above for each game of the season.


Long Version (shown below)

The striping sequence is determined by the order and amount of the points scored in each game. Knit one round in designated color every time a team scores a point.

Example game summary:

Favorite team scores a touchdown – knit 6 rounds MC

Favorite team’s extra point is good – knit 1 round MC

Opponent scores a field goal – knit 3 rounds CC

Favorite team scores a touch down – knit 6 rounds MC

Favorite scores a 2-point conversion – knit 2 rounds MC

Opponent scores a touchdown and extra point – knit 7 rounds CC

Favorite team scores a field goal – knit 3 rounds MC

Total = 28 rounds knit for game.

Work rounds based on the points for each game of the season.


Both Sizes

If desired, a visual separation between the games of the season can be worked using the optional third color:

  • Option 1 Game Separation: At conclusion of game, and using CC2, knit one round, purl one round, knit one round to denote end of game with a textured break.
  • Option 2 Game Separation: At conclusion of game, and using CC2, knit one round to denote end of game with a small stripe of color 3.

static1.squarespace

Finishing

Weave in all ends prior to closing tube.

Break yarn leaving 60” tail.

Using the Lifeline as a guide, thread the second circular needle through Round 1 and remove the waste yarn used for the provisional cast on.

Thread tail onto tapestry needle and close tube by grafting stitches with Kitchener Stitch.  See Kitchener Stitch in the Round video

If desired, weave in the tail onto the Right Side using Duplicate Stitch.  See Duplicate Stitch video

©2016 Michelle Hunter

scoreboardKPH

For an overview of the project, watch my Scoreboard KAL video.

July KAL

coa13

Please join me July 4th for a Summer Rerun of one of my favorite KALs – Center of Attention!

Why Center of Attention?
For every skein of Trekking XXL “Susanne” purchased, our sponsor Skacel will donate $10 to the Marsha Rivkin Center for Ovarian Cancer Research.

We know that many knitters choose pursuits other than knitting in the warmer months so we are waiting until Fall to debut a new yarn and pattern.  (I promise, you will be dazzled!)  Also, with so many new participants in the KAL, it will be fun introducing them to this great toe up sock design.  If you have been a faithful KALer from the start, use the opportunity to donate to a good cause and knit another pair to get a jump on your holiday projects.

Supply List
• Trekking XXL – 75% Superwash Wool, 25% Nylon – 459 yards/100g (one skein).  Sample knit in Color “Susanne”.
• Size 1 (2.5mm) needles or size necessary to achieve desired gauge.  Pattern may be knit with double points, two circular knitting method or magic loop.
• Cable needle

Size – Women’s Medium and Large

Gauge – 8 stitches per inch in stockinette

What is the Progressive Needles KAL?

The Knit Along is a month-long mystery knit with a portion of the original pattern revealed each week.  All of the techniques are supported with the online video instruction you’ve come to rely on from Knit Purl Hunter.  Questions are answered daily should you need any assistance.  It’s like having your own private knitting tutor!

How do I get started?

There is no registration and it is absolutey FREE!  Simply go to the Knit Purl Hunter website and click on the KAL icon. The clues are released every Thursday at 9am EST beginning July 4th.