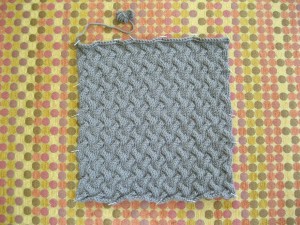
I hope you enjoyed the cable pattern covering our Pillow Front. Whether you chose to use a cable needle or not, this classic design is a perfect accent in any home decor.
Part Two brings us to the Buttonhole Band that will become a part of the back of the pillow. Having a pillow that closes with buttons allows you to easily remove the pillow form to launder the knitted cover. This design also allows us to focus on buttonhole construction. There are a wide variety of buttonhole techniques available to knitters. Many of us are familiar with the simple buttonhole that is comprised of a yarn over followed by a k2tog. This style works in many situations but it produces a loose and somewhat untidy buttonhole. For a sturdy horizontal buttonhole, I prefer the one row horizontal buttonhole. This buttonhole retains its shape after repeated uses and has a very tidy appearance. These properties make it perfect for use in garments where the buttonholes are located at a stress point in the knitted piece. Watch my Buttonhole Video to try your hand at this fundamental skill.
The buttonholes are situated in a handsome rib. The rib will stretch to hug the pillow form and act as a nice complement to the cabled front. The Buttonhole Band is cast on with only 51 stitches compared to the Front’s 62 stitches. The Front required more stitches due to the dense cable work.
Enjoy the buttonholes!
Buttonhole – Sl 1 wyif, (sl 1 wyib, psso) 3 times, return the last bind off stitch to left hand needle, turn. Using Cable Cast On, cast on 4 stitches, turn. Sl 1 wyib from left hand needle, pass last cast on stitch over this stitch and off the needle. See Buttonhole Video
psso – pass slip stitch over. See PSSO Video
sl – slip. See Slip Stitch Video
wyib – with yarn in back.
wyif – with yarn in front.
Part Two
Click here to download printable version
Buttonhole Band
Cast on 51 stitches using Long Tail cast on.
Rib Pattern
Row 1. (RS) K3, *p1, k3; repeat from * to end.
Row 2. P3, *k1, p3; repeat from * to end.
Work above rib pattern for 6 rows.
Buttonhole Row (worked once in place of Row 1):
With right side facing, (k3,p1) 3 times, buttonhole, (k3, p1) 2 times, buttonhole, (k3, p1) 2 times, buttonhole, (k3, p1) 2 times, k3.
Continue in established rib until piece measures 7 ½”.
Bind off.
Happy knitting!


