Match Play – Part 4

Match Play is no longer a free pattern!

The KAL has expired and the complete pattern may be purchased on Ravelry.  The helpful tips tips and information will continue to be available.  Just scroll down to find the pertinent section.

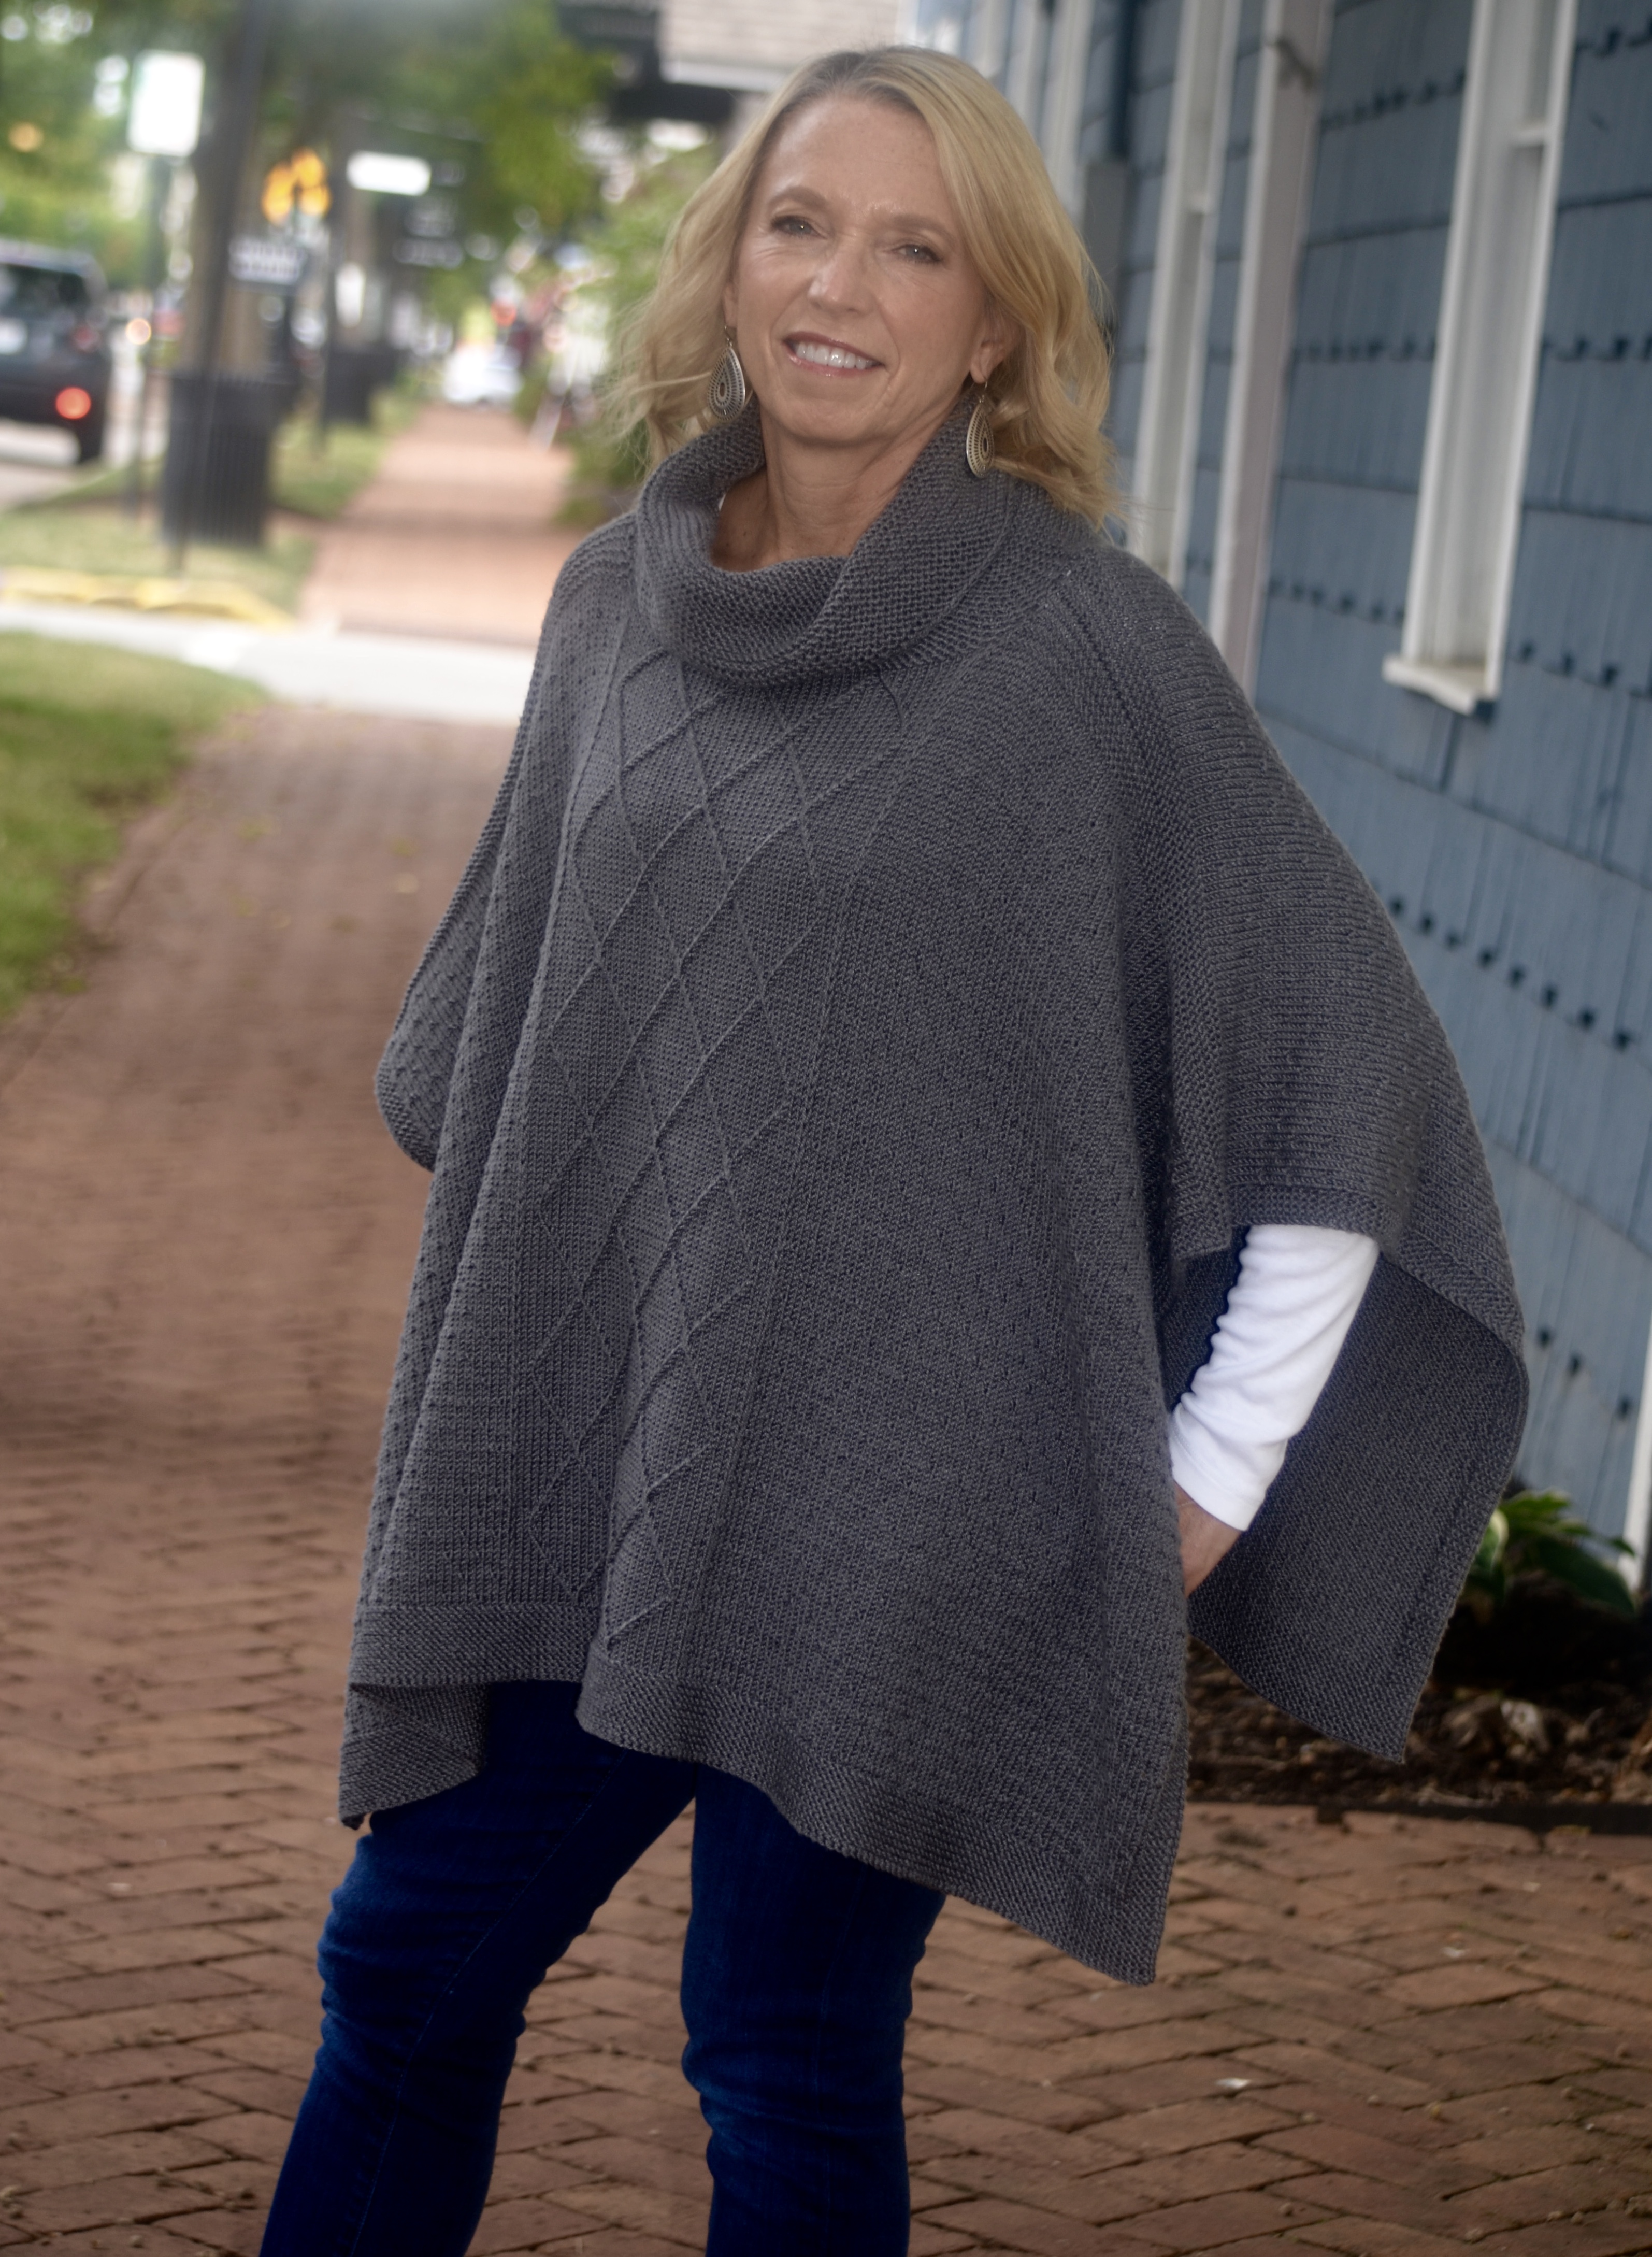
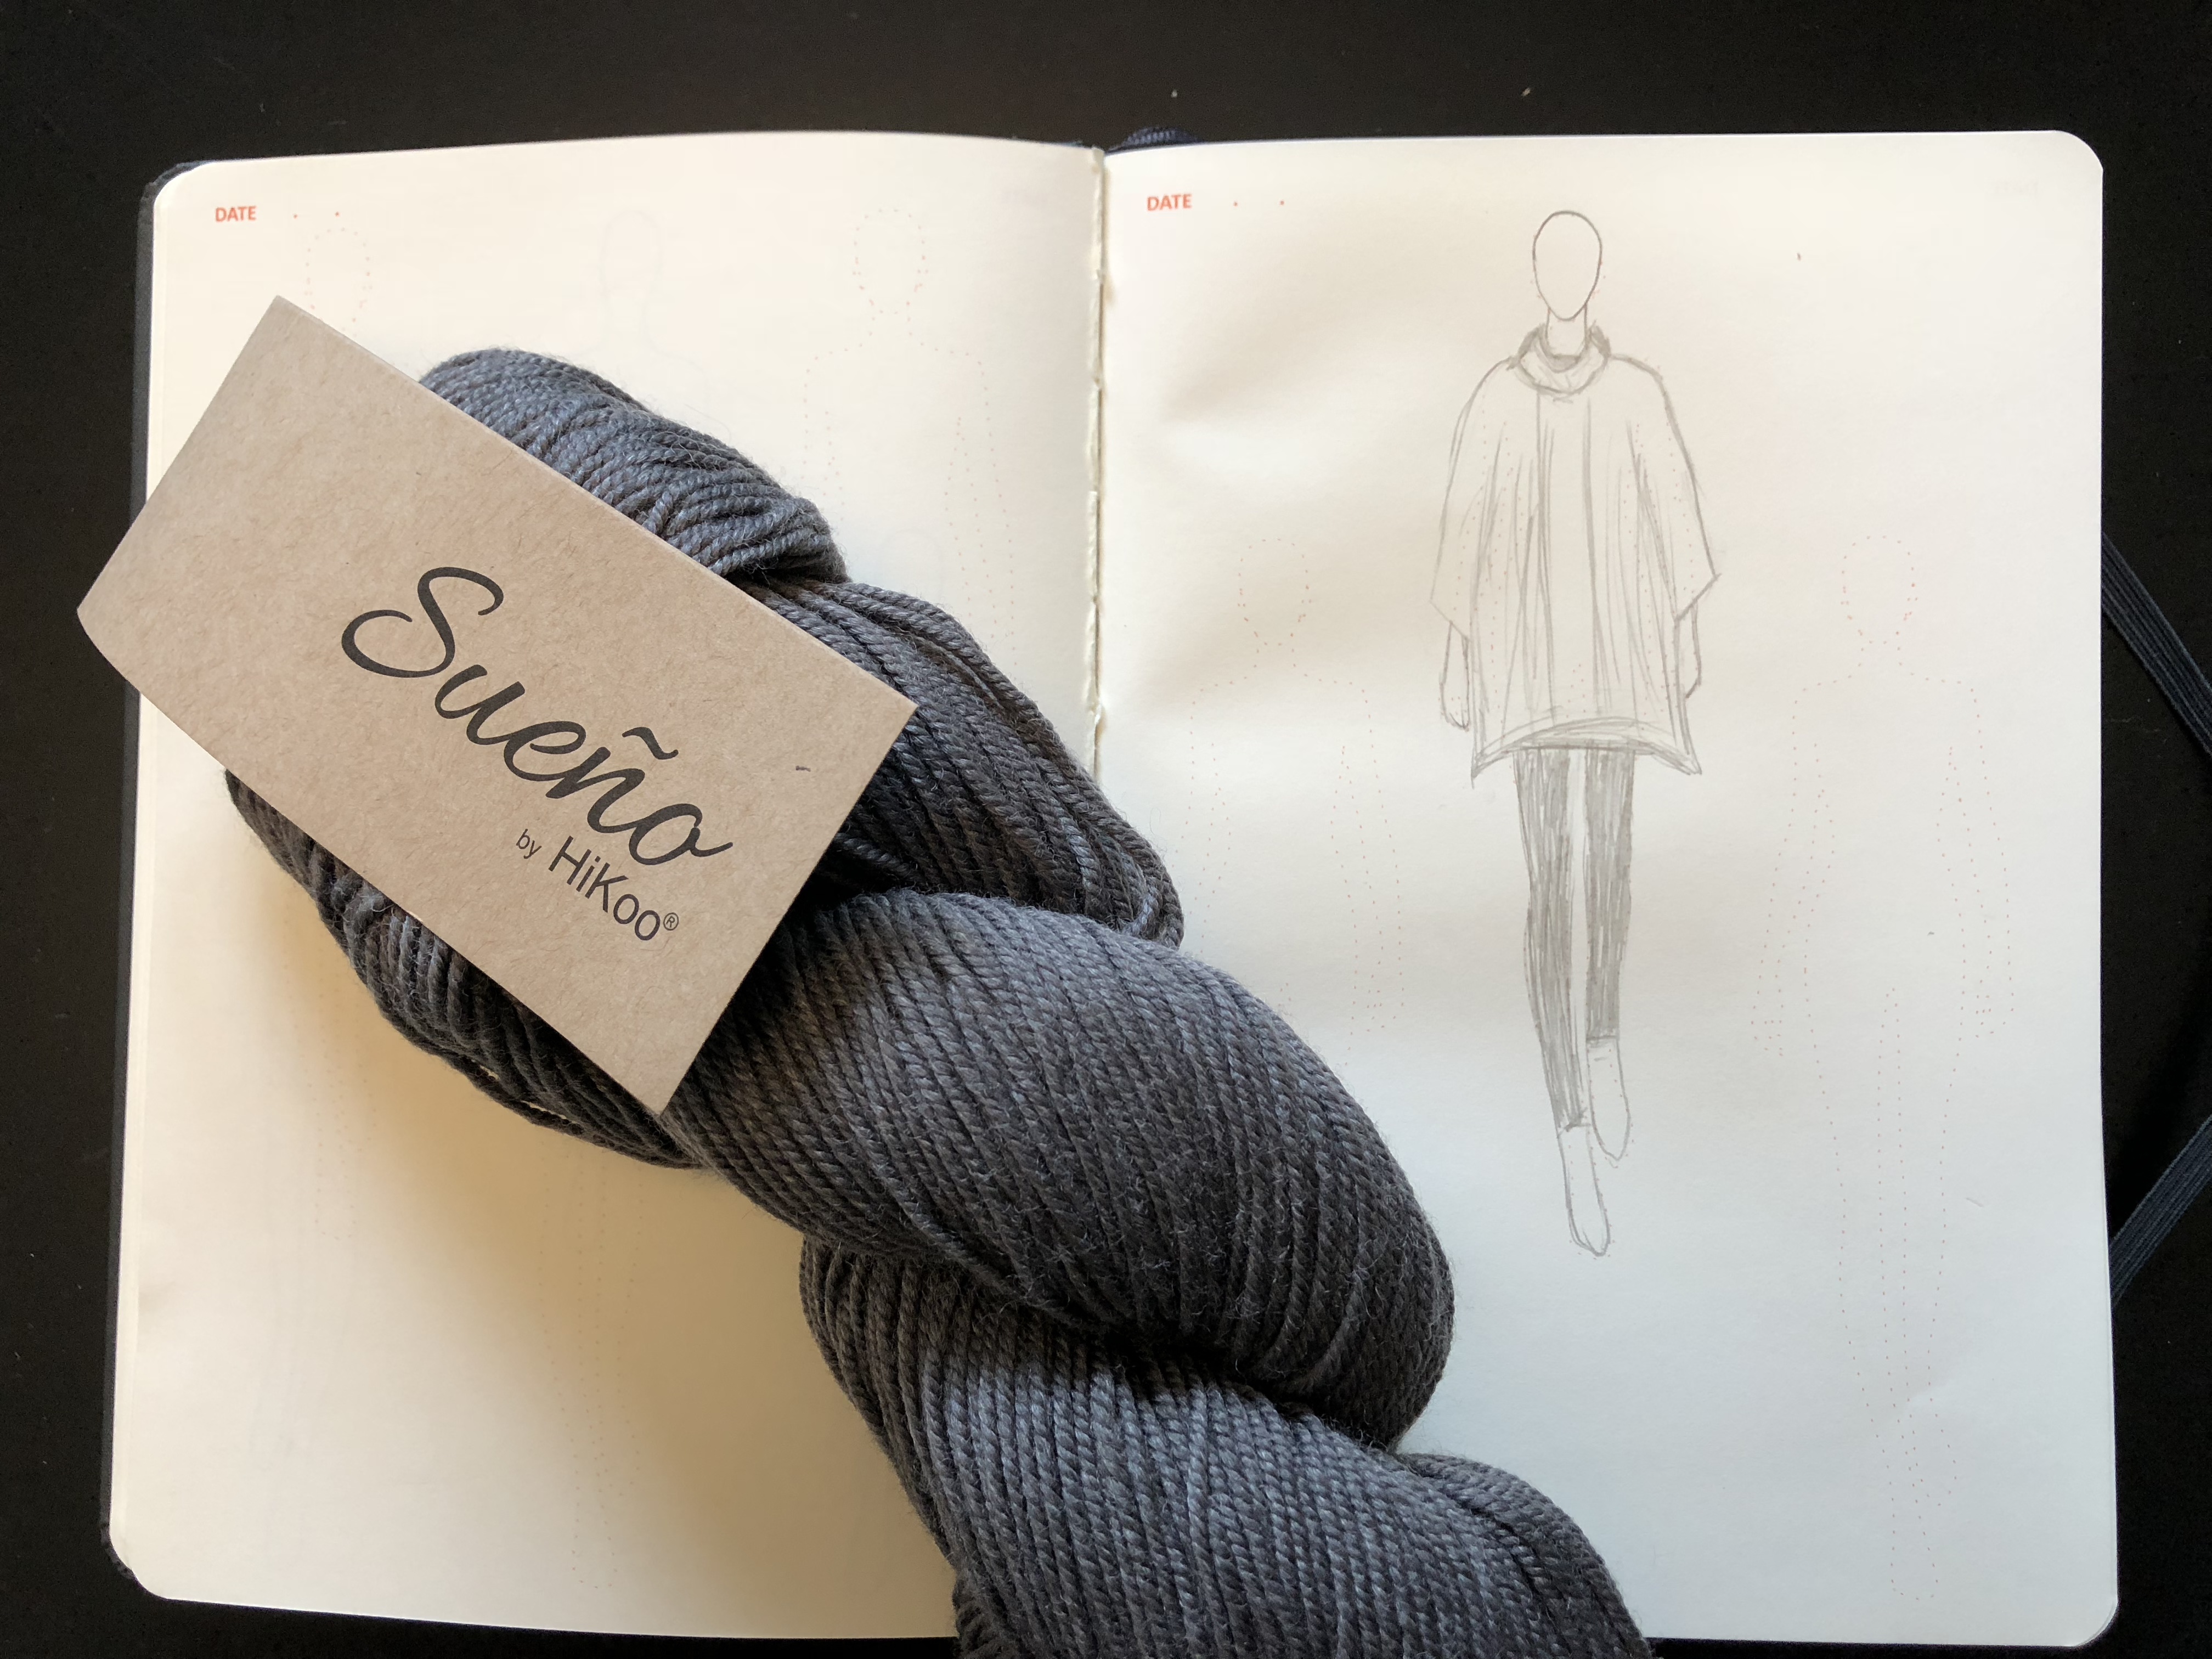
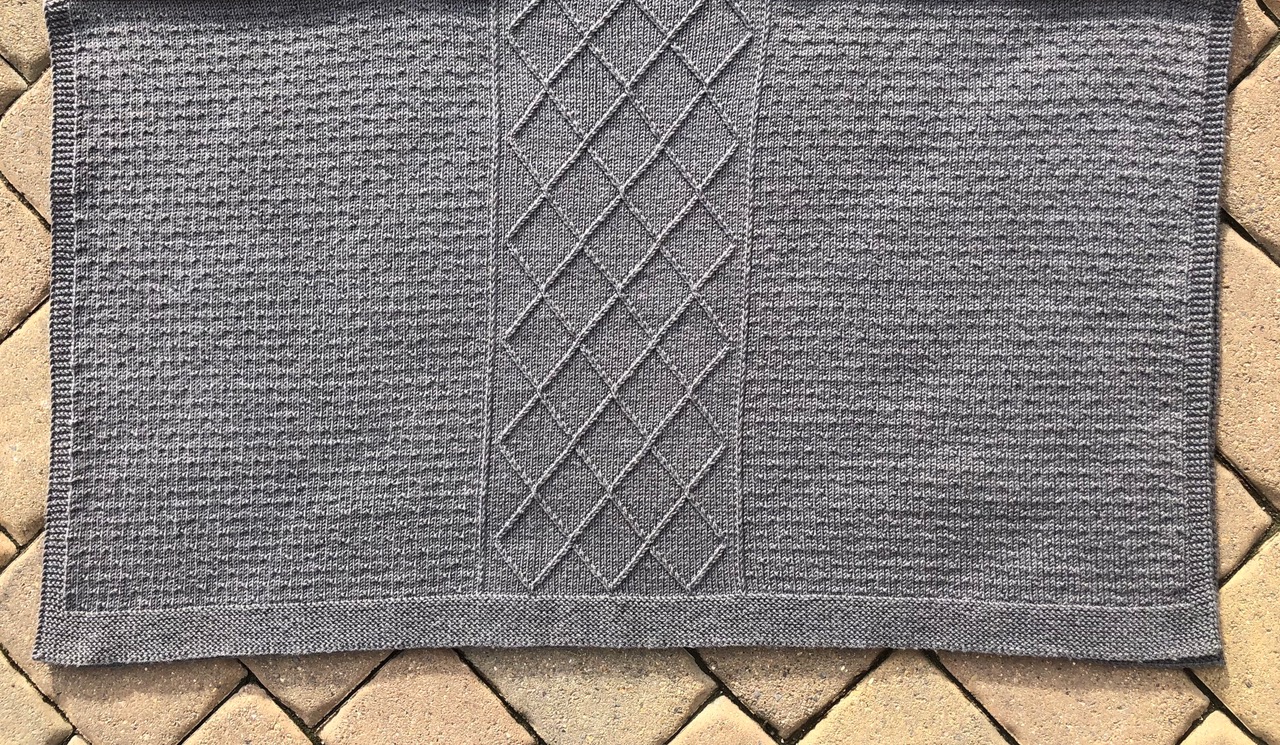
I’m so excited to reveal the completed Match Play!  I knit the reversible Option #1 version seen above.   I can’t wait to see what version you will be wearing!

Side Two

The neck shaping will complete Side Two.  Option #1 and #3 are worked the same.  Option #2 sneaks in a k3tog in Row 1 to remove the added increase stitch worked way back in the set up.

Finishing

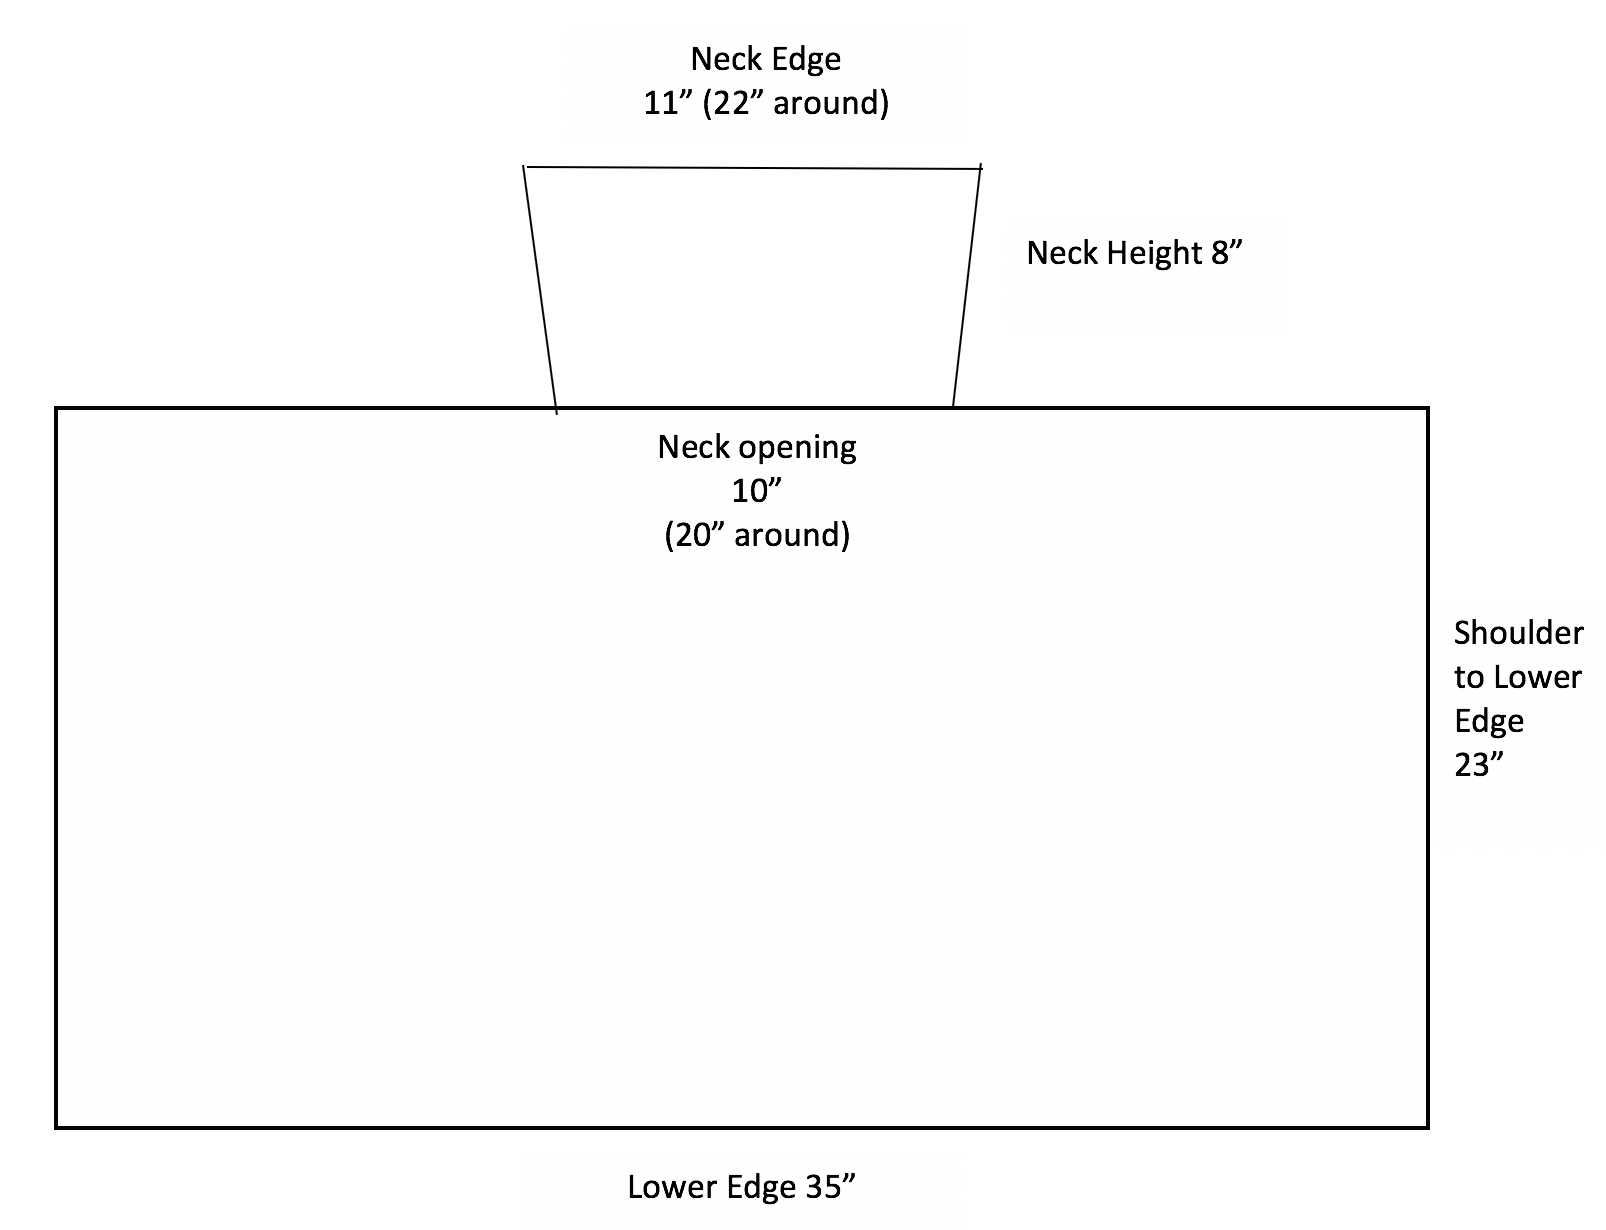
Prior to seaming the sides together, I blocked my pieces to the stated dimensions.  I blocked the edges with wires and then sprayed them with water until saturated.  Once wet, stitches can be corralled into shape and any wonky edges can be flattened. See Blocking or Blocking With Wires Video

Shoulders

Shoulders require a sturdy seam since they must withstand the weight of the garment as it hangs on the body.  A flimsy seam will pull apart and cause the poncho to sag.  In Match Play, we are joining the front to the back with a three-needle bind off.  This technique creates a firm seam as the stitches are bound off – so slick and simple!  See Three-Needle Bind Off video

The bind off gets its name from the three needles required to work the seam.  Place the 76 resting stitches from one shoulder onto a circular needle and its corresponding shoulder stitches onto a second circular needle.  These needles can be any size since the stitches will be knit onto a third needle.  (Stitches take on the size of the needle they are knit onto.)  For the third needle, use the #6 – 16″ circular (smaller size) needle.

Very importantly, the three-needle bind off is worked with right sides together.  The needles holding the stitches are parallel and pointing to the right.  The tail remaining from one of the pieces serves as the working yarn for the bind off.  You will have two tails hanging from the sides, but only one is used.  (I provided this so that no matter where you start, your work will look like my video.)  Insert the third needle into the first stitch on each needle and knit the two stitches together.  One stitch is now on the right hand needle. Again, insert the third needle into the first stitch on each needle and knit the two stitches together.  There are now two stitches on the right hand needle.  With one of the left needles, lift the first stitch over the second stitch and off the right hand needle.  Repeat until one stitch remains.  Cut the yarn and draw it through the last stitch.  I prefer to bury the shoulder tails into this seam.

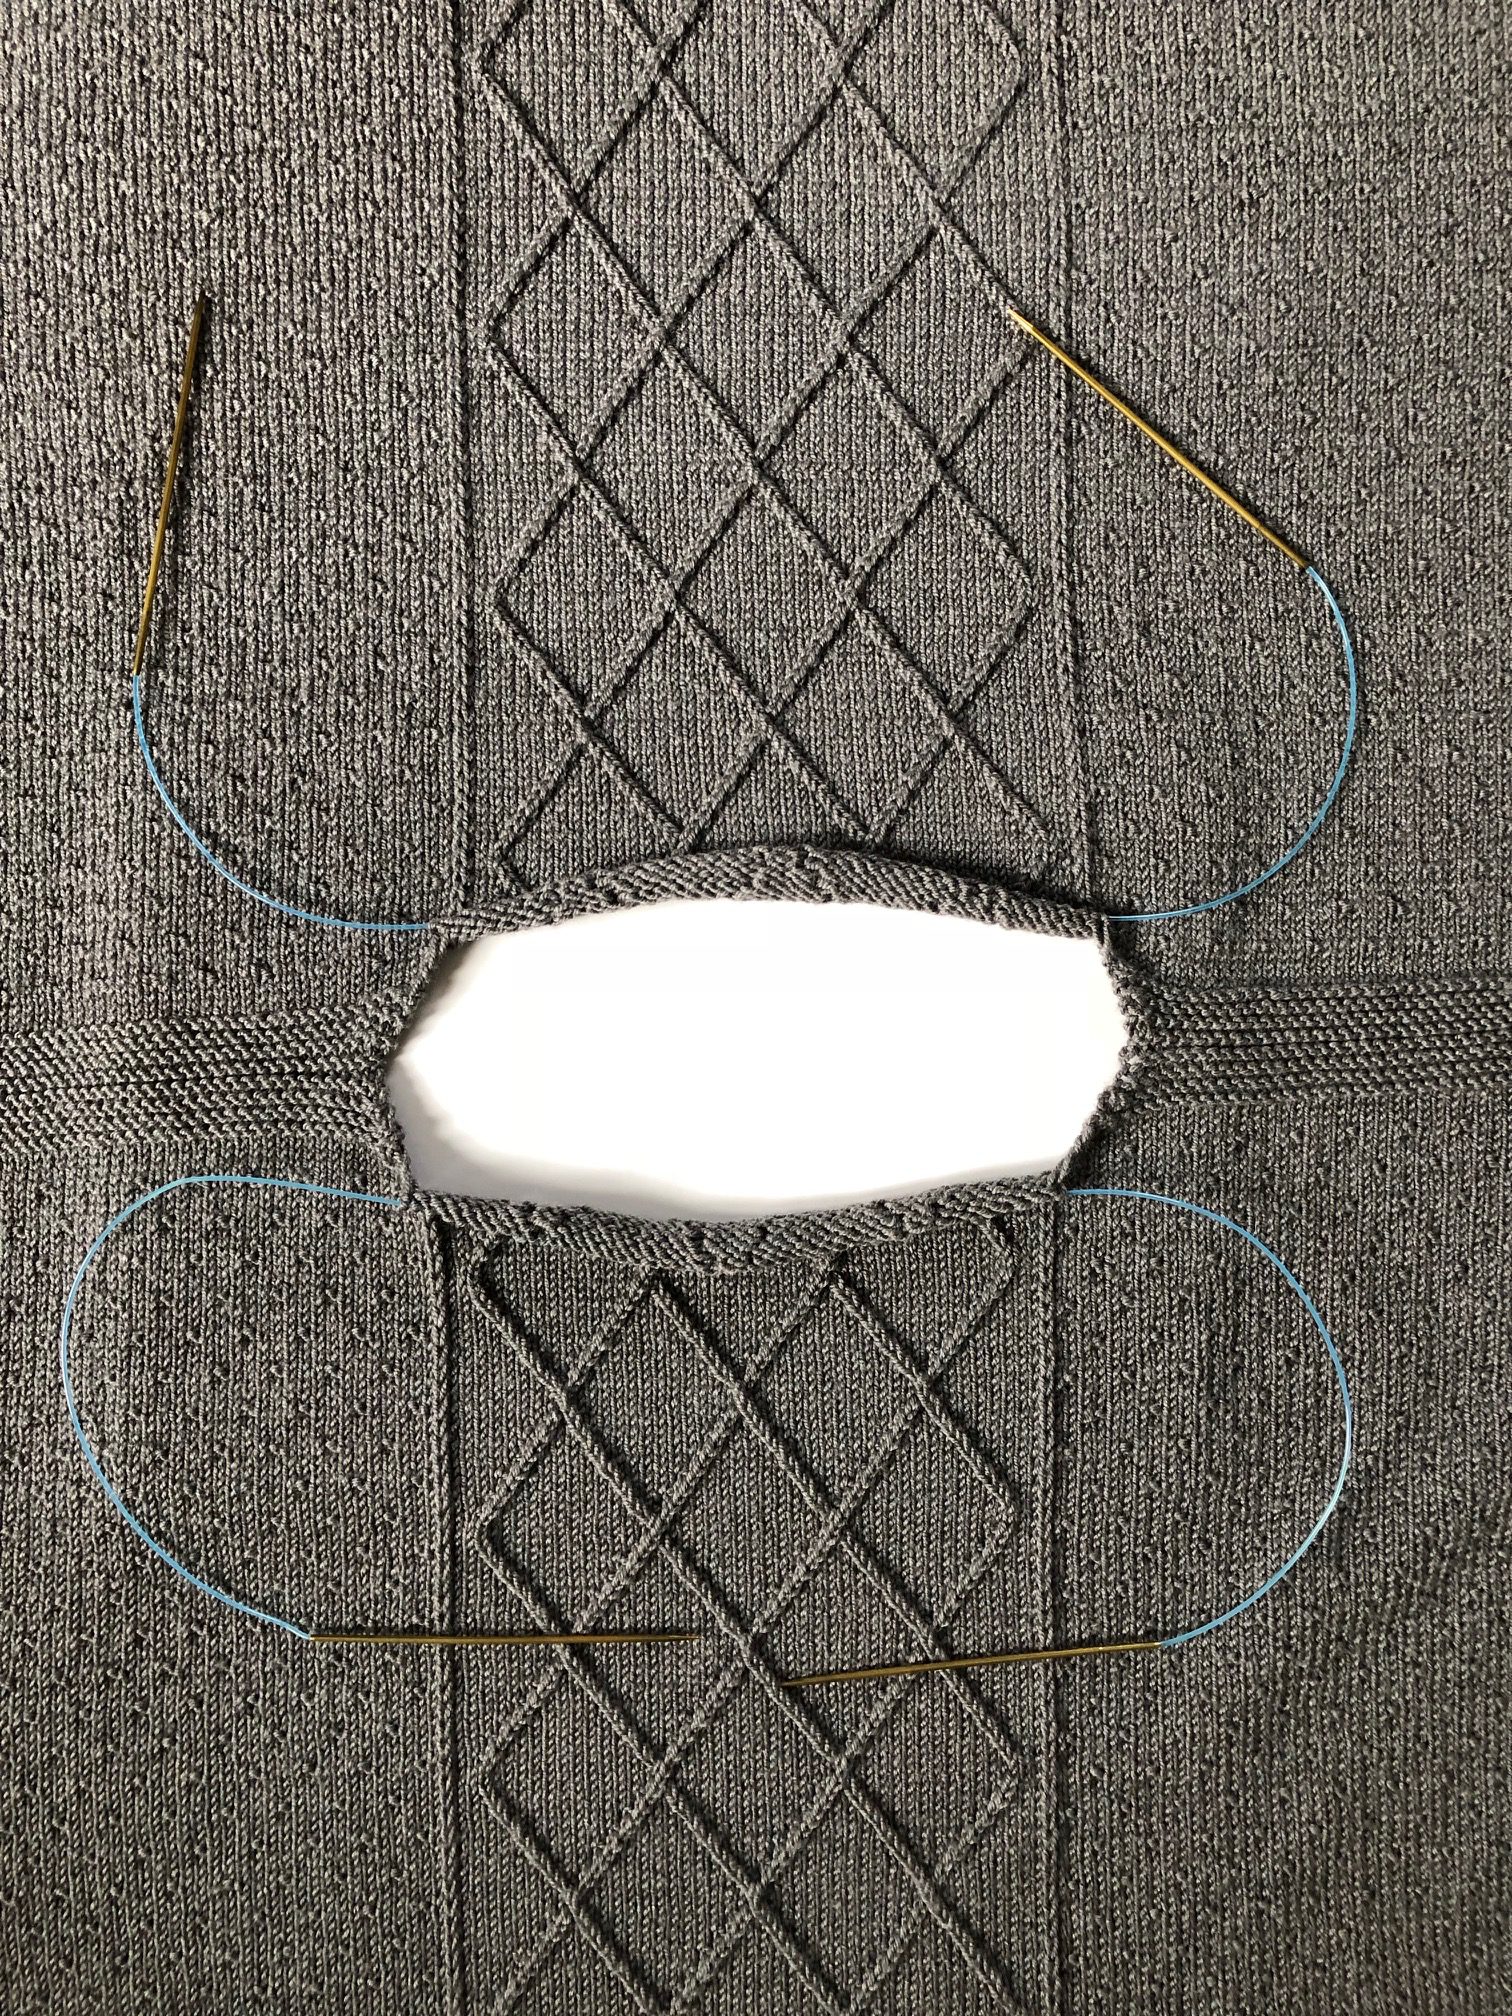
Repeat the same process for the second shoulder, leaving the center 48 stitches on each side on a holder.  The photo below shows both shoulders seamed with the center stitches resting on extra needles serving as holders.

Neck

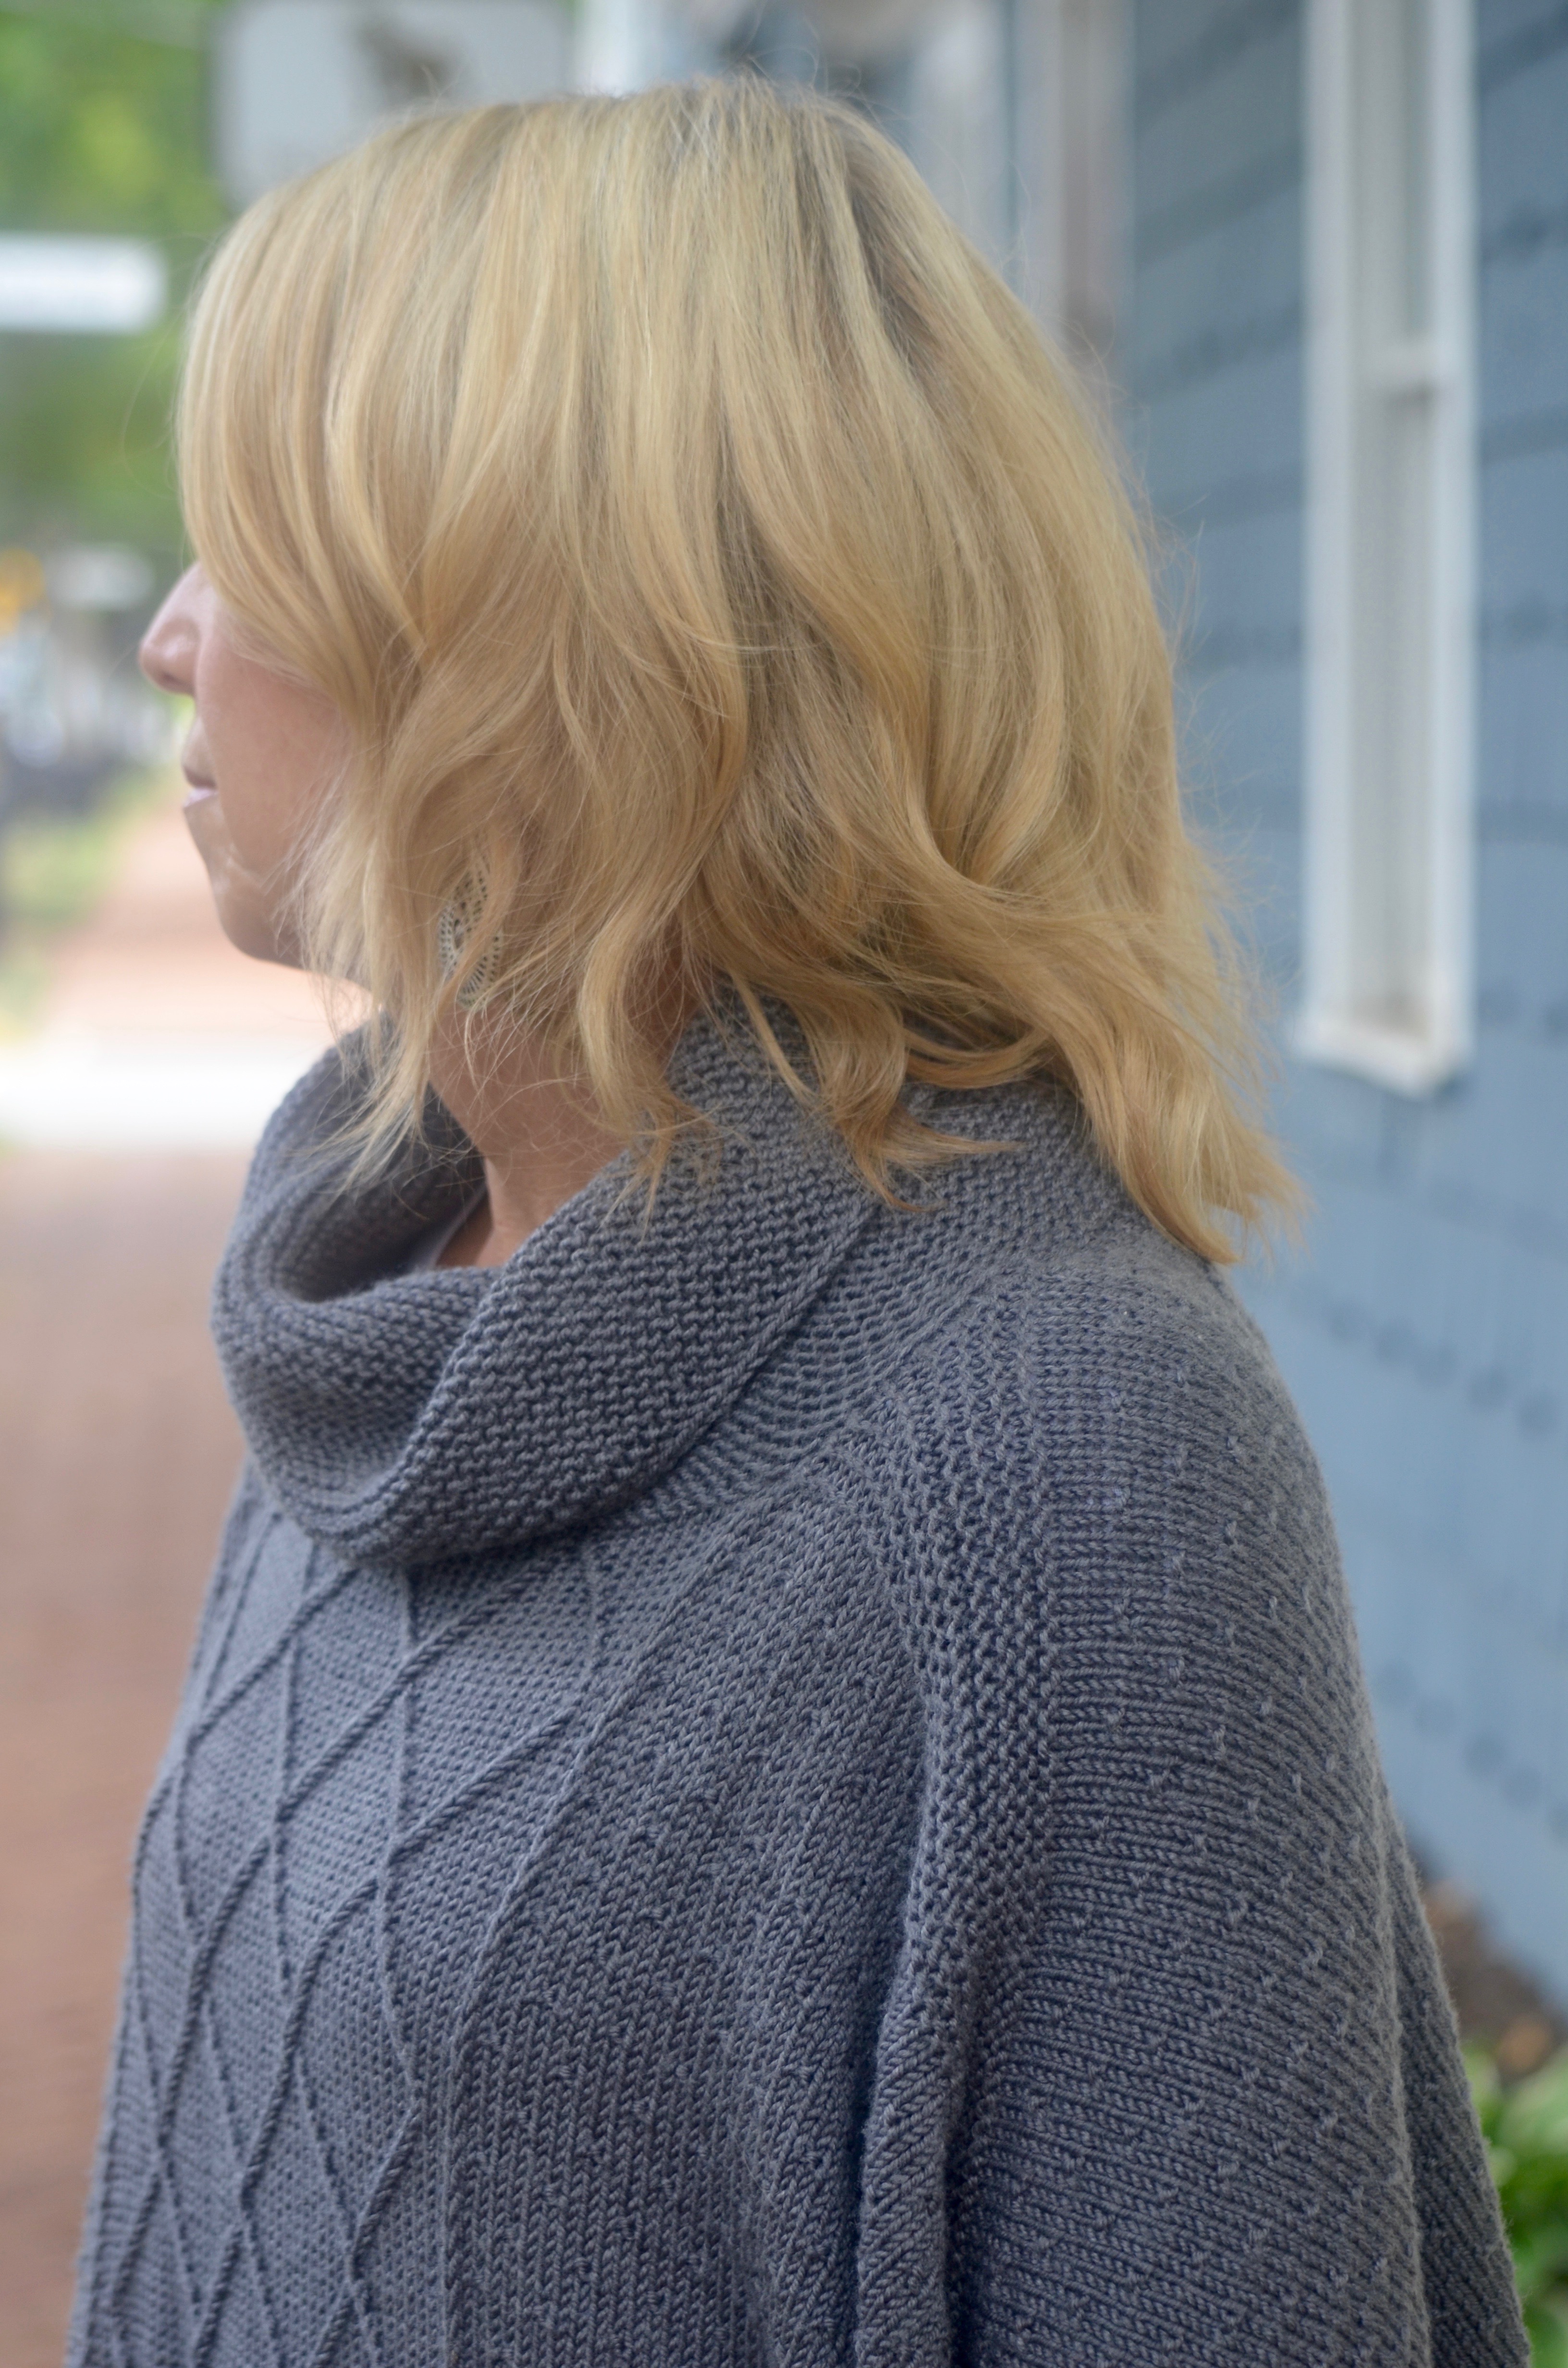
The poncho is topped off with a softly draped cowl.  The cowl is knit in garter stitch to complement the lower and side garter edges.

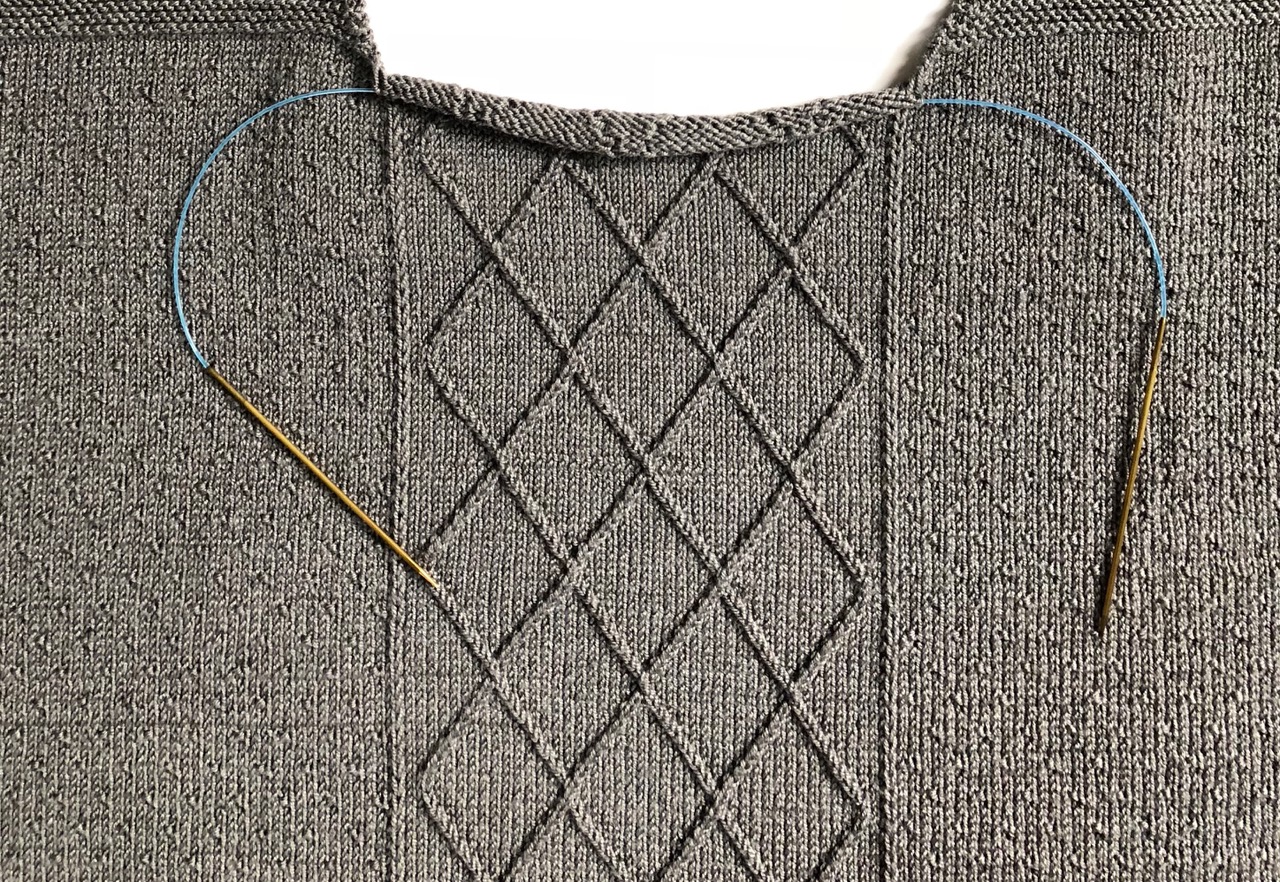
Using a #6 – 16″ circular needle and starting at left front shoulder, join yarn and pick up and knit 4 stitches – one in each garter ridge.  When picking up and knitting, work from right to left with Right Side facing.  Insert needle tip from front to back between the edge stitch and the second stitch at the ridge (see photo below). Wrap the yarn around the needle tip as if to knit and draw through a loop to the Right Side – one stitch has been picked up and knit.  If you are new to picking up stitches, I recommend watching my Pick Up and Knit Video.

Next, knit the held 48 center stitches onto the needle.  Pick up and knit four stitches up right front shoulder (one in each ridge).  Moving to the back, pick up and knit four stitches down right back shoulder (one in each ridge), knit back center 48 stitches on the needle, and finally, pick up and knit four stitches up left back shoulder (one in each ridge).    There are 112 stitches on the needle.

Place a marker and begin working in garter stitch.  Unlike garter stitch worked flat where every row is knit, garter in the round alternates purl and knit rounds.  Round One is worked in purl with Round 2 worked in knit.  Repeat Rounds 1 & 2 until neck measures 4″.  Change to #7 – 16″ circular needle and knit another 4″ for a total neck height of 8″.  Working garter in the round leaves a faux “seam” at the beginning of the round which appears as an extension of the shoulder seam.

Bind Off

The I-cord bind off adds stability to edges and is completely reversible making it a perfect choice for neck edges.  I usually find that a three stitch version works well and that is the size used here and demonstrated in my video, I-cord Bind Off.  You can use both ends of your circular needle for the bind off, but I find it more comfortable to use a double pointed needle (#7 in this instance) as my right hand needle.

Limited Time Only

Remember that the pattern is free until December 1st.  I have a condensed version of the complete pattern for you to download here.  Ravelry users can find the pattern here.

Thank You!

A big shout out to Skacel Collection, whose sponsorship brings you the knit along free of charge.  They also generously supply prizes for all participants.  To be eligible for the prize drawing, complete the poncho and submit the entry form by November 30th.  Remember, every entry is a vote for these KALs to continue.  Contest overview, rules and entry form are found here.

I also owe a big thank you to YOU!  I am honored that you continue to choose to knit with me and grow your knitting skills.  I have enjoyed hearing from you and following your progress.  I will be back in the spring with another KAL.  Be sure to subscribe to my newsletter to receive all of the updates and information as it is released.

Until next time, wishing you all happy knitting!

Michelle

Part Four

Click here to download printable version

CO – cast on

k2tog – knit two together.  See K2tog Video

k2tog tbl – knit two together through the back loop.  See K2tog tbl Video

k3tog – knit three together.  See K3tog Video

RS – right side

sl – slip.  See Slip Stitch Video

ssk – slip next stitch as if to knit, slip next stitch as if to knit, insert left needle into the front of these two slipped stitches from left to right and knit together.  See SSK Video

st(s) – stitch(es)

WS – wrong side

wyif  – with yarn in front


Option #1 and #3 – Neck Shaping

Note: Shoulders and neck are worked in garter stitch.

Left Neck

Row 1. (RS) Sl 1 wyif, knit to 3 sts before 2nd marker, k2tog, k1.  Place 48 sts between 2nd and 3rd markers on holder.  Place remaining 80 sts on a second holder. There are now 79 sts on Left Side.  First and second markers may be removed.

Row 2. (WS) Working Left Neck sts only, knit across row.

Row 3.  Sl 1 wyif, knit to 3 sts before end, k2tog, k1.  (78 sts)

Row 4.  Same as Row 2.

Row 5.  Same as Row 3.  (77 sts)

Row 6.  Same as Row 2.

Row 7.  Same as Row 3.  (76 sts)

Row 8.  Same as Row 2.

Cut yarn leaving long tail to be used for upcoming shoulder seaming.  Place these stitches on a separate holder.


Right Neck

Return 80 stitches from second holder to needles, leaving center 48 stitches on holder.

With Right Side facing, rejoin yarn and begin at neck edge as follows:

Row 1. (RS) K1, ssk, knit to end.  Remaining markers may be removed. (79 sts)

Row 2. (WS) Working Right Neck only, sl 1 wyif, knit to end.

Row 3.  K1, ssk, knit to end. (78 sts)

Row 4.  Same as Row 2.

Row 5.  Same as Row 3. (77 sts)

Row 6.  Same as Row 2.

Row 7.  Same as Row 3. (76 sts)

Row 8.  Same as Row 2.

Cut yarn leaving long tail to be used for upcoming shoulder seaming.  Place these stitches on a separate holder.


Neck Shaping – Option #2

Note: Shoulders and neck are worked in garter stitch.

Left Neck

Row 1. (RS) Sl 1 wyif, k76, k3tog, k1.  Place next 48 sts on a holder.  Place remaining 80 sts on a second holder. There are now 79 sts on Left Side.  First and second markers may be removed

Row 2. (WS) Working Left Neck sts only, knit across row.

Row 3.  Sl 1 wyif, knit to 3 sts before end, k2tog, k1.  (78 sts)

Row 4.  Same as Row 2.

Row 5.  Same as Row 3.  (77 sts)

Row 6.  Same as Row 2.

Row 7.  Same as Row 3.  (76 sts)

Row 8.  Same as Row 2.

Cut yarn leaving long tail to be used for upcoming shoulder seaming.  Place these stitches on a separate holder.


Right Neck

Return 80 stitches from second holder to needles, leaving center 48 stitches on holder.

With Right Side facing, rejoin yarn and begin at neck edge as follows:

Row 1. (RS) K1, ssk, knit to end.  Remaining markers may be removed. (79 sts)

Row 2. (WS) Working Right Neck only, sl 1 wyif, knit to end.

Row 3.  K1, ssk, knit to end. (78 sts)

Row 4.  Same as Row 2.

Row 5.  Same as Row 3. (77 sts)

Row 6.  Same as Row 2.

Row 7. Same as Row 3. (76 sts)

Row 8.  Same as Row 2.

Cut yarn leaving long tail to be used for upcoming shoulder seaming.  Place these stitches on a separate holder.

Finishing

Block pieces to desired dimensions.  See Blocking or Blocking With Wires Video

The center 48 sts on each Side One and Two remain on holders to be worked as neck.  A shoulder seam is worked over the 76 sts on each side of neck.

Place 76 sts from one holder of Side One onto needle and corresponding 76 sts of Side Two onto a second needle.  Working one shoulder seam at a time, with Right Sides together and using a third needle, bind off shoulder sts with attached long tail.  See Three-Needle Bind Off Video

Repeat bind off for second shoulder.


Neck

See Pick Up and Knit Video

Using #6 16” circular needle and starting at left front shoulder seam, join yarn and pick up and knit 4 sts along left neck edge (1 st in each ridge).

Knit front center 48 sts from holder.

Pick up and knit 4 sts up right front shoulder (1 st in each ridge).

Pick up and knit 4 sts down right back shoulder (1 st in each ridge).

Knit back center 48 sts from holder.

Pick up and knit 4 sts up left back shoulder. (1 st in each ridge).  112 sts


Garter Stitch in the Round

Place marker and join in the round.

Round 1.  Purl.

Round 2.  Knit.


Repeat Rounds 1 and 2 until neck measures 4”.


Change to #7 16” needles and work an additional 4” ending after a purl round.


I-Cord Bind Off

See I-Cord Bind Off Video

Note: I find it comfortable to use a #7 dpn to assist in this bind off as right hand needle.

CO 3 sts, *k2, k2tog tbl, return sts to left hand needle; repeat from * to last st, cut yarn and pull through last stitch.


Match Play – Part 3

Part Three of Match Play allows you to be the designer and choose a stitch pattern for Side Two.  You may have noticed that I have not referred to the pieces as Front or Back, but as Side One and Two.  The reason for this is that you will select which stitch pattern will grace the front of your poncho.

Side Two has three stitch options:

  1. Diamond Pattern
  2. Dot Pattern
  3. Lacy Diamond Pattern (pictured above)

Option #1: Diamond Pattern – “Matchy/Matchy”

If you had a grand time knitting Side One, and prefer a matching front and back, then this is the option for you.  Simply repeat Side One exactly and you will have a completely reversible poncho.

Option #2: Dot Pattern – “Recovery Mode”

If you are ready for a rest from intricate diamonds and twists, this option covers Side Two in the Dot Pattern with no central motif.  Side One’s Diamond Pattern will serve as the front and the simple dots of Side Two will serve as the back of the poncho.

Option #3: Lacy Diamond Pattern – “The Challenger”

Did you adore the diamonds and are ready to ramp it up?  This option places lace stitches inside of the diamonds for added beauty and a bit of a challenge.  Side One’s Diamond pattern will serve as the back of the poncho and the lacy version will serve as the front.

Let’s examine each option to help with your decision.

Option #1

Nothing new here to add.  Work another Side One and you will have a matching front and back for a reversible poncho.  Scroll down to the first week’s Part One to download the pattern if you need a fresh copy.

Option #2

A little zen knitting is in store with this selection.  The simple textured beauty will cover the entire side of this piece.  The garter border is identical to Side One, but the Set Up increases the stitch count by one – 209 total stitches with the Dot Pattern worked over the 199 Body stitches.  The edges remain in garter with a slipped stitch edge as on Side One.  If six Diamond Pattern repeats were worked on Side One, you will end Side Two after working Row 8 of Dot Pattern or 21 repeats of the eight row Dot Pattern.  The neck shaping for this side will be included in next week’s Part 4.  Put your feet up and enjoy the relaxing knit!

Option #3

The central motif with this choice is worked in the same manner as Side One.  The borders, set up, edge stitches and Dot Pattern are worked exactly as in Side One.  The difference is that a lace motif is added to the inside of the diamonds.  There are both written and charted instructions for this version.  I once again color-coded the chart to help differentiate the twists and decreases to simplify working across the rows.  Also, the chart used to track simultaneous diamond and dot row numbers will work for this section as well.  You can print off a fresh copy of that cheat sheet here.

The lace inserts are formed from yarn overs and carefully placed decreases.  The lace includes double yarn overs in Rows 13 and 17.

The Double Yarn Over, also know as yo twice, creates two extra strands on the needles.  When these two strands are worked on the following row, a hole substantially larger than a single yarn over is formed.

For Continental knitters, a double yarn over is made by simply scooping up the working yarn twice, placing two strands on the right hand needle, and then proceeding with the next stitch.

For Western-style knitters, a double yarn over’s execution is determined by the stitches surrounding it.  When a double yarn over is between knit stitches, the working yarn is brought between the needles to the purl position, taken over the top of the right hand needle and then under the needle to the front returning the yarn to the purl position.  One strand has been placed on the right hand needle.  Keep the working yarn in front as the next stitch is knit to form the second strand in the double yarn over.  A K2tog and SSK are considered to be knit stitches and are treated as such in the execution of a double yarn over.

On the row following a double yarn over, the two new strands must each be worked in different stitches to preserve them.  In Match Play, the first yarn over in the pair is purled and the second yarn over is worked as a knit stitch.  A complete lesson on double yarn overs for both styles of knitters is found in my Double Yarn Over (yo twice) video.

Repeat the Lacy Diamond pattern six times or to the same length as Side One.  The neck shaping will be included in next week’s Part 4.

Speaking of Part 4, the KAL is wrapped up with the remaining neck shaping, shoulder seams and neck.  Keep up the good work and you will be wearing your poncho soon!

Happy knitting,

Michelle


Match Play – Part 2

I hope you enjoyed knitting Side One of Match Play and have marveled at the lovely mirror imaged twists.  I just adore how both the diamonds and dots pop off the fabric!  As promised, this week’s clue is extremely short to allow ample time to finish this side of the poncho.

Part Two is comprised of a shallow neck shaping and the shoulder edging.  These rows are worked entirely in garter stitch as a nice complement to the lower and side edges.  Each side of the neck is worked separately with the center motif stitches resting until the neck is completed in Part Four.

I was so excited to finish my poncho that I seamed the two sides together and forgot to take a photo of Side One as seen at the conclusion of Part Two.  I don’t want to spoil the mystery of Side Two (or undo my lovely seam), so I cropped a photo to show Side One’s neck shaping.  The above photo shows Side One with the center stitches on hold.  The garter stitches on each side of neck will be on holders as well – 3 holders in total.  For holders, waste yarn or spare circular needles work well.

Left or Right?

Left side, right side, left hand side, right hand side – it can be very confusing in garment instructions.  In garment lingo, the left side of the garment is the portion of the garment that will be on the left side of the body when wearing the garment.  Using the above photo as a reference, the stitches to the right of the center stitches are the left neck stitches because they will sit on the left side of the body when the poncho is worn.  If this seems all backwards, just trust the pattern and it will all work out perfectly.

Neck Shaping

For this section of the poncho, the edge stitches (first and last 5 stitches of each row) are included in the row instructions.  Work each row exactly as written and you will sail through this portion.

We begin with the left neck side of the piece because that is where the working yarn is still attached to the fabric and ready to knit a right side row.  Continuing with the slipped stitch edge, knit to 3 stitches before the center stitches.  Work a k2tog followed by a knit one.  Placing the decrease one stitch away from the edge is known as full-fashioned shaping.  It leaves a clean edge for picking up stitches and a smooth decrease line.  The k2tog is used since it is a right leaning decrease and follows the slant of the neckline.  There are now 79 stitches on the left side.

Place the 48 center motif stitches on a holder and then the remaining 80 stitches on a second holder. The markers on the left neck can be removed.

Turn the piece to the wrong side and work only the left neck stitches.  The wrong sides are worked in all knit to form the garter stitch edge.  Continue the remaining left side rows.  After Row 8, cut the yarn leaving a 12 foot tail for future seaming.  I used about 10 feet in my seam, but I recommend a bit more as I would hate to see you run short.  Place these 76 stitches on a holder.

For the right neck side, return the 80 stitches from the second holder back onto the needles.  The center stitches will remain on their holder.  With right side facing, rejoin the yarn at the neck edge.  A knit one followed by an ssk is worked as the shaping on this side of the neck.  Again, it is placed one stitch away from the edge with a left leaning decrease chosen to mimic the slant of the piece.  Complete all eight rows and leave a long tail as on the other side of the neck.

Looking Ahead

Part Three brings three options for knitting Side Two.  I can’t wait to share the different designs with you.  If you are one of the super speedy knitters that is completely done with Part Two before next week, you can go ahead and work the Lower Garter Border as in Side One.  Do NOT work the Set Up rows as they will be changed for Part 3.

Until next week, happy knitting!

Michelle


Match Play – Part 1

Welcome to the Progressive Needles Knit Along sponsored by Skacel Collection.  Match Play is a fun-to-knit and fun-to-wear poncho that is sure to become your favorite piece.  Before we begin, here is an overview of the KAL:

  • A portion of the 4-part mystery pattern is revealed here on the 1st, 2nd, 3rd and 4th Thursdays in October at 9am Eastern time.  The weekly pattern, video resources and lots of helpful tips are included in each post.  An abbreviated, pattern-only version is included to download.
  • All techniques are supported with video instruction at knitpurlhunter.com
  • All questions and comments are monitored daily both here and in the Knit Purl Hunter group on Ravelry.  It’s like having  your own private knitting tutor!
  • Projects completed by November 30th are eligible for the monthly prize drawing – first prize is a set of addi Clicks!  See skacelknitting.com for all the info.
  • VERY IMPORTANT:  Match Play is a FREE pattern through November 30th.  After this date, it will only be available for purchase on Ravelry.  Be sure to download each portion of the pattern prior to this date.  Saving it to your Ravelry page will NOT save the pattern.  The helpful tips and videos for each section will remain on my website indefinitely.

Match Play is worked in two pieces knit from the bottom up.  Part One consists of one side of the poncho to the neck shaping.  Let’s get started!

Lower Edge

We begin by casting on 208 stitches.  When casting on a large number of stitches, I have two favorite methods that each eliminate the dreaded tail calculation.  The Crochet Cast On requires no tail and leaves a clean, attractive edge.  My video will guide you through the simple steps.

If you are not comfortable wielding a crochet hook, you can choose the Long Tail Cast On using two balls of yarn.  This little trick saves yarn and gives you the perfect tail length every time.  Watch my Long Tail Cast On (No Yarn Tail Estimate) video to add this to your knitting bag of tricks.

Once the stitches are cast on, the lower hem is worked in garter stitch.  Row 1 is a Wrong Side row and worked in all knit stitches.  After working the first row, turn your work and hang a marker on the Right Side of the fabric to avoid confusing the sides in this reversible fabric.

Starting with Row 2, every row will begin with a slipped stitch with working yarn held to the front.  A slipped stitch edge should never begin on the first row because it pulls up a cast on stitch which will yield a distorted edge.

The photo below shows a garter stitch sample with the left edge worked in all knit and the right edge receiving the slipped stitch treatment.  The slipped edge is smoother and tidier making it a great choice for exposed edges.  You can see why I chose to use it in my Building With Lace book along the garter edged shawl.

My version of a slipped stitch edge is to slip the stitch as if to purl with the yarn in front.  Once the stitch is on the right needle, return the working yarn between the needles to the back of the work and ready to work a knit stitch.  This action slightly twists the stitch and makes an elegant edge.  See Slipped Stitch Edge  video.  Continue working through Row 18, slipping the first stitch of every row.  Note that Row 18 is a Right Side row.

With Wrong Side facing, begin the three Set Up rows.  Row 1 places the markers in the correct positions to separate the different stitch patterns.  In Row 2, with Right Side facing, the stage is set for the upcoming designs.  Note that the stitch after the 2nd marker and before the 3rd marker are slipped as if to purl with yarn in back adhering to the customary slipped stitch rule.  Row 3 is a Wrong Side row maintaining the established garter edges and purling across the body designs.  From this point forward, all markers are slipped while working across the row and will not be mentioned again.

Body

The carefully placed markers will guide you in working the different stitch patterns used on this side of the poncho.  The first five stitches (before the 1st marker) and the last five stitches (after the 4th marker) will remain in the established garter stitch edge.  Continue to work them as in the Lower Edge.  These garter edge stitches are NOT included in the written instructions or in the charts.  I am trusting that the markers will serve as a reminder to maintain the edge.

The center motif, worked over the 48 stitches between the 2nd and 3rd markers, is the lovely Diamond Pattern featuring left and right twists.  I have always been disappointed with my left twists in these types of patterns where left and right twists are side by side.  The right twist was always smooth (see Right Twist video), but the left twist looked a little wobbly.  I have tried several variations but couldn’t find a mirror image to the right twist – until now!  For a beautifully smooth left twist, slip each stitch one at a time as if to knit onto the right needle.  (Same as if working an ssk.)  Return these stitches to the left needle.  Next, knit the second stitch through the back loop and then knit both stitches together through the back loop.  Taking the time to work these extra steps yields superior results.  Watch my Left Twist (Mirror to Right Twist) video and see if you agree!

The Diamond Pattern has both written and charted instructions.  The chart is color coded to easily identify the appropriate twist required when moving across a row.  Work the 28 rows of the Diamond pattern six times to complete the motif.

Flanking both sides of the Diamond Pattern is the textured Dot Pattern.  This simple knit and purl design transforms stockinette into a interestingly nubby fabric.  The Dot Pattern is worked over the 75 stitches directly before and after the center motif while simultaneously working the Diamond Pattern.  Both written and charted instructions are provided for the Dot Pattern.  The 8 rows of the Dot Pattern are worked 21 times.

The Dot Pattern has a repeat of 8 rows while the Diamond Pattern has a repeat of 28 rows.  To keep track of the multiple patterns, I find it essential to use two counters – one for the Diamond and one for the Dot.  Because I want to spoil you, I have created a chart that does the work of the two counters for you.  (Applause, please!)  The left hand column indicates the Right Side row number of the Diamond Pattern.  The following columns indicate the corresponding Dot Row number for each of the six repeats.  All Wrong Side rows are purled so they are not included in the chart.  You can download the chart here.

At the conclusion of Part One, the piece measures approximately 22″.  I joined my 4th skein on Row 24 of the 6th repeat of the Diamond Pattern.  There is a generous amount of yarn for the pattern so everyone should be well within the yardage range.

Alterations

Match Play is designed to be a one size fits most garment.  Women ranging from size 0 to 2X tried on the poncho and were thrilled with the fit.  If you would like to make the poncho shorter or longer, work the Diamond Pattern fewer or more rows to the desired length ending after ANY Wrong Side row.  (It is not necessary to complete a diamond.) Be sure to note the last row number worked for future reference.

If you would like to change the width of the poncho, increase or decrease the number of Dot Pattern stitches by 4 stitches on BOTH sides of the center motif.  I have not worked any variation of the given size so I am unable to comment on the yardage needed to alter the width.

Part Two

Next week’s clue is very short which essentially gives you two weeks to complete this side.  I hope you have fun with both the yarn and the stitches!

Happy knitting,

Michelle


  • Sueno by HiKoo, 80% merino superwash, 20% viscose from bamboo, 100 g/ 255 yards each, 8 skeins
  • US #6 (4mm) 32” circular needle
  • US #6 (4mm) 16” circular needle
  • US #7 (4.5mm) 16” circular needle
  • Markers, counters (2 separate are helpful), stitch holders (waste yarn works well)
  • Optional: Size F crochet hook for cast on

Approximately 23 stitches and 33 rows = 4” in stockinette, knit flat on smaller needle

One size

35” wide across front (70” circumference), 23” long from shoulder to hem.


LT (Left Twist) – slip as if to knit, slip as if to knit, return both slipped stitches to left needle.  Knit second stitch through the back loop, then knit both stitches together through the back loop.  See Left Twist (Mirror to Right Twist) Video

PM – place marker

RS – right side

RT (Right twist) – knit two stitches together and without taking stitches off left hand needle, reknit the first stitch and remove both stitches from left hand needle.  See Right Twist Video

sl – slip.  See Slip Stitch Video

SM – slip marker

st(s) – stitch(es)

WS – wrong side

wyib – with yarn in back

wyif  – with yarn in front


Pattern Notes

  • Poncho is knit from the bottom up in two pieces
  • Every row begins with a slipped stitch with yarn held to the front. See Slipped Stitch Edge Video


October KAL – Match Play

Join me this October for Match Play, a poncho featuring high-impact textured stitches and great techniques.  Match Play has a bit of structure as I nudge you toward full sweater knitting.  The best aspect of this poncho is that it has an easygoing fit to be figure-flattering on everyone.  Match Play’s design features a vertical central motif to elongate every silhouette and who doesn’t like that?

I discovered a new way to execute a favorite stitch that will forever change this technique for you.  Perhaps life changing is a bit strong of a term, but it certainly rocked my world!  I am excited to share the updated stitch and its accompanying video with you.

The true luxury of Match Play is due to the glorious Sueno yarn.  This merino/bamboo blend gives the fabric drape, fluidity and sheen along with excellent stitch definition.

The photo above shows my initial design sketch.  No need for registration and the pattern is FREE.  Simply go to my website any time after 9am Eastern time on October 4th to view the first part of the pattern.  Part One will include lots of tips, photos and video lessons to help you along the way.  You will also be able to download a printable copy for knitting on the go.  I monitor questions daily both on my website and in my Ravelry group so it is like having your own private knitting tutor. Be sure to subscribe to my newsletter to receive an email reminder prior to the start of the KAL.  I will be releasing tempting, mini clues up until the KAL debut on October 4th so stay tuned.

Materials

  • Sueno by HiKoo, 80% merino superwash, 20% viscose from bamboo, 100 g/ 255 yards each, 8 skeins
  • US #6 (4mm) 32” circular needle or size needed to obtain gauge
  • US #6 (4mm) 16” circular needle
  • US #7 (4.5mm) 16” circular needle
  • Markers, counters (2 separate are helpful), stitch holders (waste yarn works well)
  • Optional: Size F crochet hook for cast on

Gauge

Approximately 23 stitches and 33 rows = 4” in stockinette, knit flat on smaller needle

Size

One size

35” wide across front (70” circumference), 23” long from shoulder to hem (length may be adjusted)