

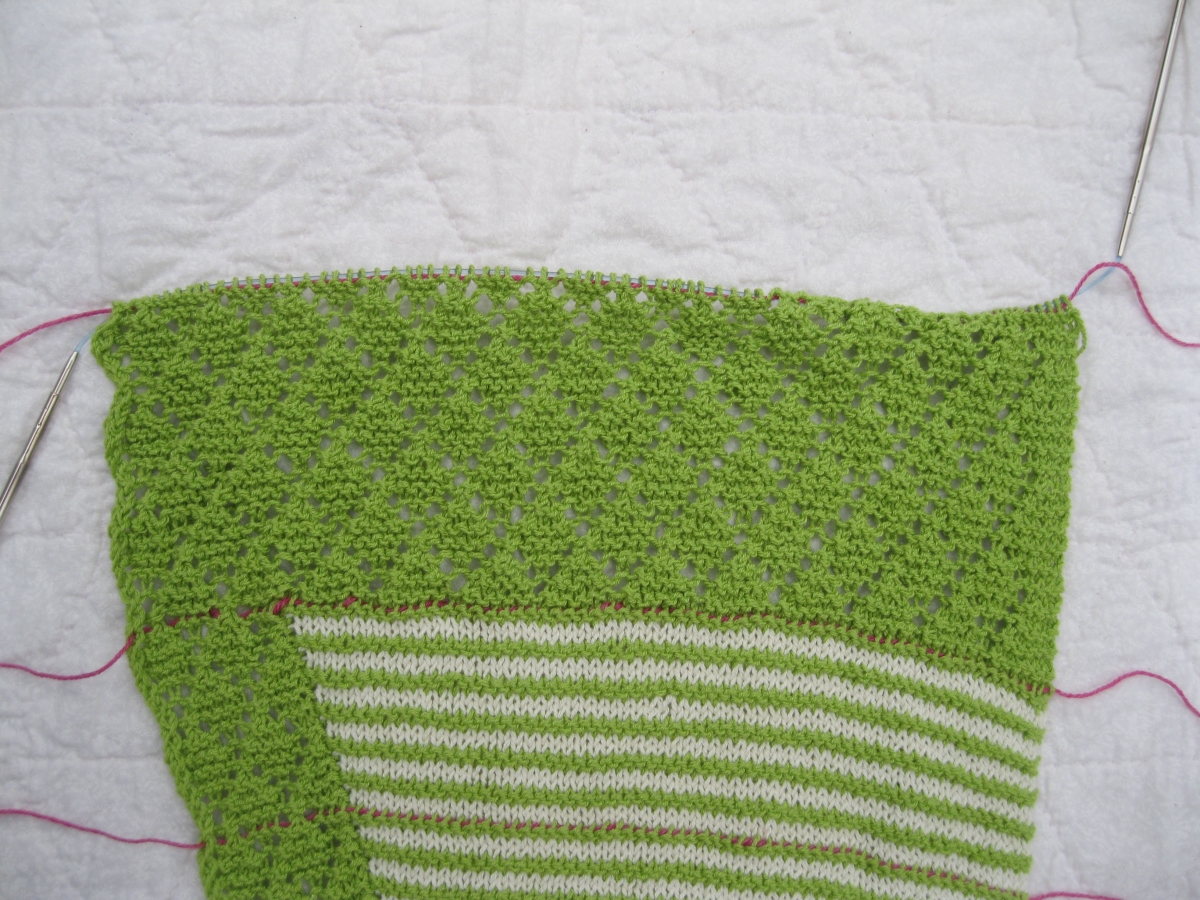
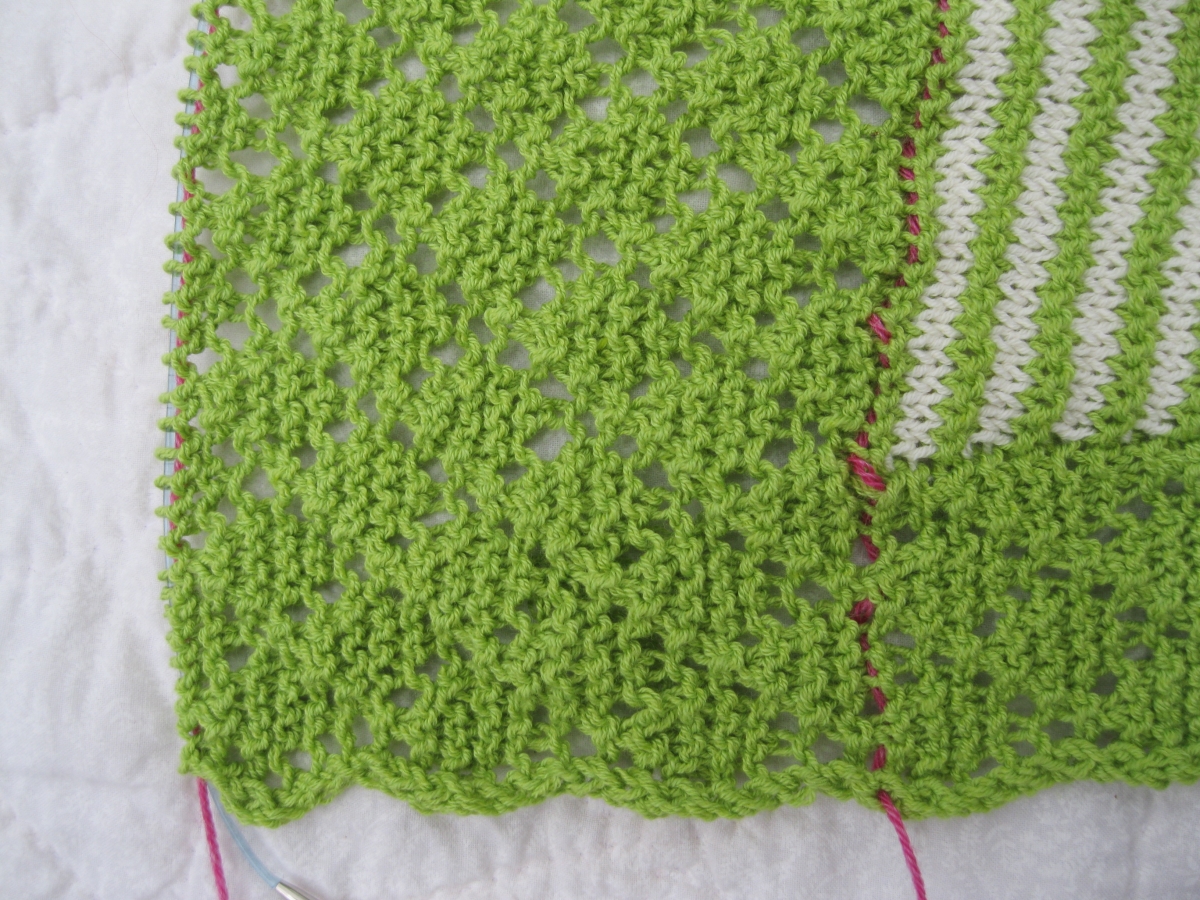
Part Two is complete and we are more than halfway done with Ridgely! As you can see from the above photo – I use lifelines, too. I love how the center lace design flows beautifully with the lace border. (See below photo) Part Three returns us to knitting with all three skeins as in Part One.
I know that many of you are concerned about the remaining yardage for Ridgely.
Here are my yarn weights and approximate yardage remaining after Part 2:
- MC – 22g/96 yards
- CC – 33g/145 yards
- MC2 – 34g/149 yards
After Part 3 (conclusion of knitting):
- MC – 4g/17 yards
- CC – 16g/70 yards
- MC2 – 21g/92 yards
While I had ample Cobasi remaining in my MC (Striped Body) skein at the end of Ridgely, one of my test knitters had only 2 yards remaining! (See below photo) Before rejoining the yarns in Part 3, we need to “steal” a little bit of yarn from our MC2 (Lace Border) skein as an insurance policy. I recommend winding off 15-20 yards of your MC2 skein to set aside as a safeguard against a shortage. It would be much easier to use this reserve skein than trying to borrow from the MC2 skein in the midst of the project. For many of you this is unneeded, but better safe than sorry!

Part Three is the Decrease Section of Ridgely and is knit much as Part One except one stitch is decreased before the marker in Rows 1, 5 and 9. The Set Up row places the marker between the Body and Border and rejoins the MC2 skein requiring a return to interlocking. The CC skein is rejoined in Row 3. Work the Decrease Section until 16 stitches remain – 2 stitches in the Striped Body and 14 stitches in the Lace Border. Knit one more row and then bind off all stitches. The knitting is complete!
Don’t worry, we still have more ahead! The education continues in Part Four as we focus on finishing techniques to give Ridgely a professional look. Expert blocking tips and an optional edge treatment will be introduced. I have several reasons for concluding the knitting after 3 sections:
- Ample time to finish the project. I want everyone to enter the prize drawing!
- Most patterns devote too little time to the proper finishing of garments. This step truly elevates your work!
I have enjoyed each and every photo posted on Ravelry and I can’t wait to see your new posts. Happy knitting!
Part Three
Click here to download printable version
![]()
Decrease Section
Return to knitting with 3 skeins as in Increase Section of Part One.
The Lace Border Chart is included here for your convenience.
Set Up
1. (MC) K60, k2tog, place marker, (MC2) k3, k2tog, yo, k4, k2tog, yo, k3tog.
Continue with Row 2 in Striped Body/Lace Border pattern (below). CC skein will be rejoined in Row 3.
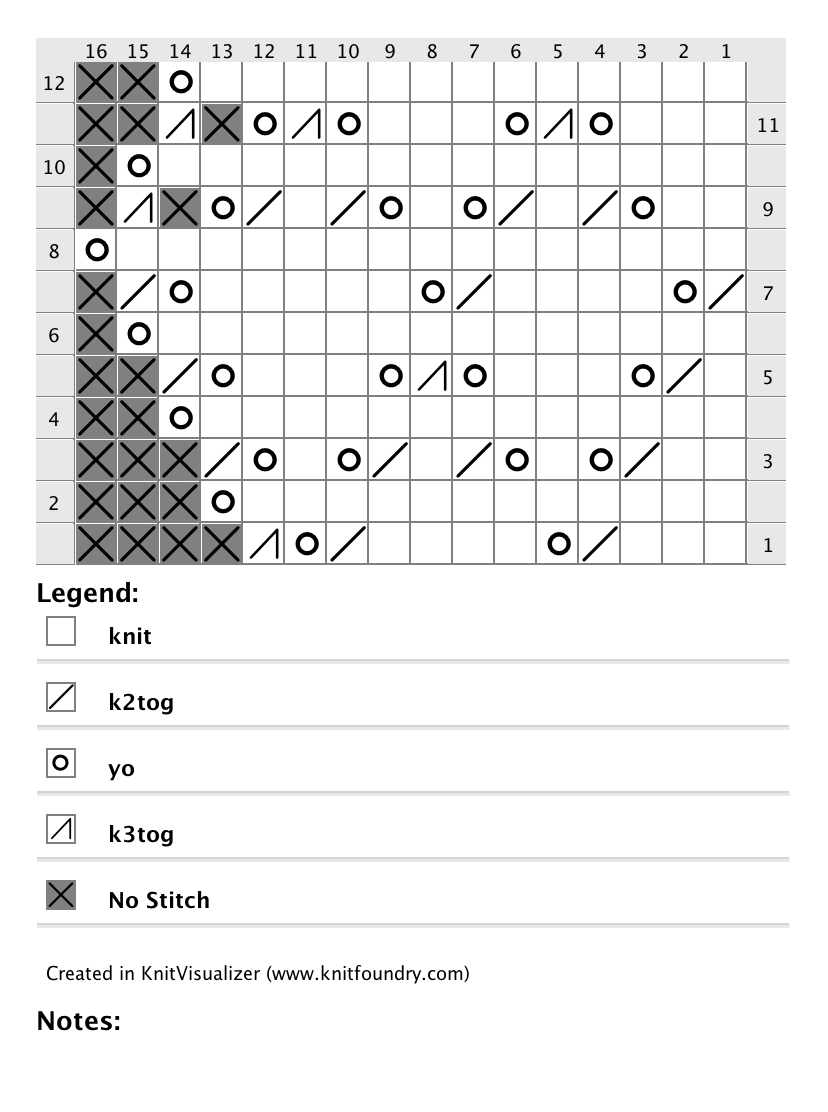
Striped Body/Lace Border (12 row repeat)
Asterisk (*) indicates decrease row – one stitch decreased.
*Row 1. (MC) Knit to 2 stitches before marker, k2tog, (MC2) k3, k2tog, yo, k4, k2tog, yo, k3tog.
Row 2. (MC2) Yo, k12, (MC) knit to end of row.
Row 3. (CC) Knit to marker, (MC2) k2, k2tog, yo, k1, yo, k2tog, k1, k2tog, yo, k1, yo, k2tog.
Row 4. (MC2) Yo, k13, (CC) purl to end of row.
*Row 5. (MC) Knit to 2 stitches before marker, k2tog, (MC2) k1, k2tog, yo, k3, yo, k3tog, yo, k3, yo, k2tog.
Row 6. (MC2) Yo, k14, (MC) knit to end of row.
Row 7. (CC) Knit to marker, (MC2) k2tog, yo, k4, k2tog, yo, k5, yo, k2tog.
Row 8. (MC2) Yo, k15, (CC) purl to end of row.
*Row 9. (MC) Knit to 2 stitches before marker, k2tog, (MC2) k2, yo, k2tog, k1, k2tog, yo, k1, yo, k2tog, k1, k2tog, yo, k3tog.
Row 10. (MC2) Yo, k14, (MC) knit to end of row.
Row 11. (CC) Knit to marker, (MC2) k3, yo, k3tog, yo, k3, yo, k3tog, yo, k3tog.
Row 12. (MC2) Yo, k13, (CC) purl to end of row.
Work above repeat until 16 stitches remain ending after Row 12.
(2 Striped Body stitches + 14 Lace Border stitches.)
With MC, knit across all stitches.
Bind off all stitches.