Blog

Knitting Retreat

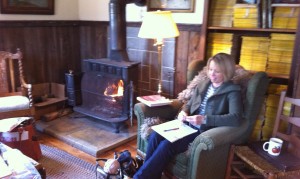
There is nothing more divine than a weekend away with fellow knitters!  I spent the past weekend at Autumn House Farms in Rochester Mills, Pennsylvania.  This picturesque haven is near Punxsutawney (yes, the Groundhog Capital) and housed me and my knitting buddies for three days of relaxation and education.

Autumn Farms is a self-sustaining farm.  For a city girl like me, I learned how this type of farm grows their own crops to feed their flock of sheep. The sheep are sheared and their wool is spun into beautiful yarn all on their own premises.  Harriet and Kenny shared their vast knowledge and warm hospitality creating the perfect getaway in their rustic bed and breakfast, The Shepherd’s Rest.

I used the time to work on new designs for upcoming classes.  It’s amazing how the creative energy just explodes when the daily grind is far away.  A crackling fire in the pot belly stove fueled my needles and my knitting soul.  I hope you can find the time for knitting with friends, too!
Rescuing Twisted Stitches

At some point, all knitters are faced with ripping out their knitting. Sometimes your mistake is so far down that it is easier to rip back to the error and then replace the stitches back onto the needles. When we place these stitches back on the needles it is very common to twist the stitches by sitting them on the needles incorrectly. (This also happens to me when I accidentally drop a stitch and pick it up in a frenzied panic before it runs down!)

When looking at the two “legs” of a knit stitch, the left leg of the stitch should be behind the needle with right leg in front. If you put your stitches with the right leg in front, essentially twisted, then I have a great tip for you. To untwist your stitches, simply knit into the back loop of the twisted stitch and VOILA! Your stitch is now sitting on the right hand needle in the correct position with the left leg behind the needle and no twist.

If you are like me, you are wondering where was this tip when you untwisted 97 stitches before knitting them!

Heel Workshop

HEEL WORKSHOP
Traditional Heel

The secret to a successful traditional heel lies in the heel flap. The heel flap selvages provide the foundation for future gusset stitches. Choose one of the following heel flap patterns to lay the perfect foundation for picking up your gusset stitches.

After completing final round of leg, turn to wrong side of stitches just worked to begin heel flap. Heel flap is generally knit over half the total number of leg stitches. In each option, repeat the two rows over an even number of stitches until heel flap reaches desired length ending after row 1.

#1 Slip Stitch Chain Selvage
The first stitch of each row is slipped. Selvage is loose and chain edge makes it simple to pick up gusset stitches.

1. (WS) Slip 1 purlwise with yarn if front, purl to end.
2. (RS) *Slip 1 purlwise with yarn in back, k1; repeat from * to end of row.

#2 Wrapped Slip Stitch Selvage
The last stitch of each row is slipped and then immediately knit on next row. Selvage is a bit firmer than Option #1, but still maintains a chain edge.

1. (WS) K1, purl to last stitch, slip 1 purlwise with yarn in front.
2. (RS) *K1, slip 1 purlwise with yarn in back; repeat from * to last 2 stitches, k1, slip 1 purlwise with yarn if front.

#3 Single Garter Stitch Selvage
First and last stitch of each row is knit. Selvage is tight with no chain edge. Stitches may be picked up in bumps or bars along edge.

1. (WS) K1, purl to last stitch, k1.
2. (RS) *K1, slip 1 purlwise with yarn in back to last 2 stitches, k2.

©2010 Michelle Hunter
www.knitpurlhunter.com

Moebius Seed Scarf

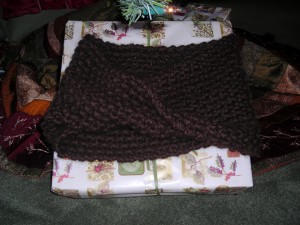
Knitters notoriously underestimate how much time is needed to knit for everyone on their gift list. It seemed like a great idea to knit Christmas gifts for all your family and friends in July! If you find yourself a bit behind this December, think big yarn and big needles. Try this simple and stylish cowl that can be knit in a few hours. You can always make everyone socks next year!
DSCN1312
Moebius Seed Scarf

2 100g skeins Misti Alpaca Chunky
Size 17 needles

Holding two strands of yarn together, cast on 18 stitches

Row 1. *k1, p1; repeat from * to end.
Row 2. *p1, k1; repeat from * to end.

Repeat rows 1 and 2 until piece measures 24”.

Bind off in pattern.

Seam short ends together twisting one end before joining to make scarf a moebius.

Pattern inspired by Nina at Nina Yarn Shop in Chicago, Illinois.

Tail Tip

Tie the tail from your cast on stitches in a bow.  Should you grab the tail instead of the working yarn, you will be stopped quickly by the bow and only need to unknit a few stitches.  Every knitter, no matter their skill level, knits with the tail now and then.  UGH!