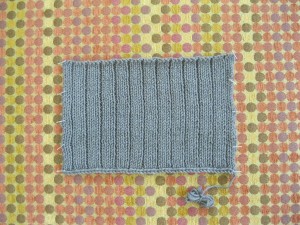
All of the pieces to our pillow are complete and it is time to assemble them into a stylish accessory. I believe that finishing is the most important step in creating beautiful garments. Taking the time to seam carefully allows your expert knitting to remain the focus. Seaming is not an exact science and it requires a bit of patience. Remember that you are handcrafting! Each stitch was executed by human hands and you can not expect to stitch together seams as quickly as a sewing machine. The more I knit, the more I enjoy the finishing process for its quiet mechanics. It’s just me, my yarn and a tapestry needle working in harmony to join the fruits of my labor.
The Buttonhole Band and Button Band will be joined to the top and bottom of the Pillow Front respectively. This horizontal seam may be executed in many ways. The simplest horizontal seam is sewn using the Overcast Stitch, often known as the whip stitch. The Overcast Stitch makes for a flat-lying seam, but the seaming yarn is quite visible against a stockinette background. I chose the Overcast Stitch for my Building Blocks book because a flat, reversible seam is perfect for an afghan and also because the seaming yarn was hidden nicely among the seed stitch. In Independence Pillow, we are primarily joining knit stitches together and I find that the Invisible Horizontal Seam is a superior choice in this situation. In this technique, the seaming yarn adds a nice row of knit stitches that flow between the two pieces as it connects them. The stitch creates a firm ridge on the wrong side making it an ideal choice for shoulder seams or anywhere a sturdy seam is required. I encourage you to use the Invisible Horizontal Seam and bring your finishing skills to the next level.
As you prepare to work the Invisible Horizontal Seams in this project, take note that the Front has more stitches across than the ribbing pieces of the Back. More stitches were necessary on the Front to compensate for the cables. These extra stitches are eased into the horizontal seam with an almost undetectable pattern interruption. I demonstrate this technique near the end of the Invisible Horizontal Seam video.
Once the horizontal seams are complete, the vertical seams are sewn using the Mattress Stitch. This is probably the most widely used stitch in finishing and I think you will be surprised how easy it is to create very professional results. Because the Buttonhole flap overlaps the Button Band, it is necessary to “catch” the Button Band underneath with the seaming yarn as you work the Mattress Stitch in this area. Don’t fret over how you catch the Button Band because this will be hidden inside the pillow.
The last bit of work to do is the button placement. Insert the pillow form into the seamed work and mark the location for each button on the Button Band. You may use matching sewing thread or leftover yarn to attach the buttons. If you use yarn, the knots have a tendency to stretch and untie themselves over time. To guard against this, use a tiny dab of “no fray” liquid (available in sewing and craft stores) on the yarn knots for each button on the wrong side of your Button Band.
I hope you enjoyed our summer KAL! I had a wonderful time knitting with all of you. Please remember to enter the prize drawing at skacelknitting.com to reward yourself for a job well done. The entries provide Skacel with participation numbers that encourage more KALs.
Join me in October for our next KAL that once again features Simpliworsted yarn. We will be knitting a great-looking cowl that features fun stitches, slick techniques, helpful videos and more prizes!
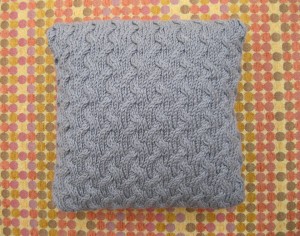
Scroll down to the bottom of this post to see the finished Independence Pillow.
Part Four
Click here to download printable version
Finishing
Block pieces if desired. See Blocking Video
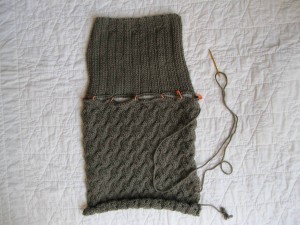
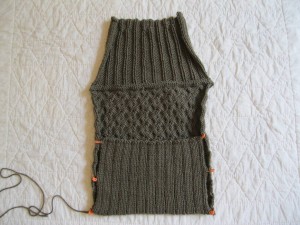
With right sides facing, pin bind off edge of Buttonhole Band to top edge of Pillow Front. (See below.) Thread yarn onto a blunt-tipped tapestry needle. Sew pieces together using the Invisible Horizontal Seam easing in the extra Pillow Front stitches.. See Invisible Horizontal Seam Video
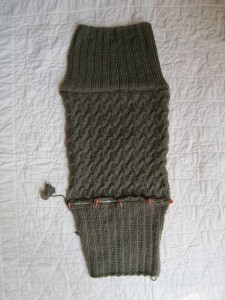
Sew bind off edge of Button Band to bottom edge of Pillow Front as above. (See below.)
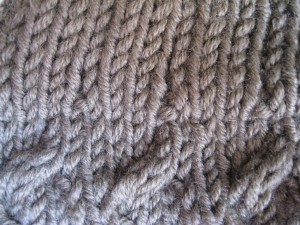
Here is a close-up photo of the finished horizontal seam:
Fold the Button Band at horizontal seam with wrong sides together. (See below.)
Fold the Buttonhole Band to overlap on top of the Button Band. Pin sides together through all thicknesses. Using Mattress Stitch, close side seams catching overlapped Button Band. See Mattress Stitch Video
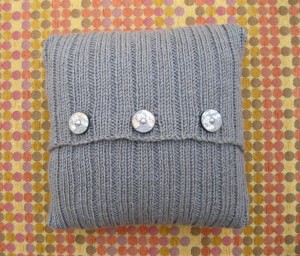
Insert pillow form and sew buttons into place on Button Band.
Real beauty sleep is laying your head on a hand knit pillow!
(c)2012 Michelle Hunter


