I’m delighted to return with the summer edition of the Progressive Needles Knit Along debuting our new project, Independence Pillow. As with all of the KALs, we will combine knitting education and fun with prizes generously supplied by our sponsor, Skacel. Take a break from the heat and knit this great looking pillow that is chock full of essential knitting techniques.
We begin Independence Pillow with the pillow front. I have chosen a cable design to grace the front of the pillow. Cables are classic works of knitting wonder that deceive the uninitiated with their simple construction. Slip a few stitches onto a cable needle and hold them to the front or the back of the work – voila, cable magic! What could be simpler?
Actually, cables CAN be made simpler by eliminating the need for the cable needle. Having been stranded numerous times without a cable needle, I have resorted to using paper clips, bobby pins, toothpicks or whatever I could get my hands on to continue cabling. It just made sense to explore cabling without a cable needle. Once I got over the initial fear of live stitches dangling from my work, I was thrilled with the speed I gained. I ended my dependence on the cable needle and the “Independence” Pillow was born! I encourage you to watch my video, Cables without a Cable Needle, to explore this slick technique. First time cablers may benefit from the security of a cable needle which is demonstrated in the Cables video. Whether you choose to use a cable needle or not, the beautiful outcome is the same.
I have a few tips to share before the knitting begins. Whenever I cast on for a project that later requires seaming, I leave a long tail at both my cast on and bind off edge. I use these tails at the conclusion of the project to seam the work. This trick makes for one less end to weave and provides a sturdier seam. I recommend leaving the tail 3 times the finished seam length to safely allow enough yarn for the seaming. In this project, leaving a 36″ tail is more than enough yarn for our future seam.
As always, be sure to check your gauge. The pillow is knit with a smaller needle than recommended by the yarn to provide a dense fabric that will fit snugly over the pillow form.
 Click here for a list of KAL retail suppliers.
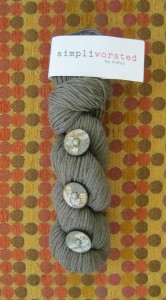
- 2 skeins Simpliworsted, 55% Merino Superwash/28% Acrylic/17% Nylon, 100g/140 yards each
- US #8 (5mm) or size necessary to achieve desired gauge
- Cable needle
- 12” square pillow form
- 3 buttons, approximately 1”
4.5 stitches = 1 inch in stockinette.
Finished knitted measurements = 11 ½” x 11 ½”.
C4B – slip next 2 stitches onto cable needle and hold in back of work, knit next 2 stitches from left hand needle, then knit 2 stitches from cable needle. See Cables Video
C4F – slip next 2 stitches onto cable needle and hold in front of work, knit next 2 stitches from left hand needle, then knit 2 stitches from cable needle. See Cables Video
Click here to download printable version
To increase speed, try working the cables below without a cable needle. See Cables Without a Cable Needle Video
Front
Cast on 62 stitches using Long Tail cast on. See Long Tail Cast On Video
Row 1. (RS) Knit.
Row 2. Purl.
Row 3. K1, *k2, C4B; repeat from * to last stitch, k1.
Row 4. Purl.
Row 5. Knit.
Row 6. Purl.
Row 7. K1, *C4F, k2; repeat from * to last stitch, k1.
Row 8. Purl.
Work above rows 9 times or until Front measures approximately 11 ½” from cast on edge.
Bind off.
Happy knitting!
©2012 Michelle Hunter


