Welcome to the Progressive Needles Knit Along sponsored by Skacel Collection. A big thank you to Skacel for their dedication to knitting education that makes this series possible!
Before we begin, here is an overview of the KAL:
- A portion of the 4-part mystery pattern is revealed here on the 2nd, 3rd, 4th and 5th Thursdays in October at 9am Eastern time. The weekly pattern, video resources and lots of helpful tips are included in each post. An abbreviated, pattern-only version is included to download.
- All techniques are supported with video instruction at knitpurlhunter.com
- All questions and comments are monitored daily both here and in the Knit Purl Hunter group on Ravelry. It’s like having your own private knitting tutor!
- Projects completed by November 15th are eligible for the monthly prize drawing – first prize is a set of addi Clicks! See skacelknitting.com for all the info.
- VERY IMPORTANT: Audition is a FREE pattern through November 15th. After this date, it will only be available for purchase on Ravelry. Be sure to download each portion of the pattern prior to this date. Saving it to your Ravelry page will NOT save the pattern. The helpful tips and videos for each section will remain on my website indefinitely.
Audition is an asymmetrical shawl full of interesting stitches and patterns that result in a piece you will love to knit and wear. The pattern is aptly named Audition because there are lots of new stitches to “try out”.
Let’s begin with a few words about yarn management. I will be providing the yarn weights throughout the pattern to help assess proper yardage. Please note that yarn weights vary, by as much as 5 grams, at the start of each skein due to humidity levels and other environmental factors. However, the yardage is carefully regulated so have no fear if the skein weighs less than the stated grams. You can rest assured that you do have the stated yardage. I knit my skein of Spray beginning at the outside of the skein, but starting at either end will work. The Spray yarn will change from light to dark hues several times and starting in either direction will complement the design.
Section 1
The shawl will grow into its shape by a series of increases and decreases. Every right side row begins with k1, kfb and ends with k2tog, k1. These offsetting stitches coax the shawl into shape. Every wrong side row ends with kfb, k1 which increases the stitch count by one at that edge of the shawl. This same edge detail will continue throughout the entire shawl.
Begin by casting on five stitches in your preferred method with the Main Color yarn. I used the Long Tail Cast On, but any style will work. I recommend hanging a marker on the right side of the work to avoid any confusion with right and wrong sides. Repeat Rows 1 and 2 until there are 56 stitches on the needle ending after completing a wrong side row.
Section 2
In this section a bit of striping is added for interest. Garter stripes of contrasting colors are a great way to showcase any beautiful colors. When alternating rows of color in striping and color knitting, it is not necessary to cut the yarn at each color change. The multiple colors may remain attached to the piece, reducing the number of tails in the project. When it is time to change colors at the beginning of a row (after the initial join), drop the old color and bring up the new color from behind and underneath to begin knitting. This creates a tidy edge with less bulk.
The general rule in knitting is if a yarn will not be used for four or more rows, it is a good idea to carry the resting yarn up the side of the fabric. This helps maintain an even tension and also prevents large loops that can snag with use. In this section, the yarn only rests for four rows so it is optional if you would like to carry the yarn up the side. I do prefer to carry it for a clean look. To carry the unused yarn up the side, bring it to the front and over the working yarn at the beginning of a row. The resting yarn is “caught” in the working yarn and carried up the side. Take care that the carried yarn is not pulled too tightly, so as to help maintain a consistent tension. Watch my Carrying Yarn Up The Side video for a complete tutorial.
At the end of Section 2, cut the Main Color yarn. The upcoming section is worked all in Contrasting Color and is too long of a stretch to carry the yarn up the side.
Section 3
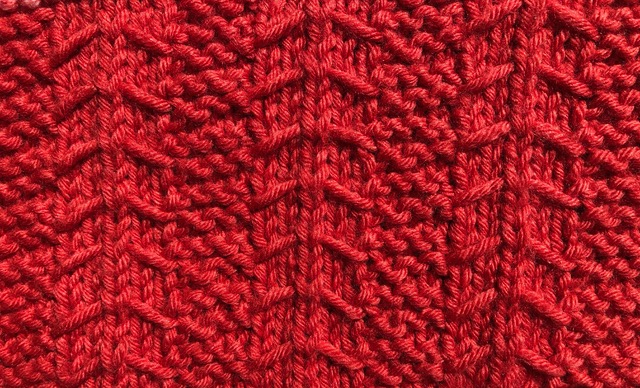
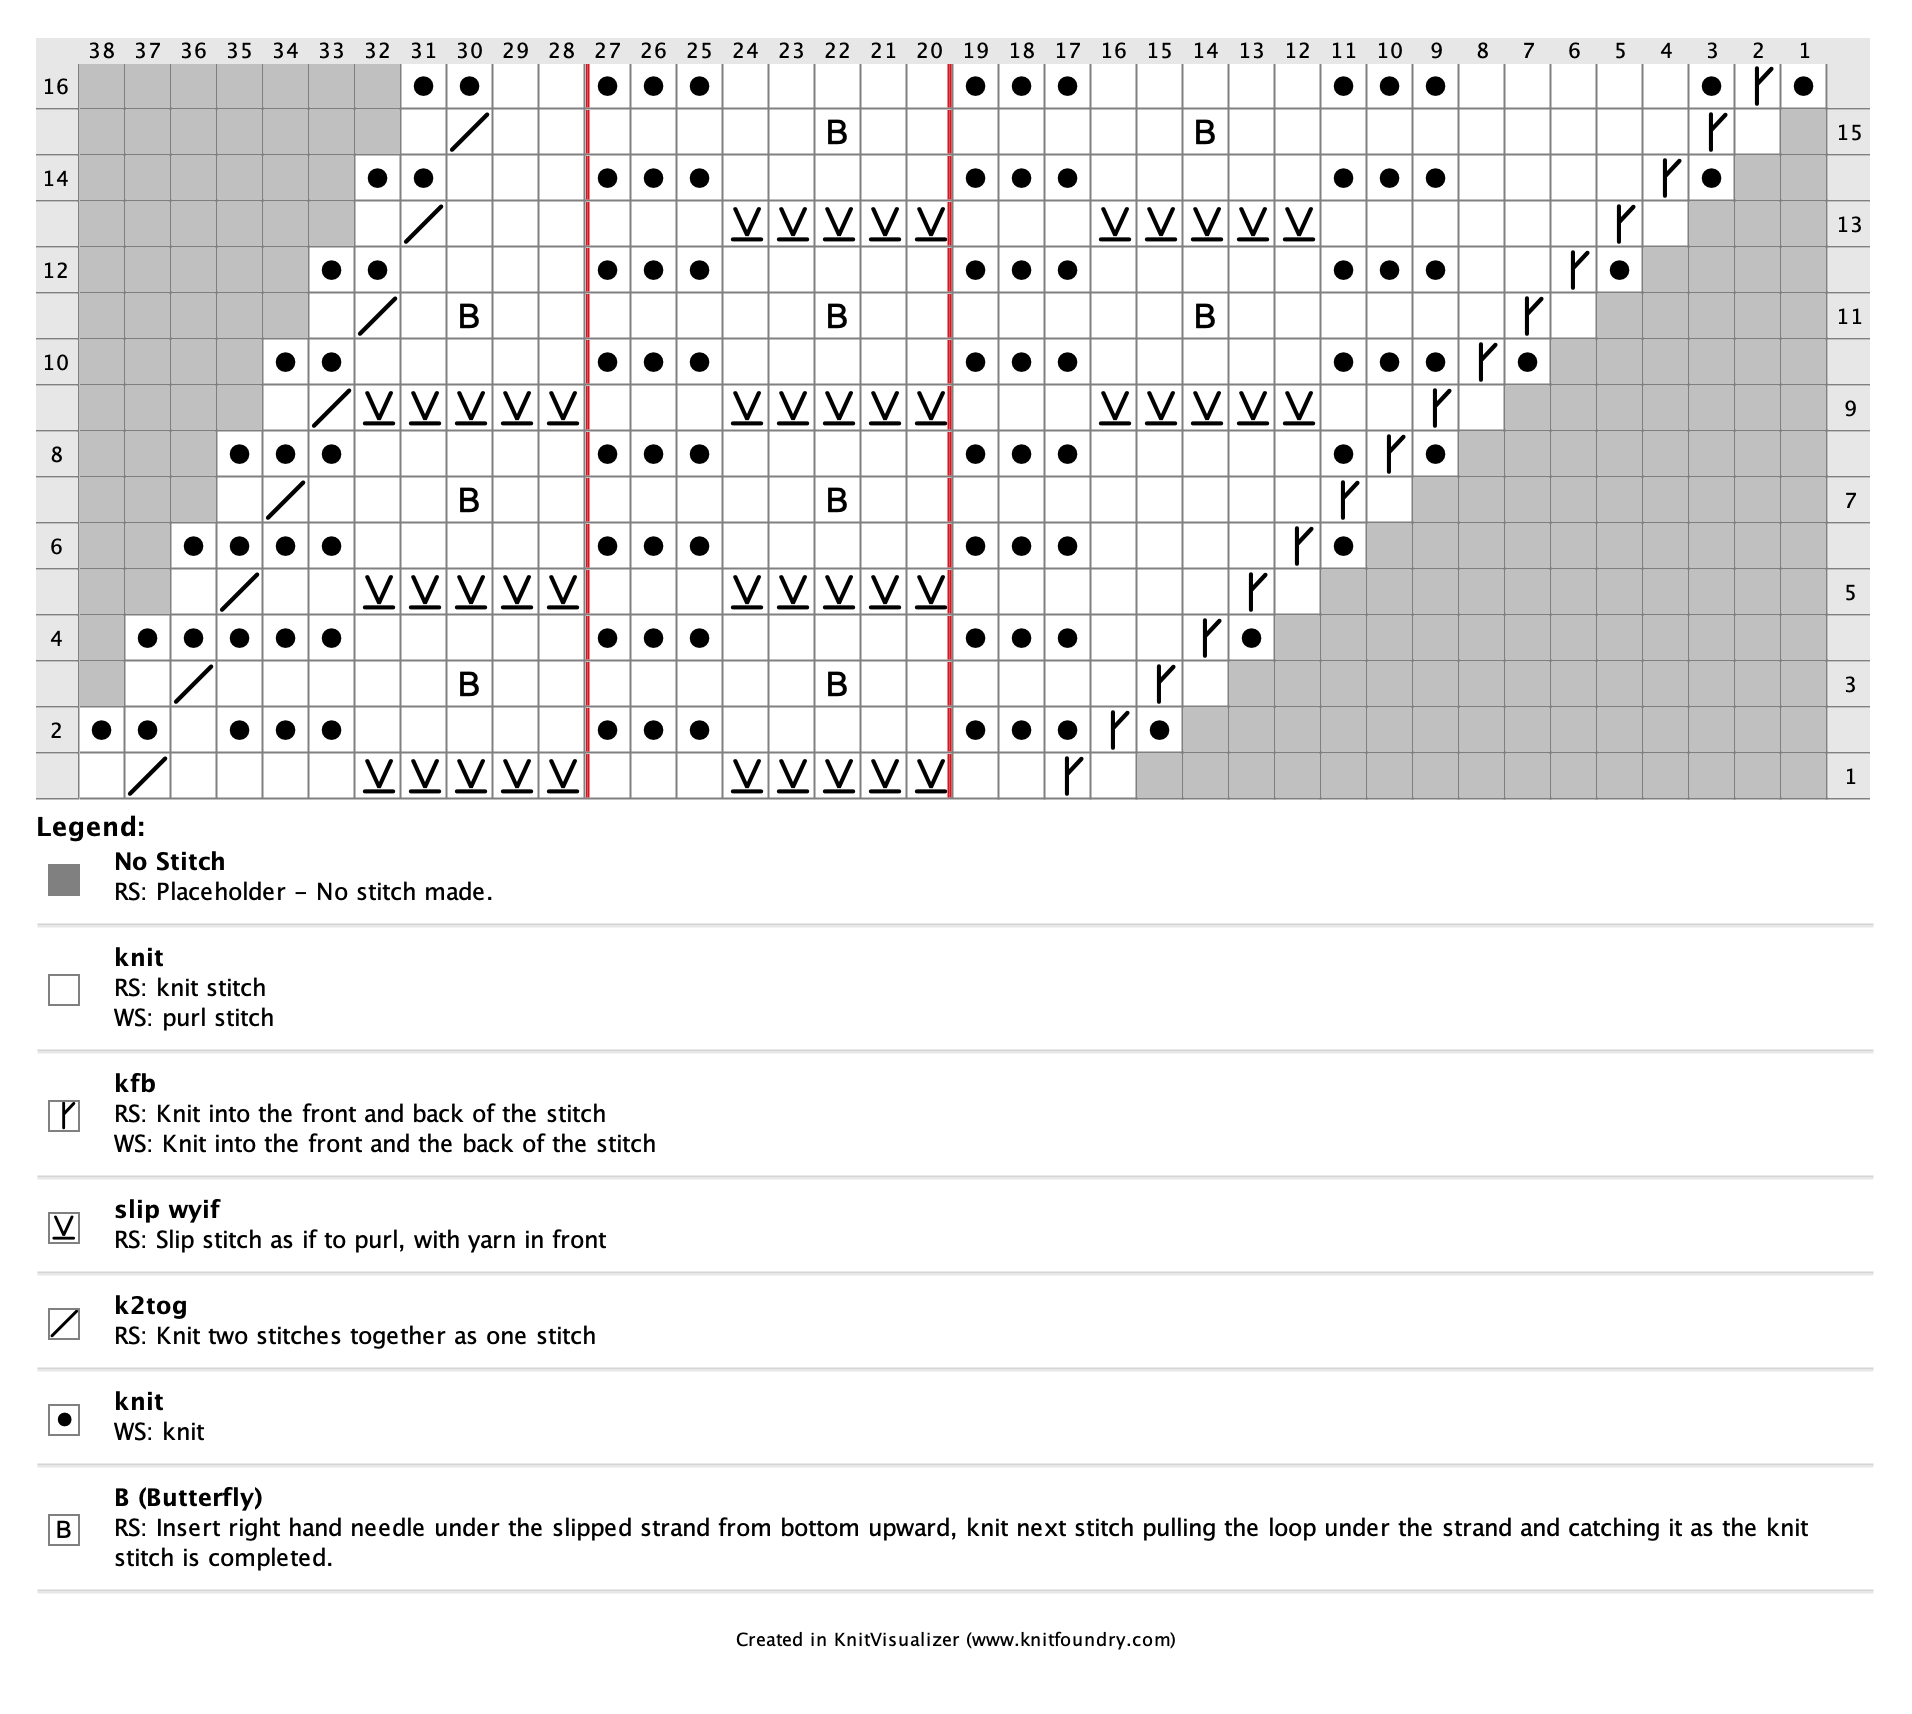
A fun stitch, know as Little Gulls (above), is worked in the contrasting color. This textured beauty is actually quite easy to work. The tiny, winged stitches are formed by picking up long strands of slipped stitches and catching them in the stitch above resulting in a butterfly-like design. The long strands (or floats) are constructed by slipping five stitches with yarn in front. It is important to remember that a stitch is always slipped as if to purl with yarn held to the wrong side unless otherwise stated. In this pattern you are directed to slip 5 with yarn in front (wyif). This means the stitches are still slipped as if to purl, but the yarn is held in an otherwise stated (wyif) position.
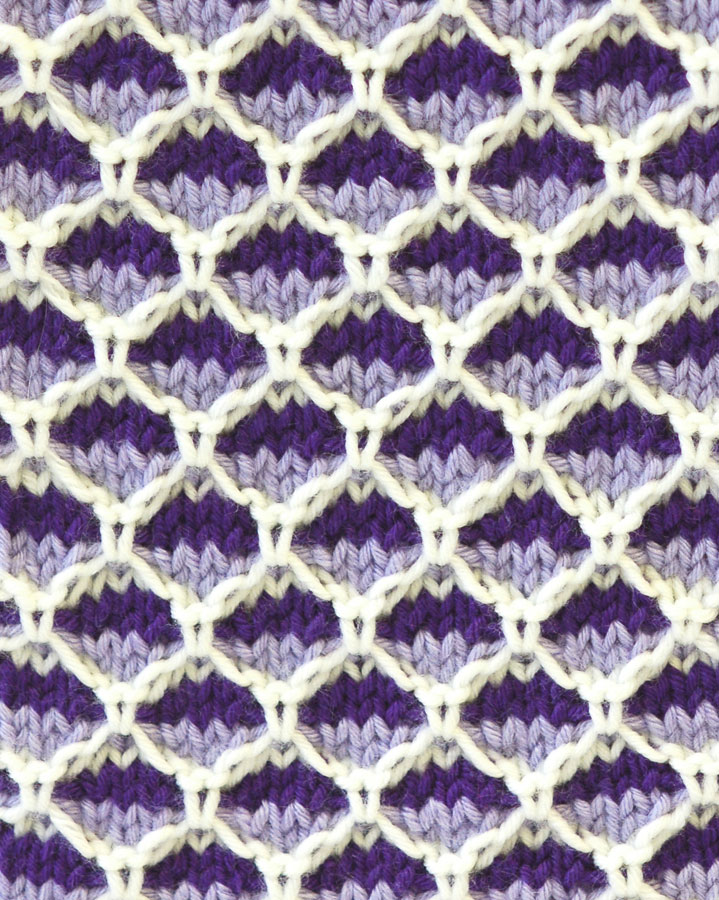
The Little Gull stitch is very similar to the Butterfly Stitch used in my Building In Color book (left) and Fluttered Socks (right) which use three strands instead of the one strand in Audition. To avoid any confusion, I have filmed a Little Gulls video to guide you through the process.

Before working the Little Gulls stitch, two set up rows are required and they are NOT in the Little Gulls chart.
The pattern includes both written and charted instructions for this section. Charting a shawl with this type of shaping presents some unique problems. When comparing the chart to the shawl’s written instructions, you will notice a discrepancy with the edge stitches. The repeat is found between the bold red lines. In some rows, the edge stitches also include one of the eight-stitch repeats. This chart modification was needed to maintain the visual integrity of the chart repeat.
Another chart anomaly is found in the left edge stitches on right side rows. The right side rows will always end with k2tog, k1. Its offsetting increase is found at the beginning of the row. If you are following the chart it will show one less “square” on the left edge than the number of stitches you have on your needle. For example, in Row 1 the left edge stitches on the chart read: slip 5 wyif, k4, k2tog, k1 and uses eleven squares on the chart. However, the k2tog requires two stitches to execute that decrease so in reality there will be twelve stitches on the needle for these edge stitches. Chart followers will need to train their brain to remember that each k2tog on this edge of shawl counts as two stitches on the needle. This sounds much more complicated than it is! Any confusion can be easily verified by comparing the charted instructions with the written instructions.
I have provided the stitch count at the end of every wrong side row. It’s always a good idea to count and stay on track.
At the end of Section 3, your shawl is shaping up nicely and ready for another new stitch pattern next week.
Until next week, happy knitting!
Michelle

Part One
Click her to download printable version
Materials
- MC (Option 1): Simplicity Spray; 55% Merino Superwash, 28% Acrylic, 17% Nylon; 456 yards per 200 gram cake , 1 cake. —OR— MC (Option 2): Simplicity Tonal, 55% Merino Superwash, 28% Acrylic, 17% Nylon; 117 yards per 50 gram hank, 4 hanks of the same color.
- Contrasting Color (CC) – Simplicity by HiKoo, 55% merino superwash, 28% acrylic, 17% nylon, 50 g/117 yds, 2 skeins
- US #7 (4.5mm) addi 24-32” circular needle
Gauge
Approximately 20 stitches and 41 rows = 4” in garter stitch, unblocked
Size
Asymmetrical triangle, approximately 16” deep and 67” at longest edge
Abbreviations
B (Butterfly) – insert right hand needle under the slipped strand from bottom upward, knit next stitch pulling the loop under the strand and catching it as the knit stitch is completed.
See Little Gulls Video
CC – contrasting color.
k2tog – knit two together. See K2tog Video
kfb – knit into front and back of stitch. See Kfb Video
MC – main color.
sl – slip. See Slip Stitch Video
wyif – with yarn in front.
Instructions
Section #1 (All MC)
Using MC, cast on 5 sts.
Row 1. (RS) K1, kfb, knit to last 3 sts, k2tog, k1.
Row 2. (WS) Knit to last 2 sts, kfb, k1. (1 st increased)
Repeat Rows 1 and 2 until there are 56 stitches ending after Row 2.
Approx. 165g remaining in MC.
Section #2 (MC and CC)
Row 1. (RS) With CC, k1, kfb, knit to last 3 sts, k2tog, k1.
Row 2. (WS) With CC, knit to last 2 sts, kfb, k1. (1 st increased)
Row 3. With MC, same as 1.
Row 4. With MC, same as 2.
Row 5. With CC, same as 1.
Row 6. With CC, same as 2.
Row 7. With CC, same as 1.
Row 8. With CC, same as 2.
Row 9. With MC, same as 1.
Row 10. With MC, same as 2.
Row 11. With CC, same as 1.
Row 12. With CC, same as 2.
Row 13. With MC, same as 1.
Row 14. With MC, same as 2. (63 stitches)
Cut MC yarn.
Section #3 – Little Gulls (CC)
Set Up
Set Up Row 1. (RS) K1, kfb, knit to last 3 sts, k2tog, k1.
Set Up Row 2. (WS) K2, p2, *k3, p5; repeat from * to last 3 sts, k1, kfb, k1. 64 sts
Little Gulls (See Chart below)
Row 1. (RS) K1, kfb, k2, *sl 5 wyif, k3; repeat from * to last 4 sts, k1, k2tog, k1.
Row 2. (WS) K2, p1, * k3, p5; repeat from * to last 5 sts, k3, kfb, k1. 65 sts
Row 3. K1, kfb, k4, *k2, Butterfly, k5; repeat from * to last 3 sts, k2tog, k1.
Row 4. K2, *k3, p5; repeat from * to last 7 sts, k3, p2, kfb, k1. 66 sts
Row 5. K1, kfb, k6, *sl 5 wyif, k3; repeat from * to last 10 sts, sl 5 wyif, k2, k2tog, k1.
Row 6. K1, *k3, p5: repeat from * to last 9 sts, k3, p4, kfb, k1. 67 sts
Row 7. K1, kfb, k8, *k2, Butterfly, k5; repeat from * to last 9 sts, k2, Butterfly, k3, k2tog, k1.
Row 8. *K3, p5; repeat from * to last 3 sts, k1, kfb, k1. 68 sts
Row 9. K1, kfb, k2, *sl 5 wyif, k3; repeat from * to last 8 sts, sl 5 wyif, k2tog, k1.
Row 10. K2, p5, *k3, p5; repeat from * to last 5 sts, k3, kfb, k1. 69 sts
Row 11. K1, kfb, k4, *k2, Butterfly, k5; repeat from * to last 7 sts, k2, Butterfly, k1, k2tog, k1.
Row 12. K2, p4, *k3, p5; repeat from * to last 7 sts, k3, p2, kfb, k1. 70 sts
Row 13. K1, kfb, k6, *sl 5 wyif, k3; repeat from * to last 6 sts, k3, k2tog, k1.
Row 14. K2, p3, *k3, p5; repeat from * to last 9 sts, k3, p4, kfb, k1. 71 sts
Row 15. K1, kfb, k8, *k2, Butterfly, k5; repeat from * to last 5 sts, k2, k2tog, k1.
Row 16. K2, p2, *k3, p5; repeat from * to last 3 sts, k1, kfb, k1. 72 sts
Row 17. Same as 1. Row 25. Same as 9.
Row 18. Same as 2. 73 sts Row 26. Same as 10. 77 sts
Row 19. Same as 3. Row 27. Same as 11.
Row 20. Same as 4. 74 sts Row 28. Same as 12. 78 sts
Row 21. Same as 5. Row 29. Same as 13.
Row 22. Same as 6. 75 sts Row 30. Same as 14. 79 sts
Row 23. Same as 7. Row 31. Same as 15.
Row 24. Same as 8. 76 sts Row 32. Same as 16. 80 sts
First skein of CC = 23g
Do NOT cut CC yarn as it will be used in next week’s Section #4.
Little Gulls Chart
8-stitch repeat between red lines, work Rows 1-16 twice. (Don’t forget to work Set Up rows prior to beginning chart)