Center of Attention – Part 4

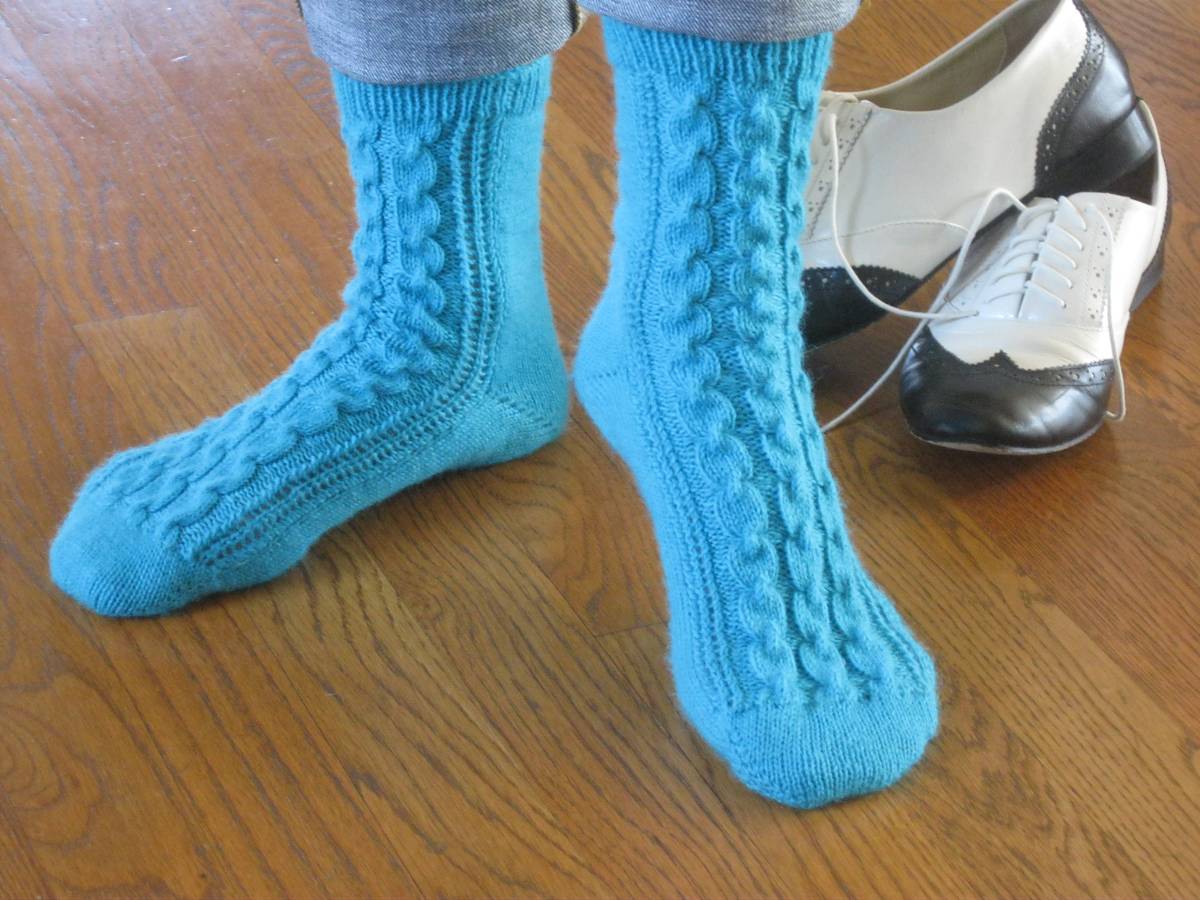
Now that your heel is complete it is time to cruise on up the leg.  First, let’s pause for a minute and admire the beauty of the short row heel one last time before we knit on.  It really is a bit of knitting magic!


I wrote this pattern for the novice and experienced sock knitter alike.  I hope the experienced sockers appreciated the challenge of a new stitch.  For the newer sock knitters, especially first time toe-up sockers, the leg of this sock is quite simple.  In fact it is so simple that I sheepishly give you the instructions.

To complete the sock, simply continue up the leg maintaining the instep design over the front of the leg and allowing the back of the leg to remain in stockinette.  I can hear many of you groaning because there is nothing new to add!  I have several reasons for this design choice:

  • A simple leg allows the cables to remain at the “center of attention” and ensure that every knitter is successful.
  • Knitting the design over only half of the leg means you can knit quicker and finish in time to enter the prize drawing.
  • The stockinette stitches provide a good area to customize the size.

Before continuing with the leg, take some time to evaluate the circumference of the knitted foot since it will also be the circumference of the leg of your sock.  Stretch the foot to see how wide it will expand for your leg.  Most knitters will find that this measurement is suitable for the leg as well.  If your cables were firmer or looser than mine, you may wish to make some adjustments for the leg size.  The simplest adjustment is to change needle sizes at this point.  The difference will be undetectable to the eye, but may provide the change you need.  Other options include adding an increase (Kfb or Make One) or decrease (ssk) at the beginning and end of the first round of stockinette stitches.  They will be nearly invisible since they are tucked next to the lace stitches on the chart.

If you would like to work the back of the leg in the cable design you may do so easily.  Medium size knitters will need to increase the stitch count as in the Set Up Row in Part One to achieve the required 36 stitches for the design.  Once the instep/front of the leg is ready for Row 1 of the charted design, work the pattern over all of the 72 stitches.  This pattern modification maintains the eligibility of your sock within the prize rules.

When binding off a toe up sock, it is essential to use a loose bind off.  I have seen beautiful socks become unwearable after the knitter used the standard bind and it would no longer fit over their ankle.  I recommend Elizabeth Zimmerman’s Sewn Bind Off for this sock.  You will love the clean line it creates while keeping your cuff edge firm yet still elastic.  Watch my Sewn Bind Off  Video to learn this handy bind off.  To finish your two at a time socks, watch Two at a Time Socks – Bind Off   for a quick tutorial.

Part Four

Click here to download printable version

AC6 (Axis Cable) – slip 4 stitches to cable needle and hold in front of work, knit 2 stitches from left hand needle, return 2 center stitches from cable needle to left hand needle, move cable needle to back of work, knit 2 center stitches, knit 2 stitches from cable needle.  See Axis Cable Video

k2tog – knit two together.  See k2tog Video

ssk – slip next stitch as if to knit, slip next stitch as if to knit, insert left needle into the front of these two slipped stitches from left to right and knit together.  See ssk Video

yo – yarn over.  See Yarn Over Video

Directions are for women’s Medium (directions for Large in parentheses when necessary).

Leg

Continue knitting in the round with first 36 stitches worked in design pattern (see chart above) and last 32(36) remaining in stockinette (all knit) until leg reaches 5” or desired height ending after Row 10.

Cuff

All Sizes: Work a k1, p1 rib for 1”.

Bind off using sewn bind off method.  See Sewn Bind Off  Video

Optimized-IMG_0203

I consider a knitting project the most essential item in any survival kit.

Who would want to be stranded without it?

©2013 Michelle Hunter

www.knitpurlhunter.com

October Knit Along

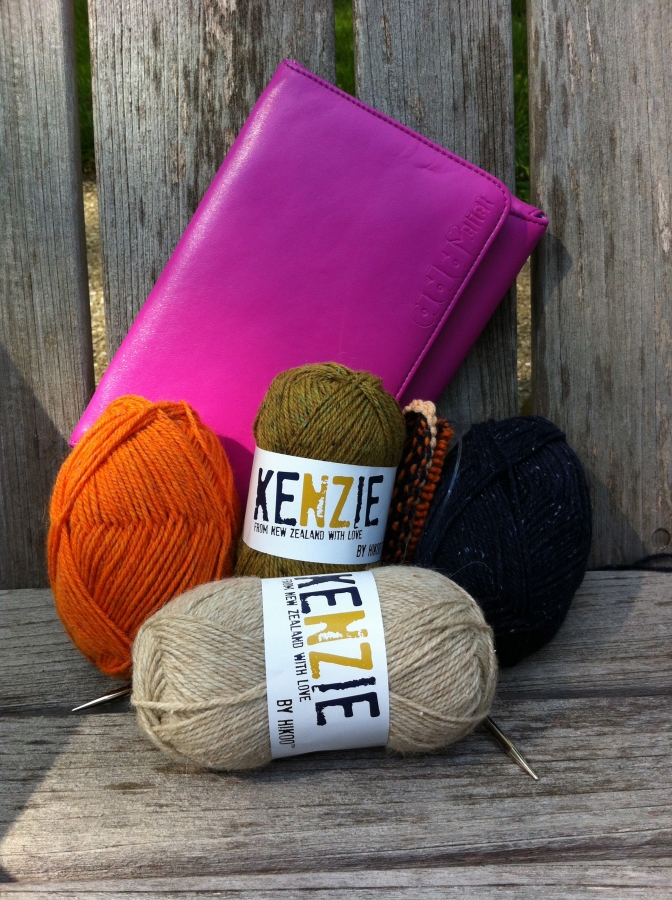
Join me this Fall for a beautiful colorwork cowl featuring four colors of Kenzie by HiKoo.  Kenzie is a gorgeous tweed from New Zealand with yummy colors and superior softness.  Size Small – four skeins will yield a cowl up to 32″.  Size Large – 8 skeins (2 each of four colors), knits the season’s must-have infinity scarf 60-68″ to wear fashionably doubled.  Just in time for your Holiday knitting!  My favorite sample is knit to 64″ in the featured colors pictured below: #1000 Pavlova (natural), #1006 Kumara (orange), #1007 Kiwifruit (green) and #1009 Oceania (navy).

OctKAL1

Supplies

Size Small – up to 32″.  (Size Large up to 68.”)

1(2) skeins each of 4 different colors of Kenzie, 160 yards/50g each.  50% New Zealand merino, 25% nylon, 10% angora, 10% alpaca, 5% silk noils.

US #7, 16″ circular needle

US#8, 16″ circular needle

Two removable stitch markers

Gauge – Approximately 20 stitches = 4″ in stockinette.


Center of Attention – Part 3

Are you now a huge fan of the axis cable?  I loved that one row of cabling gave the 10 row repeat a big impact with a chain links effect.


This gorgeous foot deserves only the best heel!  Part three of this pattern gives you instructions to knit a short row heel.  Many sock knitters prefer the short row heel because it is quick to knit, uses less yarn than a classic heel and most closely resembles a machine knit sock.  (Machine knit socks?  You will never return to them after experiencing the luxury of hand-knit socks!)

Watch my two-part video, Short Row Heel, Part 1 & Part 2, and complement those lovely cables with this slick heel technique.  If you are new to short row heels, you may find the optional use of a counter, as demonstrated in video, to be a handy aid.

For those of you knitting two socks at once, watch my Two at a Time Socks – Short Row Heel Video to manage both heels efficiently.

Part Three

Click here to download printable version

AC6 (Axis Cable) – slip 4 stitches to cable needle and hold in front of work, knit 2 stitches from left hand needle, return 2 center stitches from cable needle to left hand needle, move cable needle to back of work, knit 2 center stitches, knit 2 stitches from cable needle.  See Axis Cable Video

k2tog – knit two together.  See k2tog Video

ssk – slip next stitch as if to knit, slip next stitch as if to knit, insert left needle into the front of these two slipped stitches from left to right and knit together.  See SSK Video

W&T (Wrap & Turn)  See Wrap and Turn Video

  • On knit side – slip 1, bring yarn to front of work, slip same stitch back to left needle, bring yarn to back of work, turn.
  • On purl side – slip 1, bring yarn to back of work, slip same stitch back to left needle, bring yarn to front of work, turn.

yo – yarn over.  See Yarn Over Video

Directions are for women’s Medium (directions for Large in parentheses when necessary).

Heel

See Short Row Heel – Part 1 Video

Work next row of design pattern across 36 instep stitches (see above chart).  These stitches will remain unworked during heel construction.  The 32(36) sole stitches will form the heel.

Work across heel stitches as follows:

Row 1.  Knit to last stitch on heel, W&T.

Row 2.  Purl to last stitch on heel, W&T.

Row 3.  Knit to stitch before wrapped stitch, W&T.

Row 4.  Purl to stitch before wrapped stitch, W&T.

Repeat Rows 3 and 4 until there are 12(14) unwrapped center stitches ending after Row 4.  There will be 10(11) wrapped stitches on each side of the center stitches.

Pick up (unwrap) wrapped stitches as follows:  See Short Row Heel – Part 2 Video 

Row 1.  Slip 1, knit to 1st wrapped stitch, lift front leg of wrap from front to back (placing left leg of wrap in front of needle) and knit it together with next stitch through the back loop, turn.

Row 2.  Slip 1, purl to 1st wrapped stitch, lift back leg of wrap from back to front (placing right leg of wrap on front of needle) and purl it together with next stitch, turn.

Repeat Rows 1 and 2 until 1 wrapped stitch remains on each side of heel ending after Row 2.

Slip 1, knit across heel stitches and unwrap last stitch on knit side leaving one remaining wrapped stitch on the purl side.  (Do not go back and unwrap!)

Work across instep in charted pattern.

Unwrap last remaining wrap on the knit side by lifting wrap on needle (as on previous knit rows) and knit it together with next stitch through the back loop.  Knit remainder of heel stitches.

STOP!

Your heel is done and you should be quite proud of it!  Come back next week and we’ll finish up the sock.

Happy knitting!

Center of Attention – Part 2

I hope you have a sweet toe just begging for an incredible instep design.  Here is a picture of my toe just twitching in anticipation for Part Two:

I always say that cables give you the best bang for your buck in knitting because cables only look difficult.  It can be our secret that the big results in this sock are actually quite simple to knit.  The unusual cable in this pattern is called an axis cable.  It is worked over six stitches and makes a dramatic statement.  If you are new to cables, watch my Cables video before you begin.  Follow up with the Axis Cable video to walk you through each step of this cable technique.

Knitters following a size Medium will need to work increases (see below) over the instep stitches to achieve the required 36 stitches.  All knitters will work the instep by following a chart.  In circular knitting, charts are worked from bottom to top and right to left.  Charts give a clear picture of the finished work.  Begin at Row 1 of the chart working each stitch over the first 36 stitches of the round – this will be the instep.  Finish the round by knitting the remaining 32(36) to keep the sole of the foot in stockinette.  After working all 10 rows of the chart, begin again at Row 1.  Repeat this process until the sock measures 2″ less the length of your foot ending after an even numbered round.  If knitting with circular needles, just slip the sock on to test the length.  Dpn knitters can put in a lifeline and remove the needles if desired.  The 2″ is measured from the back of the heel.

Part Two

Click here to download printable version

AC6 (Axis Cable) – slip 4 stitches to cable needle and hold in front of work, knit 2 stitches from left hand needle, return 2 center stitches from cable needle to left hand needle, move cable needle to back of work, knit 2 center stitches, knit 2 stitches from cable needle.  See Axis Cable Video

kfb – knit into front and back of stitch.  See Kfb Video


k2tog – knit two together.  See K2tog Video


ssk – slip next stitch as if to knit, slip next stitch as if to knit, insert left needle into the front of these two slipped stitches from left to right and knit together.  See SSK Video


yo – yarn over.  See Yarn Over Video

Foot

Note: Directions are for medium size (directions for large in parentheses when necessary).

MEDIUM SIZE ONLY:  Increase 4 stitches over instep (first 32 stitches) as follows:  (K7, kfb) 4 times.  Knit to end of round.  There are now 36 instep stitches and 32 sole stitches for a total of 68 stitches.

ALL SIZES:  First 36 stitches will form the instep (top of foot). Last 32(36) stitches will form the sole (bottom of foot).

Begin design on instep stitches (see chart below), knitting all sole stitches.

Continue knitting in pattern until foot measures 2” less than desired length of foot ending after an even numbered row.

STOP!

Your beautiful foot needs a heel, but you will have to wait for next week’s instructions.

Happy knitting!

Center of Attention – Part 1

coa13

A Summer Rerun of Knit Along #1

Welcome to a repeat of the very first Knit Purl Hunter knit along!  Your beautiful turquoise yarn is waiting for you to work some magic.  The yarn has already done good work since $10 of each skein was denoted by Skacel to the Marsha Rivkin Center for Ovarian Cancer Research.

Is this your first KAL with us?  Here is all the pertinent information:

  • A portion of the pattern is revealed here every Thursday in July.  The complete pattern, video resources and lots of helpful tips are included in each post.  An abbreviated, pattern-only version is included to download.
  • All techniques are supported with video instruction at knitpurlhunter.com
  • All questions and comments are monitored daily both here and in the Knit Purl Hunter group on Ravelry.  It’s like having your own private knitting tutor!
  • Completed projects are eligible for the monthly prize drawing – first prize is a set of addi Clicks!  See skacelknitting.com for all the info.

Center of Attention is a toe up sock that features some awesome cables.  Are you new to toe up socks?  Give them a try and find out why many sock knitters prefer this method.  Watch my video, Judy’s Magic Cast On (Starting Toe Up Socks), to see what all the fuss is about.  I know you are going to be hooked, so make it your summer project to kick your socks up a notch!

The original KAL had no references to knitting the socks two at a time (2aat).  If you would like to prevent the dreaded second sock syndrome,  I have videos to guide you every step of the way to knit both Center of Attention socks at once.  Watch my Two at a Time – Toe Up Socks Video to get started.  I prefer to knit 2aat on a 40″ circular needle using the Magic Loop method while some knitters enjoy the process using two 24″ needles.

scale

Before knitting 2aat, the 100g skein must be separated into two 50g balls.  I use a digital food scale to guide me.  Simply place the full skein on the scale and wind off yarn until the scale registers half of the weight.  Don’t fret if your skein weighs less than 100g prior to dividing.  Yarn weights vary with humidity and temperature and are only meant to be an approximation.  The yardage on every skein is an accurate measurement and is consistent with each skein.  If you don’t have access to a scale just estimate as best you can as there is plenty of yardage in the skein to make two socks.

Whether you are knitting one or two toes this week, you can look forward to sock addiction!

  • Trekking XXL – 75% Superwash Wool, 25% Nylon – 459 yards/100g (one skein).  Sample knit in Color “Susanne”.
  • Size 1 (2.5mm) needles or size necessary to achieve desired gauge.  Pattern may be knit with double points, two 24″ circular needles, one 32″ or 40″ needle for magic loop method.  See Magic Loop Video
  • Cable needle

8 stitches per inch in stockinette.

Women’s medium (directions for large in parentheses when necessary).

Medium leg circumference measures 7 ½” unstretched.

Large leg circumference measures 8” unstretched.

Size may also be adjusted by altering needle size.

KPHtemplate_instructions

Part One

Click here to download printable version

kfb – knit into front and back of stitch.  See Kfb Video


Cast On

See Judy’s Magic Cast On Video

Using two needles, cast on 24 stitches using Judy’s magic cast on with 12 stitches on each needle.

Securing tail, knit first 12 stitches.

Knit second 12 stitches through the back loop.


Toe Increases

If using Magic Loop or two circular needle knitting method, increases (kfb) are made at the beginning and end of each needle as follows:

Round 1.  On 1st needle, kfb, knit to last stitch on needle, kfb;  On 2nd needle, kfb, knit to last stitch on needle, kfb.

Round 2.  Knit all stitches.

If using double points, arrange stitches evenly with 6 stitches on 4 needles.  Increases (kfb) are made as follows:

Round 1.  Kfb, knit to last stitch on 2nd needle, kfb, kfb into 1st stitch on 3rd needle, knit to last stitch on 4th needle, kfb.

Round 2.  Knit all stitches.

All needle types:  Repeat Rounds 1 and 2 until toe reaches 64(72) stitches.

STOP!

I promise an amazing cable to keep you busy next week.

Happy knitting!