Our second, and last section of mosaic knitting is complete and it is time to knit Section 4 and close our tube. You may have already guessed that Section 4 returns us to the Saw Tooth Stripes pattern. This section’s design brings continuity to the scale and color of the fabric. This last section is worked on the smaller needle size in Colors B and D. It is vital to end the last repeat of the pattern after Round 4 for an invisible join.
VERY IMPORTANT – Before closing the tube, weave in all ends on the wrong side except for the long 80″ tail.
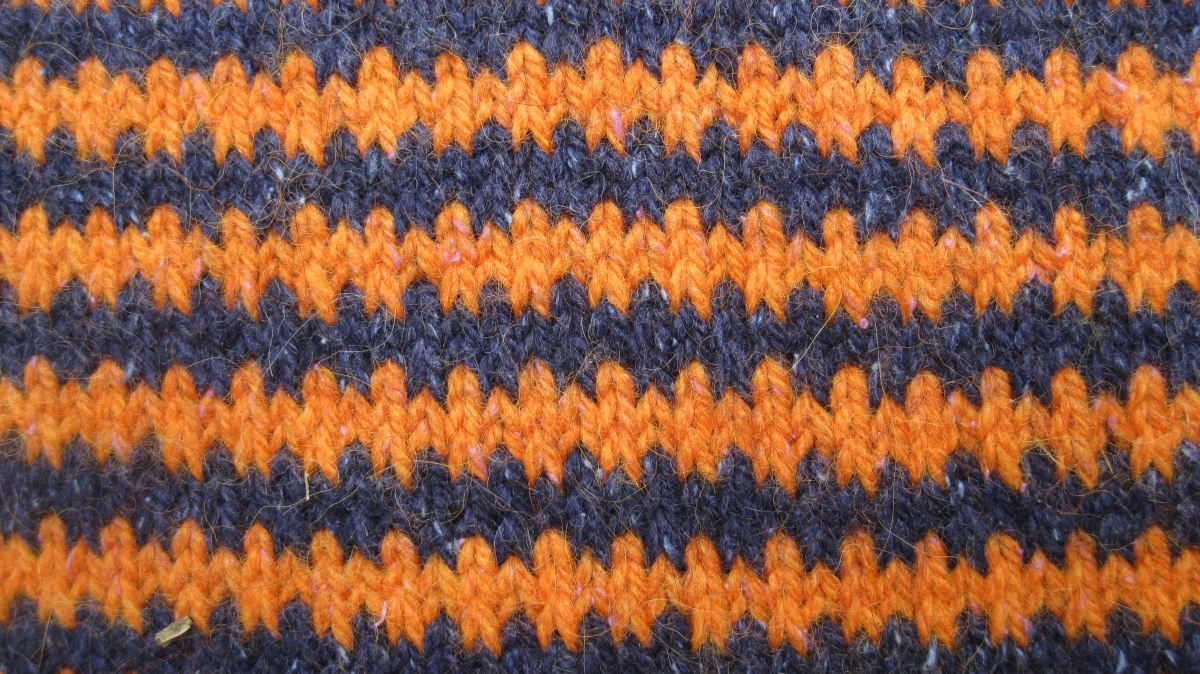
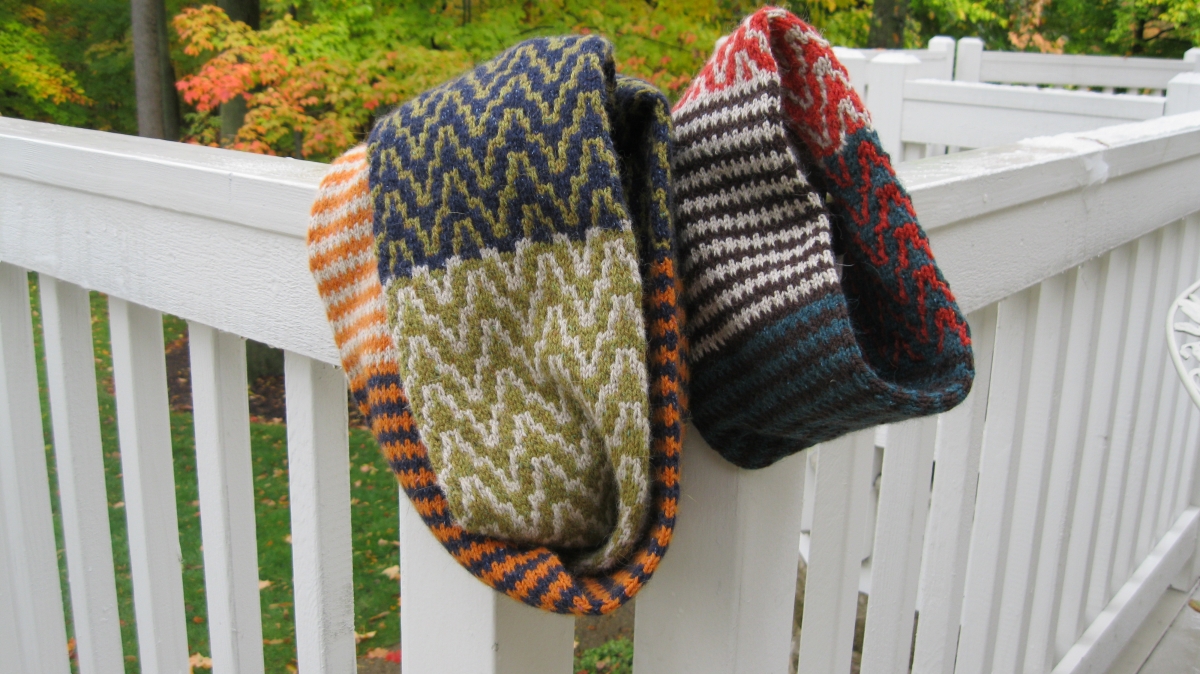
Our tube is joined by grafting the live stitches at each end to each other with the Kitchener Stitch. The 80″ tail in Color B at the beginning of the project will serve as the seaming yarn and will leave the cowl with an invisible join. It is a thing of beauty! (see photo below)
If you are new to the Kitchener Stitch, I recommend practicing the technique on a small piece before closing the cowl. Make two swatches as follows: Cast on a small number of stitches (10 or so) and work in stockinette for a few rows ending after a purl row. Do not bind off. With wrong sides together, work the Kitchener Stitch to join the two swatches. See Kitchener Stitch Video
Before grafting, the waste yarn must be removed to reveal its live stitches. Using your larger circular needle (it’s okay that the needles at each end are different sizes), go through each stitch in the first round below the the waste yarn. This step is made very easy thanks to the lifeline that was placed in this round. Simply follow the path of the lifeline yarn and you will perfectly capture each stitch. Count the stitches on the needle to ensure that there are 84 stitches before removing the waste yarn. To remove the waste yarn, unzip the extra chain stitches at the end of the cast on and gently pull out the cast on stitches. Remove the lifeline yarn and you are ready to graft.
As promised, I have a video to guide you through grafting Colormatic. It is best to work this step without interruption – so carve out some quiet time, pour a cup of tea and let the magic happen! See Kitchener in the Round Video
To simplify the grafting of Colormatic, I found it a HUGE help to section groups of stitches with markers on both open ends of the cowl. I placed a removable marker (a piece of tied yarn will suffice) after every 12 stitches on each needle. If worked correctly, the markers will be reached simultaneously as you graft pairs of stitches. This isolation of stitches allowed me to stay on track during the long Kitchener process.
When working the Kitchener Stitch in the round, it is not necessary to perform the usual set up stitches on the first stitch of each needle. However, to keep the end of the round tidy I place a marker in each of these stitches and pass through them at the end of the round. (This is demonstrated quite nicely in the video.) As I work my way around the cowl, I pause after every few stitches to adjust the tension of the seaming yarn. The goal is to have the stitches created in the grafting to be the same size as the stitches above and below. Take your time and it will be great!
Once all the stitches have been grafted, weave the remaining tail into the right side of the cowl using the Duplicate Stitch. This handy little technique is also fabulous to use in repair work or as an embellishment to stockinette. See Duplicate Stitch Video
End your project with blocking. This last step will even out the stitches and allow the yarn to soften and bloom. Give the cowl a bath in cold water and gently squeeze out the excess water. Lay the cowl flat – it will be doubled on itself. Use this opportunity to straighten the rounds that may have spiraled a bit on you in the knitting process. I place the beginning of the round at the side edge to mask the slight jog in the Saw Tooth sections. You may pin through the layers if needed. Allow your cowl to dry and then enjoy!
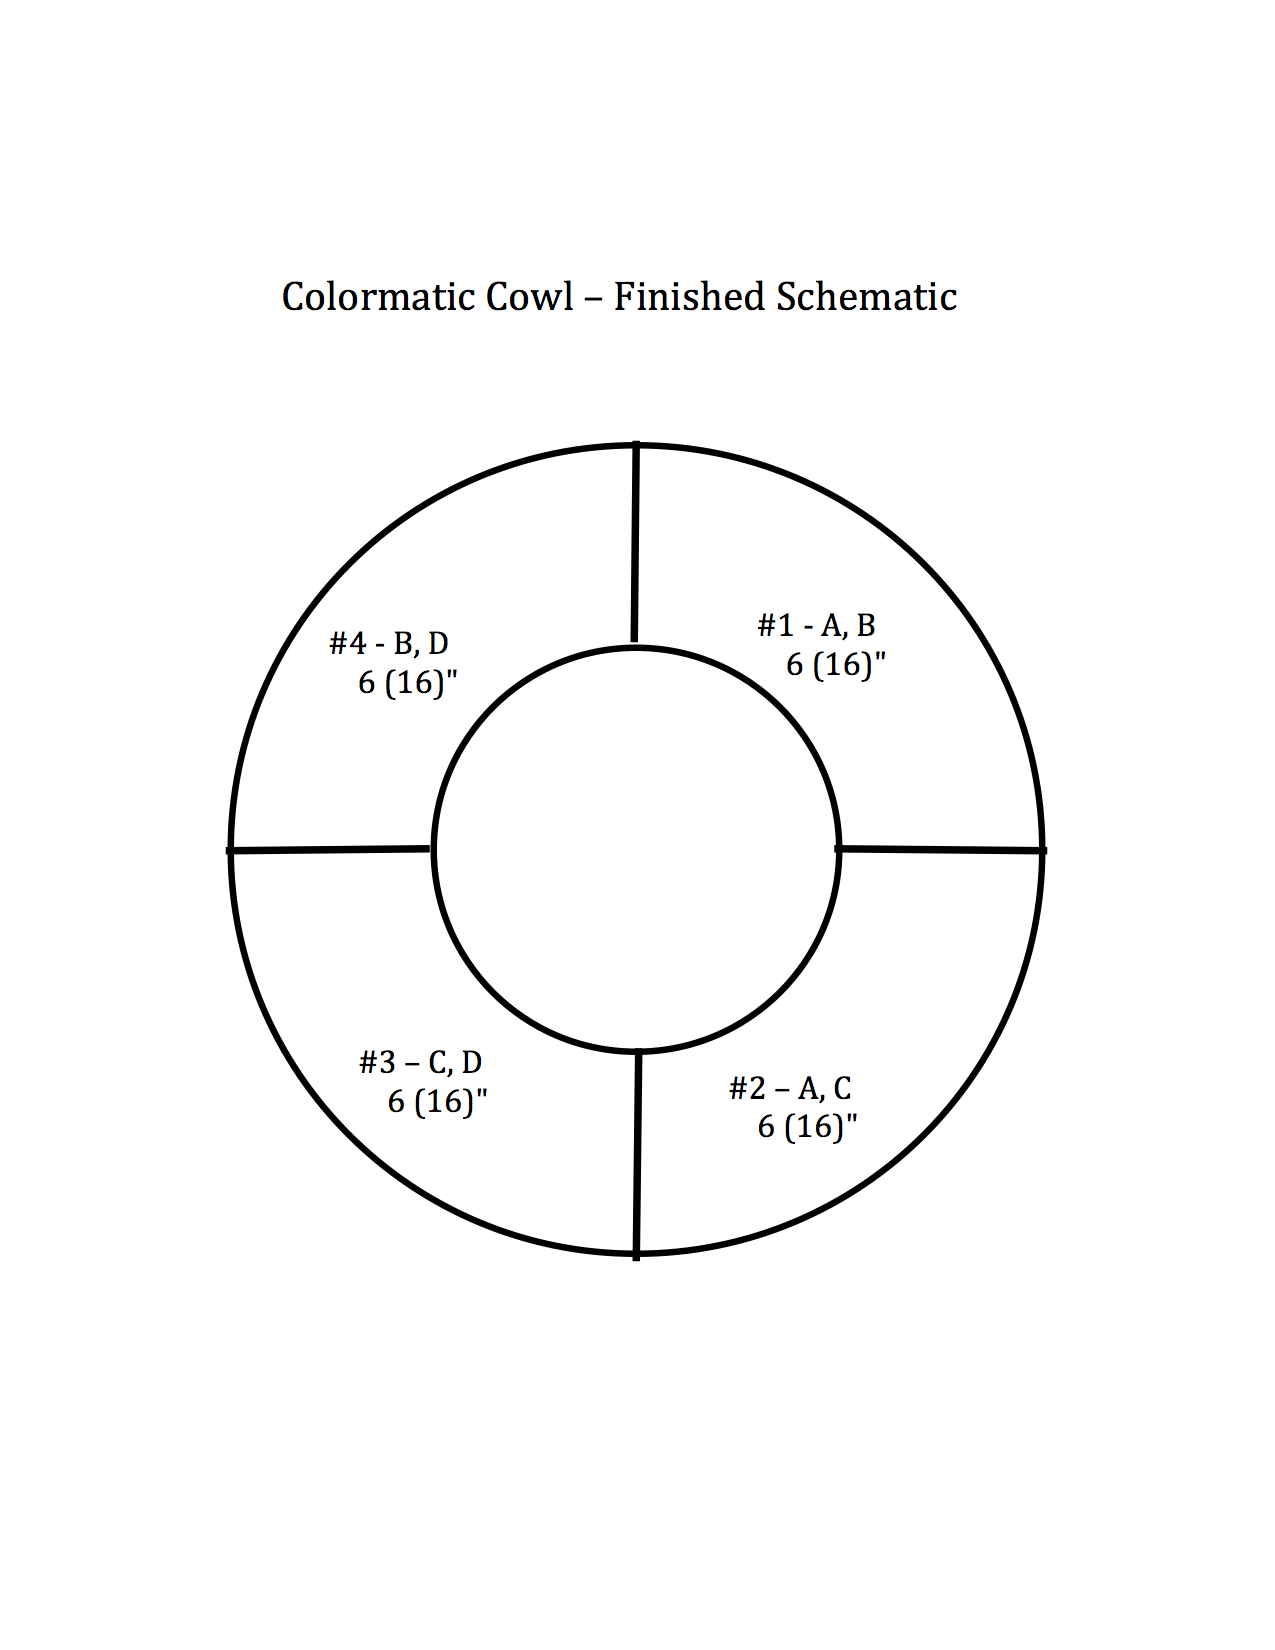
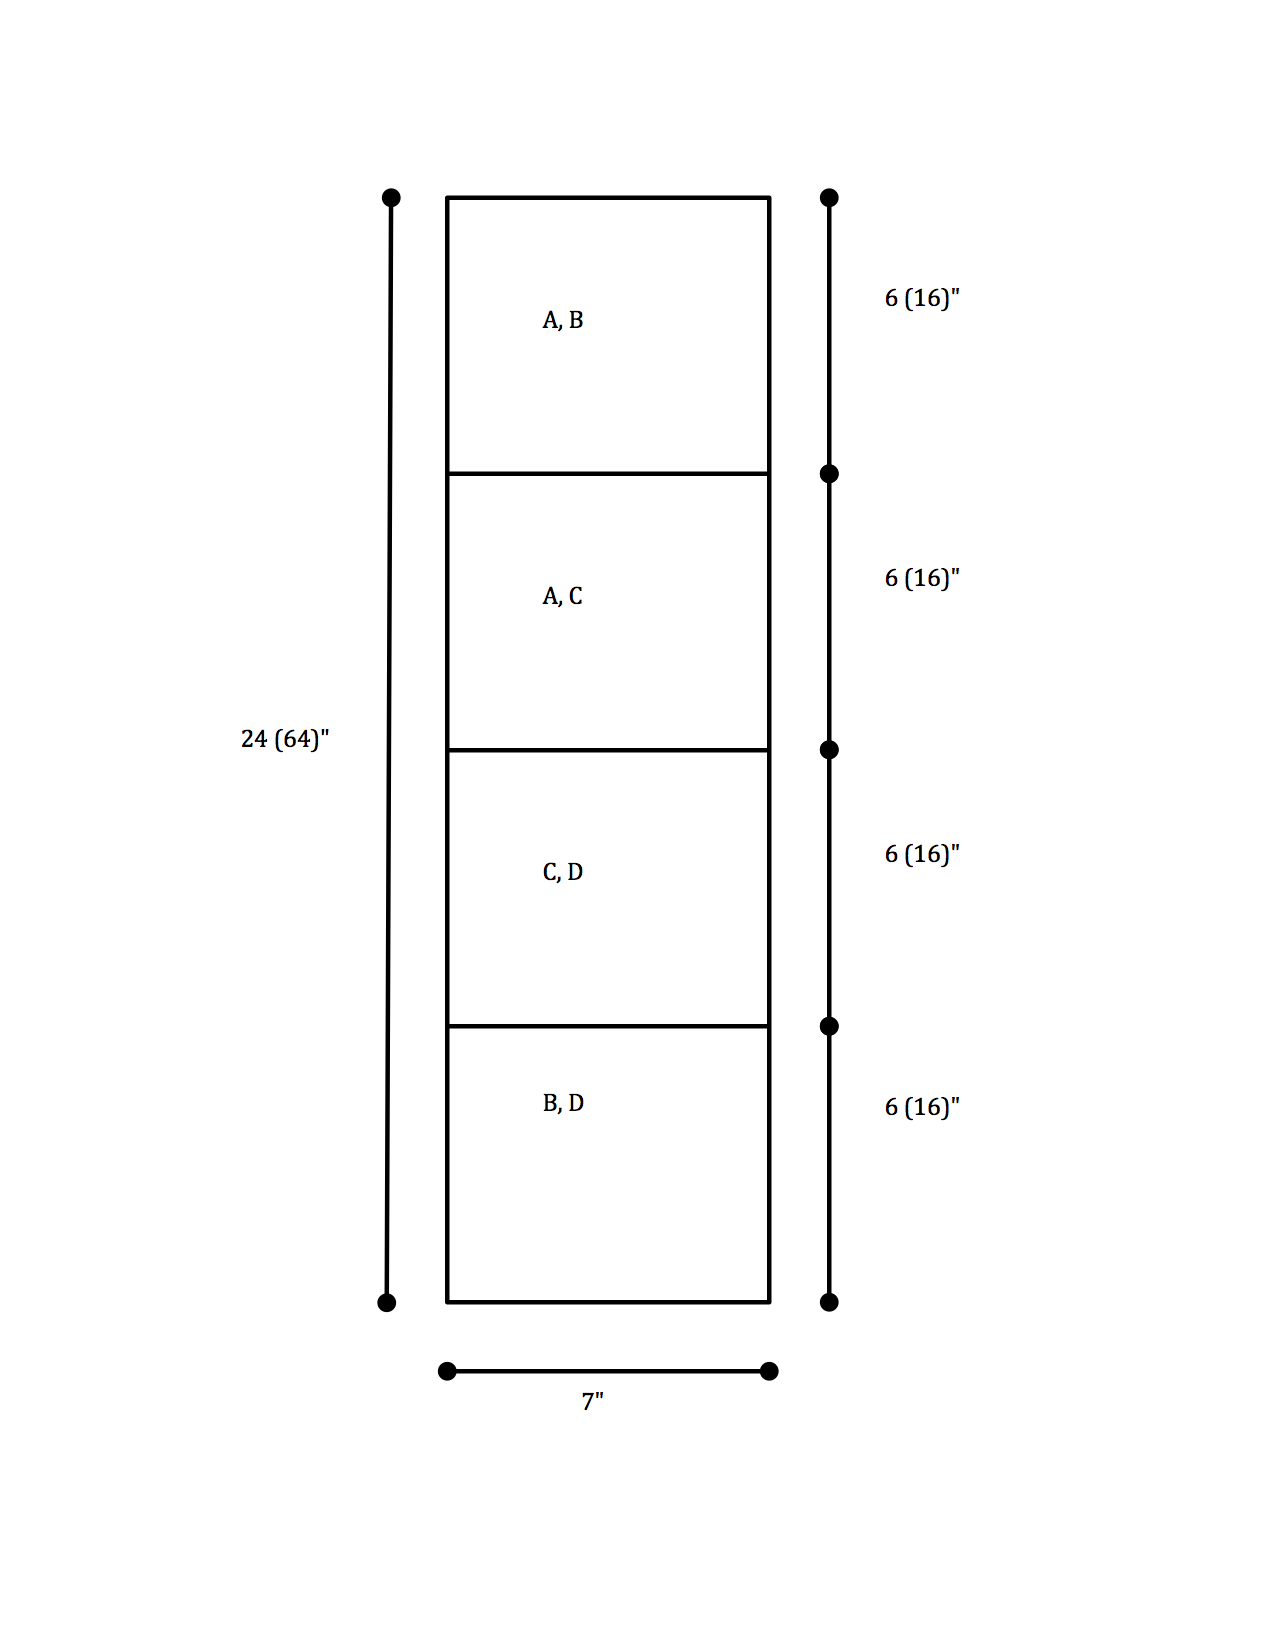
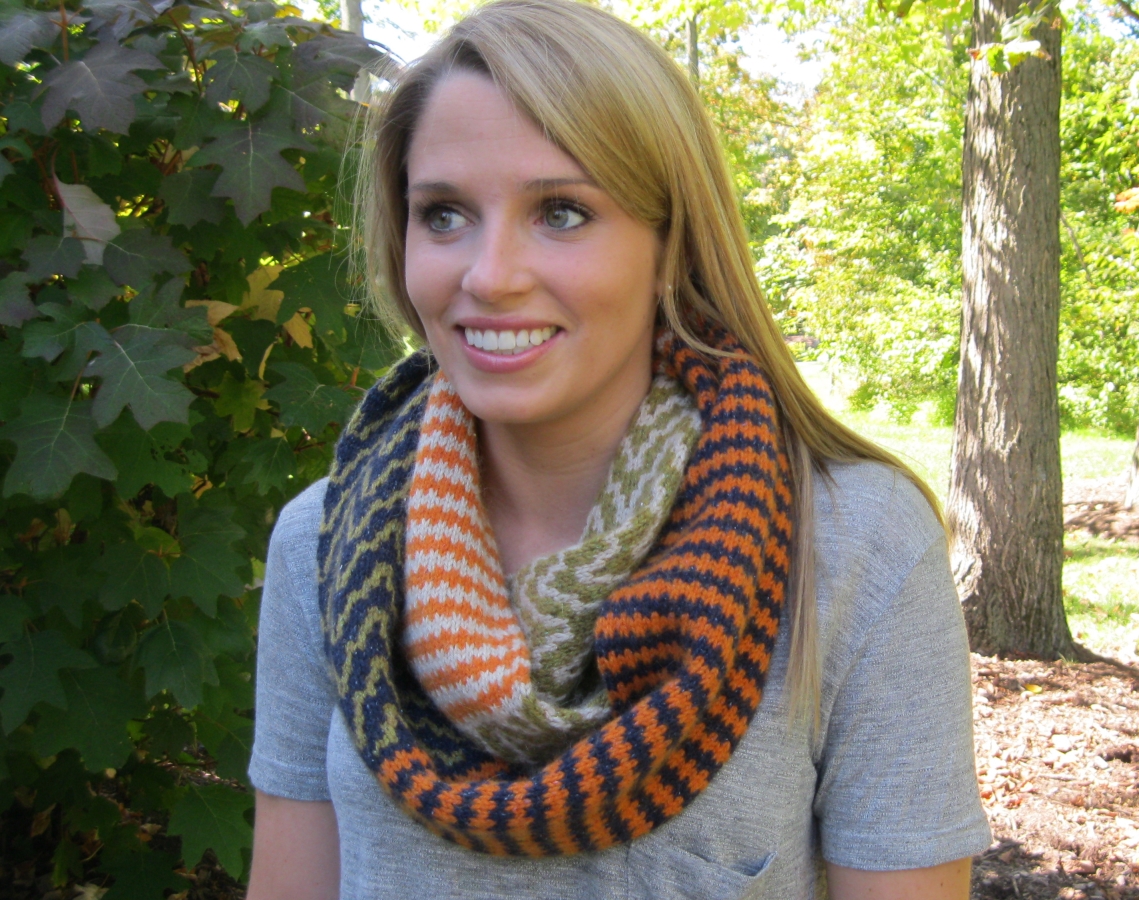
Whether your Colormatic is short or long, it can be twisted and turned to showcase the different stitch patterns in many ways. I hope you love wearing yours as much as I do!
Thank you so much for knitting with me! Be sure to enter your cowl in the prize drawing by November 15th. Every entry tells our sponsor, Skacel Collection, that you enjoy the KAL and want it to continue. Scroll down to the end of the post for information on the January 2014 KAL.
Happy knitting,
Michelle
Part Four
Click here to download printable version
![]()
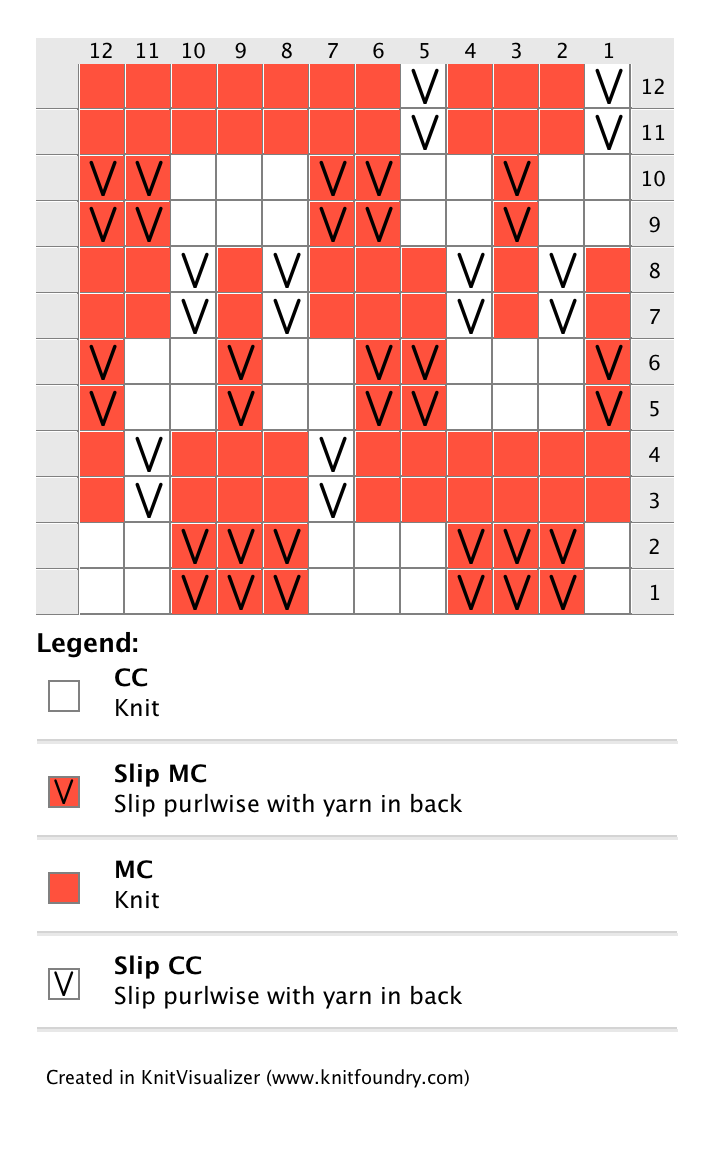
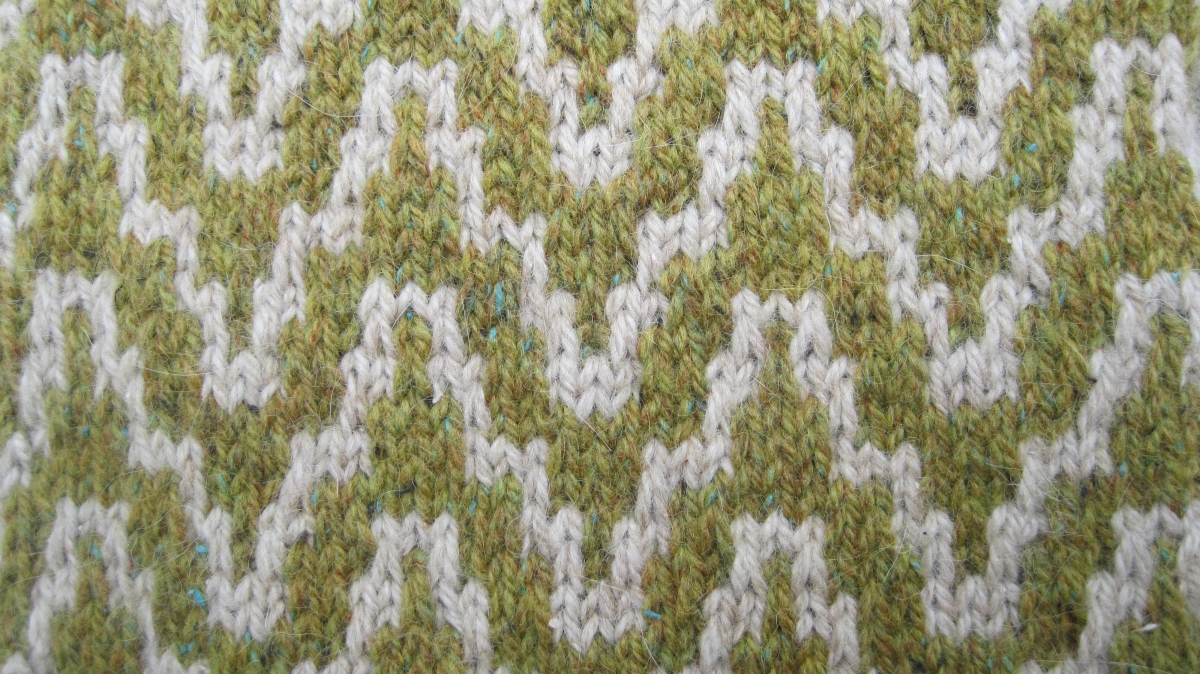
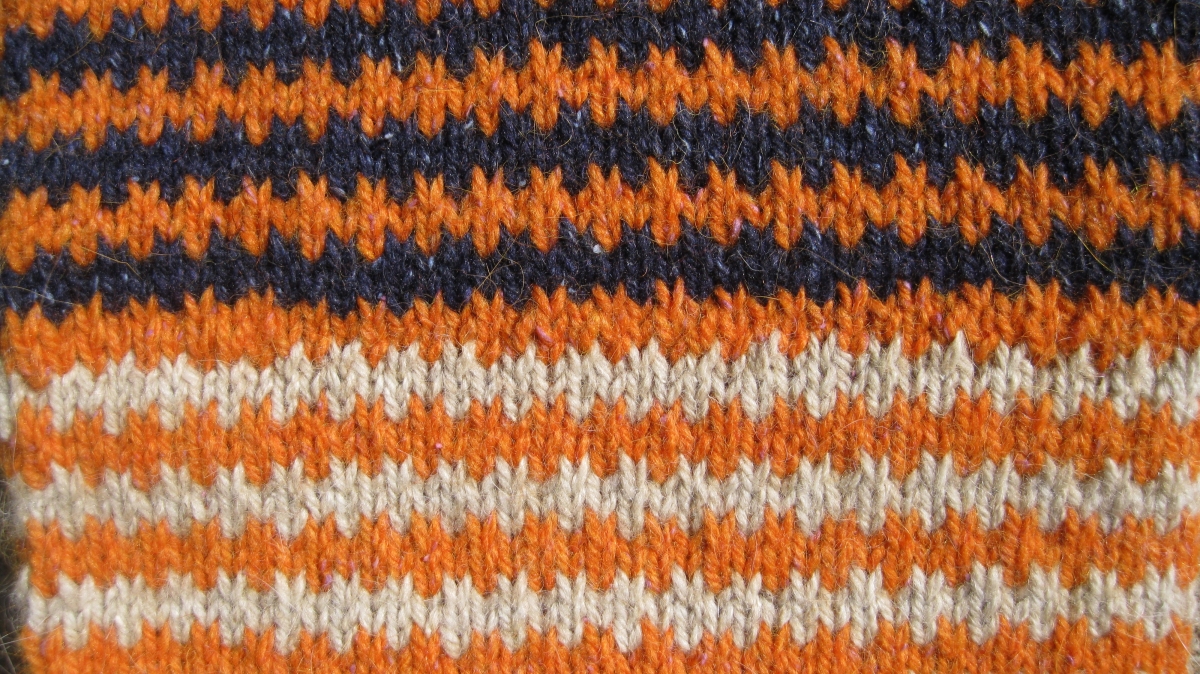
Section Four
Using Colors B and D, change to smaller needle and work Saw Tooth Stripes pattern (below) for 6 (16)” ending after Round 4. DO NOT BIND OFF!
Saw Tooth Stripes
Round 1. With Color D – *sl 1, k1; repeat from * to end of round.
Round 2. With Color D – knit.
Round 3. With Color D – knit.
Round 4. With Color B – *k1, sl 1; repeat from * to end of round.
Round 5. With Color B – knit.
Round 6. With Color B – knit.
Finishing
Weave in all ends except for 80” tail at cast on edge.
Remove waste yarn and place resulting live stitches on second circular needle.
With Color B, graft live stitches using Kitchener Stitch.
See Kitchener in the Round Video
Wet block lightly to even stitches and allow yarn to soften and bloom.
![]()
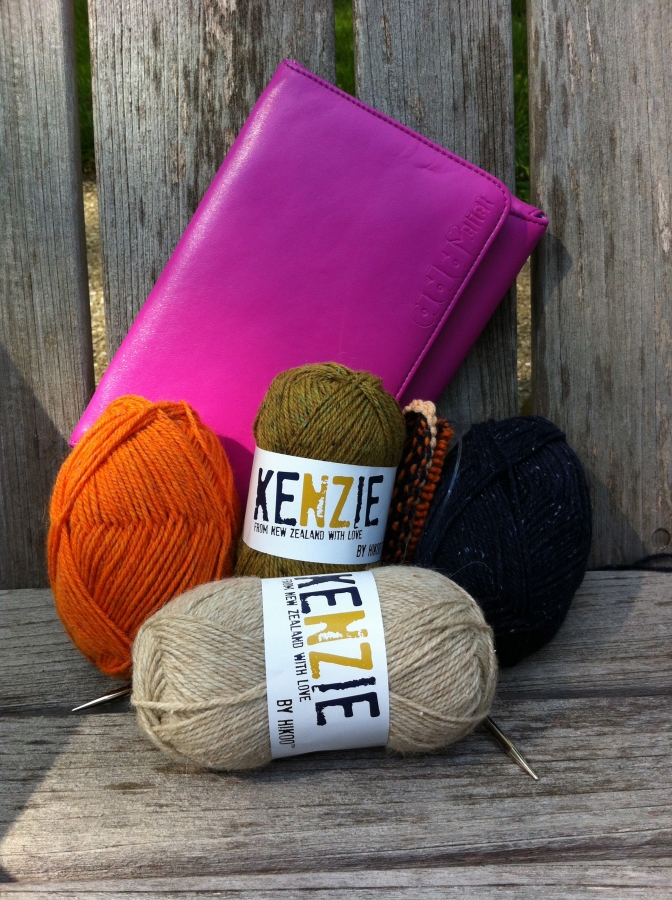
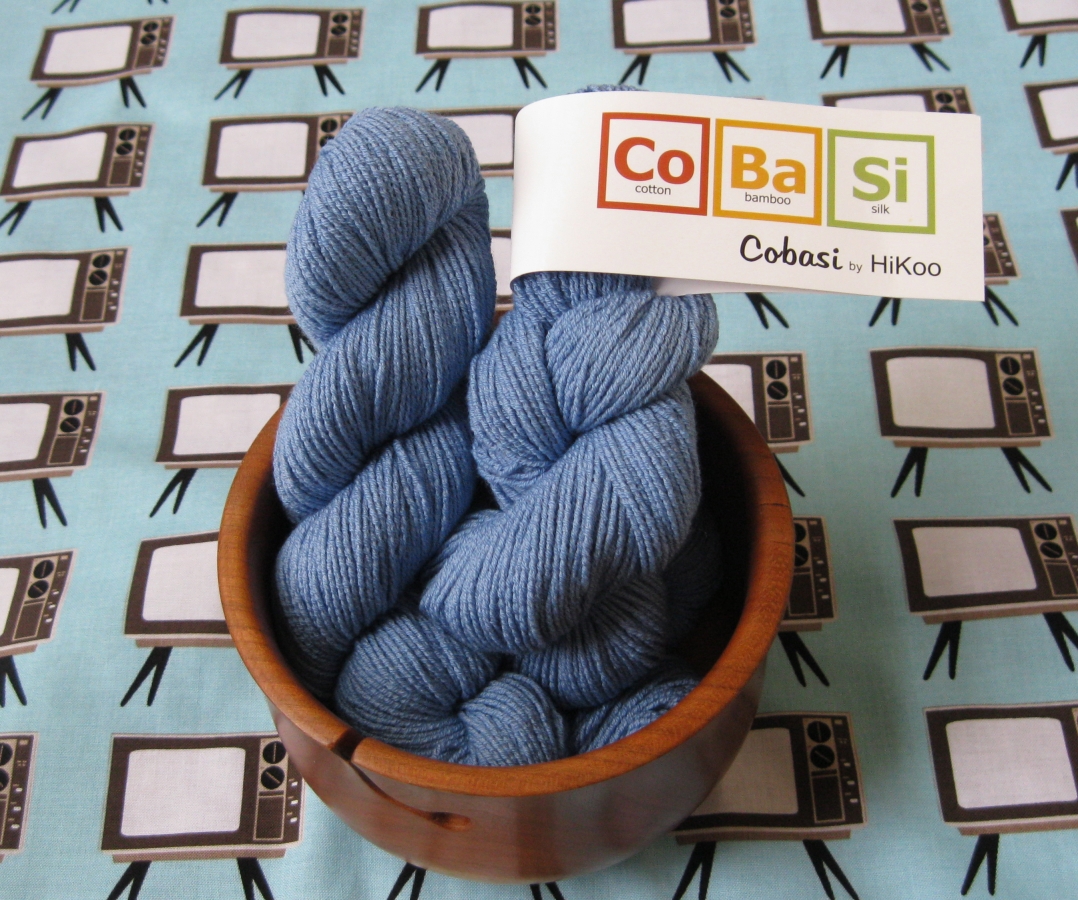
With so many color work patterns and designs, I may need more yarn!
(c)2013 Michelle Hunter
January KAL
Join me in 2014 as we return to sock knitting with a unique two at a time sock pattern. This pattern is suitable for men and women and features techniques new to the series. Subscribe to my newsletter to receive an email reminder.
Supply List
- 2 skeins, CoBaSi by HiKoo, 50g/220 yards each, 55% cotton, 16% bamboo, 8% silk, 21% elastic nylon
- US #1 (2.5mm) 40″ circular needle or size necessary to achieve approx. gauge of 8.5 stitches per inch.
Sample knit with Cobasi color #12 on addi Sock Rockets.