Winter Buzz – Part 4

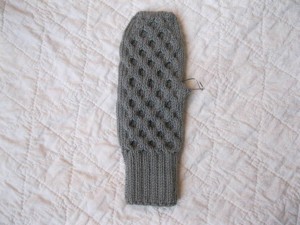
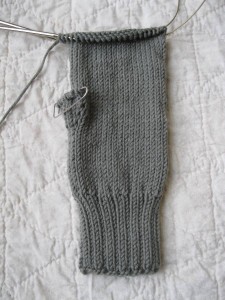
With our hand complete, it is time to turn our attention to the thumb.  We have created a nice resting place for our thumb with a full-fashioned gusset.  A few quick rounds and you can wear your toasty warm beauties.

I have a very popular video to help you, titled Thumb”, that I created as a generic guide to all thumb knitting.  Since many of you are first time mitten knitters, I created a Winter Buzz Thumb video that is specific to this pattern.  The new video contains the same techniques without the confusion of trying to adapt to a different stitch count.  I welcome your feedback as I am always striving to create better videos.

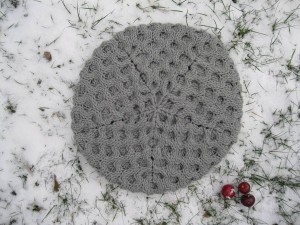
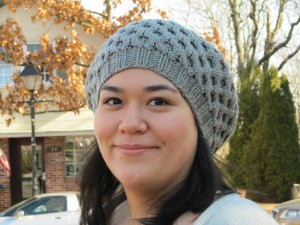
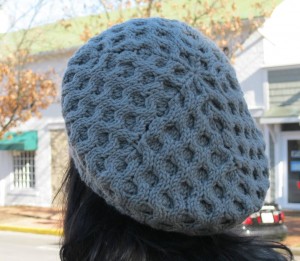
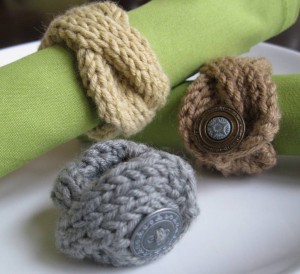
As promised, I have several patterns to help you use any leftover Simpliworsted yarn.  At the bottom of this post, I will tease you with a pattern featuring two Winter Buzz hat versions available in the Pattern Store on my website.  Also, try the FREE pattern for Classic Cable Napkin Rings that uses leftover Simpliworsted yarn.

Check back tomorrow for a photo of the completed mittens.

Part Four

Click here to download printable version

Thumb – Mitten

Place first 6 stitches from stitch holder onto a double point needle.  This will be Needle #1.

Place last 6 stitches from stitch holder onto a second double point needle.  This will be Needle #2.

With a third double point needle, pick up one stitch in “ditch” on left side of thumb opening (area between Needle #2 and the backward loop cast on stitches), pick up 2 stitches above thumb opening (former backward loop cast on stitches), and one stitch in “ditch” on right side of thumb opening (area between the backward loop cast on stitches and Needle #1).  There are 4 stitches on Needle #3 for a total of 16 thumb stitches.

Beginning round at Needle #1, join yarn leaving a 12” tail.

Knit 12, (k2tog) twice.  14 thumb stitches.

Knit all 14 stitches until thumb reaches halfway up thumbnail.

Decrease thumb as follows:

*k2tog, k1; repeat from * to last 2 stitches, k2tog.  (9 stitches)

*k2tog; repeat from * to last stitch, k1.  (5 stitches)

Break yarn and thread through loop and pull tight to close.

Weave in ends using thumb tail to close any remaining gaps in thumb gusset.


Thumb – Fingerless Mitt

Work same as Mitten Thumb, except ending when thumb reaches halfway up thumb or to desired length.  Do not decrease.

Bind off loosely.

Weave in ends using thumb tail to close any remaining gaps in thumb gusset.

Cool Hands = Warm Heart

Warm Mittens = Cool Knitting Chick

©2012 Michelle Hunter

Winter Buzz Hats

Pattern includes two versions knit with Simpliworsted – Slouchy and Watch Cap.  Slouchy version uses approximately 140g and Watch Cap version uses approximately 90g.  See the Pattern Store for details.

Classic Cable Napkin Rings

Turn your leftover yarn into a chic table accessory.  Download your FREE pattern today!

KAL continues on February 2nd!

Join us next month as the Progressive Needles KAL continues with two-color sock knitting in Disappearing Act.  This toe up pattern features great techniques and a heel new to the series.  Disappearing Act uses two skeins of Royal sock yarn – one for the main color and one for the contrasting color.  Pair your favorite colors and let the fun begin.  Sample was knit on US#1 (2.5mm) needles with a gauge of 8.5 stitches = 1 inch in stockinette.


Winter Buzz – Part 3


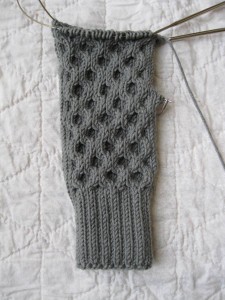
Don’t you just love the honeycomb pattern over the top of the hand?  I am always amazed at the gorgeous designs that are created using simple cables.  Tell all your non-knitting friends that this was insanely difficult and that you are pretty much a genius.  It will be our secret that cabling is so easy!

Today’s clue has us decreasing for the top of the mitten.  Nothing can strike fear in the hearts of knitters more than the phrase, “decrease in pattern”.  The knitter is left to wonder how to decrease, where to decrease and how exactly to maintain the established pattern.  Have no fear!  I have taken all the guess work out for you by providing directions for each stitch in the decrease process.

As you work through each round, I hope you will come to understand the strategies used to maintain the cable design while decreasing stitches.  In Winter Buzz, the stitches are decreased every other round.  When the cable row presents itself, sometimes there are not enough stitches to form the outer four-stitch cables.  It is in these instances that a bit of cable knowledge is helpful.

When decreasing in pattern, it is sometimes necessary to form a cable with fewer stitches than the “normal” amount worked throughout the cable pattern.  When faced with this dilemma, remember this tip:

  • The stitches in the cable that deviate from the “normal” stitch count of the cable should be hidden in the back of the work behind the cross of the cable.  The stitches in the front of the cable should have the same stitch count as the rest of the cables in the pattern.

Here are some examples:

  • It is time to work a four-stitch cable with stitches held to the back (C4B).  However, there are only three stitches remaining.  Hold one stitch to the back and knit two stitches from the left hand needle.  Knit the held stitch.  A three-stitch cable was formed.  Because the deviation from the usual stitch count (one stitch held in back instead of two) is hidden behind the cross of the cable, it is nearly undetectable.
  • It is time to work a four-stitch cable with stitches held to the front (C4F).  However, there are only three stitches remaining.  Hold two stitches to the front and knit one stitch from the left hand needle.  Knit the held stitches.  A three-stitch cable was formed.  Because the deviation from the usual stitch count (one stitch knit from left hand needle instead of two) is hidden behind the cross of the cable, it is nearly undetectable.

Store this cable know-how away for future patterns to create a professional look to your garment shaping.  Meanwhile, in Winter Buzz, simply follow the pattern directions below to master this discriminating treatment.  There are separate instructions for mittens that ended after Round 4 and for those ended after Round 8.  Be sure to follow the appropriate decrease rounds for your mitten.

Once your mitten top is shaped, close the opening with the Kitchener Stitch.  This seamless grafting stitch is a useful skill every knitter should possess.  Watch my Kitchener Stitch” Video to learn this great finishing technique.

For the fingerless mitts, no decreasing is needed in the cable pattern.  Look for the simple cuff directions at the end of this clue and get ready for next week’s thumb.

Part Three

Click here to download printable version

k2tog – knit two together.  See “k2tog” Video

ssk – slip next stitch as if to knit, slip next stitch as if to knit, insert left needle into the front of these two slipped stitches from left to right and knit together.  See “ssk” Video

Top of Mitten

Decrease in pattern using appropriate instructions for Hand ended after Round 4 (below) or Round 8 (following).

If Hand ended after Round 4:

1.  Top of Hand:  k1, ssk, knit to last 3 stitches, k2tog, k1.  Palm:  k1, ssk, knit to last 3 stitches, k2tog, k1.  (44 stitches)

2.  Top of Hand:  sl 2 to cn and hold in front, k1, k2 from cn, (C4B, C4F) twice, sl 1 to cn and hold in back, k2, k1 from cn.  Palm:  knit.

3.  Same as 1.  (40 stitches)

4.  Knit all stitches.

5.  Same as 1.  (36 stitches)

6.  Top of Hand:  k1, (C4F, C4B) twice, k1.  Palm:  knit.

7.  Same as 1.  (32 stitches)

8.  Knit all stitches.

9.  Same as 1.  (28 stitches)

10.  Top of Hand:  sl 1 to cn and hold in back, k2, k1 from cn, C4F, C4B, sl 2 to cn and hold in front, k1, k2 from cn.  Palm:  knit.

11.  Same as 1.   (24 stitches)

Close top of mitten using Kitchener Stitch.  See “Kitchener Stitch” Video


If Hand ended after Round 8:

1.  Top of Hand:  k1, ssk, knit to last 3 stitches, k2tog, k1.  Palm:  k1, ssk, knit to last 3 stitches, k2tog, k1.  (44 stitches)

2.  Top of Hand:  sl 1 to cn and hold in back, k2, k1 from cn, (C4F, C4B) twice, sl 2 to cn and hold in front, k1, k2 from cn.  Palm:  knit.

3.  Same as 1.  (40 stitches)

4.  Knit all stitches.

5.  Same as 1.  (36 stitches)

6.  Top of Hand:  k1, (C4B, C4F) twice, k1.  Palm:  knit.

7.  Same as 1.  (32 stitches)

8.  Knit all stitches.

9.  Same as 1.  (28 stitches)

10.  Top of Hand:  sl 2 to cn and hold in front, k1, k2 from cn, C4B, C4F, sl 1 to cn and hold in back, k2, k1 from cn.  Palm:  knit.

11.  Same as 1.  (24 stitches)

Close top of mitten using Kitchener Stitch.  See “Kitchener Stitch” Video


 Fingerless Mitt Top Cuff

Using smaller size needles, decrease 6 stitches in the next round as follows:

*(k2, p1, k2tog, k1, p1) 3 times, k2 p1: repeat from  * to end of round.  (42 stitches)

Work a k2, p1 rib for 3 rounds.

Bind off in pattern.  See “Bind Off in Pattern” Video


STOP!

We will knit our thumbs in next week’s clue.  Happy knitting!

Winter Buzz – Part 2

Are you enjoying the lofty softness of Simpliworsted in your cuff?  Now it’s time to get to the real fun!  Today’s clue has us adding one of my favorite cable stitch patterns.  This classic design makes for a beautiful and interesting knit that only looks complicated.

The cable design will be worked over the top of the hand with the palm remaining in stockinette.  The simple palm allows us to easily insert a full fashioned thumb gusset.  The use of the Make One Left and the Make One Right gives our thumb a sophisticated opening.  The pattern directs you to begin the thumb shaping at the base of the thumb.  The base of your thumb is the lowest joint, or knuckle, at the bottom of your thumb.

The directions for this clue are the same for both the mitten and fingerless mitt versions except for the length.  Mitten knitters will stop 1 ¾” from the top of the hand (tallest finger).  Fingerless mitt knitters will stop 1” less than the total desired length – generally about 6” to 7” from the cast on edge.

A few reminders:

  • Switch to the larger size needles after the Increase Round.
  • Work the appropriate thumb directions for the left and right hand.

Part Two

Click here to download printable version

C4B – slip next 2 stitches onto cable needle and hold in back of work, knit next 2 stitches from left hand needle, then knit 2 stitches from cable needle.  See “Cables” Video

C4F – slip next 2 stitches onto cable needle and hold in front of work, knit next 2 stitches from left hand needle, then knit 2 stitches from cable needle. See “Cables” Video

cn – cable needle.

kfb – knit into front and back of stitch.  See “kfb” Video

M1L (Make One Left) – With left needle tip, lift strand between needles from front to back.  Knit the lifted strand through the backSee “Make One” Video

M1R (Make One Right) – With left needle tip, lift strand between needles from back to front.  Knit the lifted strand through the front.  See “Make One” Video

sl – slip.

Hand

Increase round:

*(k2, p1, kfb, k1, p1) 3 times, k2, p1; repeat from * to end of round.  (48 stitches)

First 24 stitches of round form Top of Hand.  Second 24 stitches of round form the Palm.

Change to larger size needles.  Work Cable Pattern (see below) over Top of Hand and stockinette (all knit) over Palm stitches for 16 rounds, or to base of thumb, ending after an even numbered row.

Cable Pattern

1.  Knit.

2.  *C4B, C4F; repeat from *.

3.  Knit.

4.  Knit.

5.  Knit.

6.  *C4F, C4B; repeat from *.

7.  Knit.

8.  Knit.


Right Mitten Only

Work pattern across Top of Hand.

On Palm stitches:  k2, place marker, M1R, k2, M1L, place marker, knit to the end of the round.

There are 4 Thumb Gusset stitches between the markers.

Next Round:  Work in pattern across Top of Hand and knit across all Palm and Thumb Gusset stitches.

Left Mitten Only

Work pattern across Top of Hand.

On Palm stitches:  k20, place marker, M1R, k2, M1L, place marker, knit to end of round.

There are 4 Thumb Gusset stitches between the markers.

Next Round:  Work in pattern across Top of Hand and knit across all Palm and Thumb Gusset stitches.

BOTH Mittens

While continuing to knit in established pattern, increase 2 Thumb Gusset stitches every other round as follows:

Round 1.  Pattern across Top of Hand.  On Palm: knit to 1st marker, slip marker, M1R, knit to 2nd marker, M1L, slip marker, knit to end of round.

Round 2.  Pattern over Top of Hand.  Knit all Palm stitches with no increases.

Repeat Rounds 1 and 2 until there are 12 stitches between the markers.

Next Round:  Pattern across Top of Hand.  Knit to 1st marker.  Place 12 Thumb Gusset stitches on a stitch holder removing markers.  Cast on 2 stitches onto Right Hand needle using Backward Loop Cast On.  (See “Backward Loop Cast On” Video)  Knit to end of round.

Mittens Only:  Continue knitting in established pattern until mitten reaches 1 ¾” less than desired length, measured from top of tallest finger, ending after Round 4 or 8 of Cable Pattern.

Fingerless Mitts Only: Continue knitting in established pattern until mitt reaches 1” less than the total desired length, generally about 6” to 7” from the cast on edge, ending after Round 4 or 8 of cable pattern.

STOP!

Next week’s clue will have us finishing the mitten tops with a discriminating touch.  Happy knitting!

Winter Buzz – Part 1

Happy New Year and welcome back to the Progressive Needles Knit Along sponsored by Skacel!  We kick off 2012 with a toasty warm mitten pattern using the deliciously soft and durable Simpliworsted.  As always, this project is full of tips, techniques and videos to increase your knitting know-how.

Mittens get their warmth from good wool that is knit on needles smaller than the size recommended by the yarn.  This firm gauge keeps the wind out and helps to retain the body’s heat.  Simpliworsted is especially nice since its cushy loft allows for the use of different needle sizes while still maintaining a beautiful stitch definition.  (It doesn’t hurt that it is machine washable, too!)

Winter Buzz is designed to fit the average woman’s hand.  The length of the mitten will be customized in Part Two by matching the knitting to the height of your hand.  The circumference may be adjusted by altering the needle sizes.  The pattern and the yarn easily adapt to smaller or larger needles.

Because hand lengths vary greatly, the yardage each knitter uses for the mittens will vary as well.  My hands are on the small side and I just needed a small portion of my second skein of yarn.  Having the second skein provides ample yardage to accommodate longer hands and a longer cuff for those who like more wrist coverage.  If you are choosing to knit fingerless mitts, one skein should do the trick.  I will reveal several patterns to use with your leftover Simpliworsted at the conclusion of Winter Buzz. 

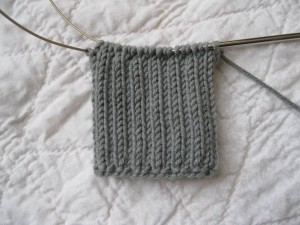
In Part One, we will be knitting the cuff of our mittens.  The cuff is knit with a nice firm rib to keep the drafts away.  I recommend casting on for the cuff using the German Twisted Cast On.  This variation of the Long Tail Cast On is a bit firmer and will help the cuff hug your wrist.  This cast on is not crucial to the design but it is a great skill to add to your knitting repertoire.  I substitute it for the Long Tail method in most projects because I favor its clean line.  Check out the German Twisted Cast On” Video to learn this sophisticated technique.

Part One

Click here to download printable version

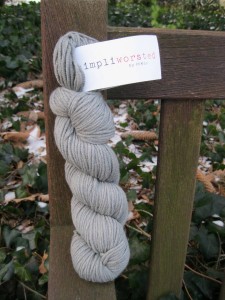
  • 2 skeins Simpliworsted, 55% Merino Superwash/28% Acrylic/17% Nylon, 100g/140 yards each.
  • US #5 (3.75mm) AND #7 (4.5mm) 6” double points (see NOTE below) or size necessary to achieve desired gauge.
  • Cable needle
  • Stitch holder
  • Markers

NOTE:  Mittens hands may also be knit with two 24” circular needles or one 32” circular needle for Magic Loop method.  See Magic Loop Video.  Sample was knit using the Magic Loop method on 32” addi Lace needles.  For thumb, #7 double points are recommended.

5 stitches = 1 inch in stockinette on larger size needles.

Women’s Average – Size may be adjusted by changing needle sizes.

Finished wrist circumference:  approximately 6” unstretched and will comfortably stretch up to 10”.

Finished hand circumference:  approximately 8” unstretched and will comfortably stretch up to 10”.

Finished length:  10” (may be adjusted).

Cuff

With smaller needles, cast on 42 stitches using German Twisted Cast On method.  See “German Twisted Cast On” Video

Divide stitches evenly between needles and join in the round taking care not to twist the stitches.

Work a k2, p1 rib for 20 rounds or until cuff reaches desired length.

STOP!

Next week’s clue brings a great cable pattern for the hand.  Happy knitting!

We have a weekly prize winner!!!  Congratulations to Pat G.!  This week’s clue was posted right here.  The remaining weekly clues will be a bit harder to find.  Look on the Skacel and Knit Purl Hunter sites on various days for your best chance to win.  Here is what this week’s clue looked like:

Wondering about those hidden clues to win a weekly prize?  Here is a clue hidden in plain sight for you!  Be the first to email info@knitpurlhunter.com with “Happy 2012 KAL” in the subject line and you will win this week’s prize.

Thanks to all emailed me!