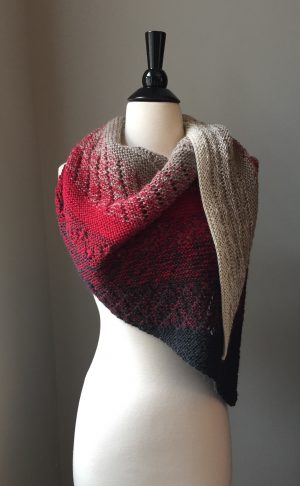
Transient is no longer a free pattern!
The KAL has expired and the pattern may be purchased on Ravelry. The helpful tips and information will continue to be available. Just scroll down to the pertinent section.
How quickly the weeks have flown by to bring us to the final clue in Transient. Before moving on to the instructions, please remember to download all of the instructions before May 31st. Saving the pattern to your Ravelry library will NOT save the instructions – they must be downloaded! Beginning June 1st the pattern will be available for purchase only. The information at the top of each post with its helpful tips will remain on my site indefinitely.
A BIG thank you to Skacel Collection for their continued sponsorship of these knit alongs. They are free to you due to their commitment to knitting education. Skacel also offers prizes to participants who complete the project before May 15th. First prize is a set of addi Clicks! With no KAL registration, an entry form shows our sponsor the level of participation from all of you. Please enter the prize drawing as your vote for more KALs!
Final Installment
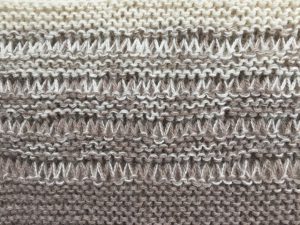
The last pattern section is an openwork made possible with an elongated stitch. Because this pattern can be worked over any number of stitches, it can be repeated as often as your unique gauge allows. Let’s see how this magic works!
Section 8 – CCCD, CCDD, CDDD
Elongated stitches are used to create interesting textures and gauges within a project. An elongated stitch is considerably larger than its neighboring stitches, making it an excellent choice for openwork or color manipulation. The elongated stitch is most commonly formed with a method that utilizes multiple wraps.
A normal stitch is worked by inserting the needle tip into the stitch and the working yarn is wrapped once around the needle. This single strand of yarn is then drawn through the stitch before removing it from the left hand needle. In an Elongated Stitch, the stitch is worked in the same manner except the yarn is wrapped around the needle two, three or even four times. These multiple wraps are then drawn through the stitch leaving this group seated on the right hand needle. On the following row, only one stitch is worked and the extra wraps are dropped off the left hand needle. In Transient, all of the Elongated Stitches are wrapped twice with the extra wrap dropped off the needle on the following row. Be sure to watch my video for a complete tutorial on Elongated Stitches.
Before starting Section 8, notice that the six row repeat is numbered 1 – 6. With every knitter ending Section 7 at their own unique Wrong Side row, I thought this seemed to be a simple solution. Every knitter should begin Section 8 with Right Side facing. Non-Concentric knitters will continue to keep the row count as noted in the instructions.
To work Row 1 in Section 8, knit the first stitch of the row in the usual manner, then knit every stitch across the row wrapping the yarn twice around the needle until the last stitch. Work a kfb into the last stitch.
Our goal is to work the elongated stitch pattern until the appearance of DDDD. Work Rows 1 – 6, then repeat Rows 1 – 6 as often as possible ending after ANY row except Row 1. You can end after a Right or Wrong Side row. If you find yourself ready to work Row 1 with the yarn ready to change there, just begin Section 9.
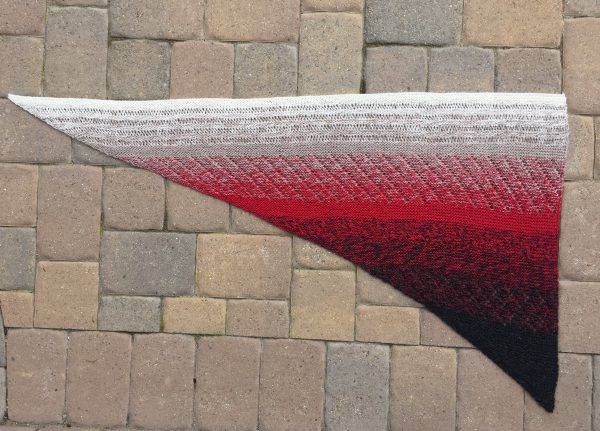
I continued to keep my original row counts with my yarn changing to DDDD midway through Row 190 which is Row 4 of the repeat. I finished the row and then began Section 9 with DDDD on Row 191. Remember, this is not an exact science and your yarn will let you know when it is time to switch. Any stitch count is completely acceptable!
Section 9 – DDDD
Now we get to play yarn chicken! That is the game where you try to knit as long as possible leaving enough yarn to complete the bind off.
Section 9 has two rows in the garter section – a Right Side row and a Wrong Side row. If you ended Section 8 after a Wrong Side row, then begin Section 9 with the Right Side row. Conversely, if you ended Section 8 with a Right Side row, then begin Section 9 with a Wrong Side row. Alternate the rows until you are left with enough yarn to work the bind off. At my gauge, I used 6 yards, approximately 3 grams, of yarn to work the bind off. I am not very brave at yarn chicken and stopped my Section 9 after 4 rows of garter stitch and 6 grams remaining in my skein.
There are several ways to estimate the amount of yarn required for the bind off.
- As you work Section 9, weigh your yarn before a row and then after completing that row. Double the weight used and this will give you a nice estimate on how much yarn you will need for the bind off. For example, if a row uses 2 grams then leave 4-5 grams for the bind off.
- A no-math solution is to leave about 4 times the length of a row (more if a looser gauge) to work the bind off. If the top of your shawl measures 48″ (4 feet) across then you will need to leave 16 – 18 feet of yarn for the bind off. Add a little length to this calculation to be on the safe side.
I recommend placing a lifeline through your second to last row in this section. This will preserve the stitches below if you happen to run out of yarn during the bind off and need to rip out a row.
Take care not to bind off your stitches too tightly so the shawl can be blocked a bit wider. I used the Standard Bind Off and had no problem. If you are prone to tight bind off edges, I recommend the Russian Bind Off worked in all knit stitches.
Finishing
Once the shawl is off of the needles, blocking it will open up the lace work and showcase the stitches nicely. I like to block my shawl using blocking wires, but the pin method works as well. If you are new to blocking, my Blocking and Blocking With Wires videos will guide you.
I prefer to weave in my ends after the blocking process. Weaving in tails on reversible garter stitch can be tricky. I have a great video that will show you how to weave in your ends invisibly in garter. Watch my Weaving in Ends (Garter Stitch) for a truly reversible fabric.
Thank you!
As always, I am thrilled to lead these KALs and have enjoyed hearing from you all! I will return in October with a new project to expand your knitting skills. The pattern is currently in development and I will have the information ready soon. Be sure to subscribe to my newsletter for all of the details.
You can knit past KALs which are found in my Best of Knit Purl Hunter book. 25 beautifully photographed patterns all accompanied with the video support you’ve come to expect. The book is available at your local yarn shop or as an ebook on Ravelry.
Happy knitting,
Michelle

